
How to Fold Paper: A Step-by-Step Guide
Table of Contents
If you’re looking for a fun and creative way to spend your free time, learning how to fold paper is a great option. Paper folding, also known as origami, is an art form that has been enjoyed for centuries. Not only is it a great way to relax and unwind, but it also helps to improve hand-eye coordination and concentration. In this article, we’ll provide you with a step-by-step guide on how to fold paper, including basic and advanced folds, tips for success, common mistakes to avoid, and more.
Basic Folds
Before you can create intricate origami designs, it’s essential to master the basic folds. These folds include the valley fold, mountain fold, squash fold, and reverse fold. The valley fold is a simple fold where you fold the paper in half, creating a crease down the center. The mountain fold is the opposite of the valley fold, where you fold the paper upwards, creating a peak. The squash fold involves taking a flap and folding it down towards the center of the paper, creating a squash-like shape. Finally, the reverse fold involves folding a flap one way and then folding it back in the opposite direction.
To execute these basic folds, start by selecting a square piece of paper. Hold the paper with the white side facing up and fold it in half diagonally to create a triangle. Once you have your triangle, follow the instructions below for each of the basic folds:
- Valley fold: Take the left corner of the triangle and fold it towards the center of the paper, creating a crease. Repeat with the right corner, then unfold the paper.
- Mountain fold: Take the left corner of the triangle and fold it upwards towards the top point of the triangle, creating a crease. Repeat with the right corner, then unfold the paper.
- Squash fold: Take the left flap of the triangle and fold it towards the center crease, creating a squash-like shape. Repeat with the right flap, then unfold the paper.
- Reverse fold: Take the left corner of the triangle and fold it upwards, creating a crease. Then, fold the flap back down in the opposite direction, creating a reverse fold. Repeat with the right corner, then unfold the paper.
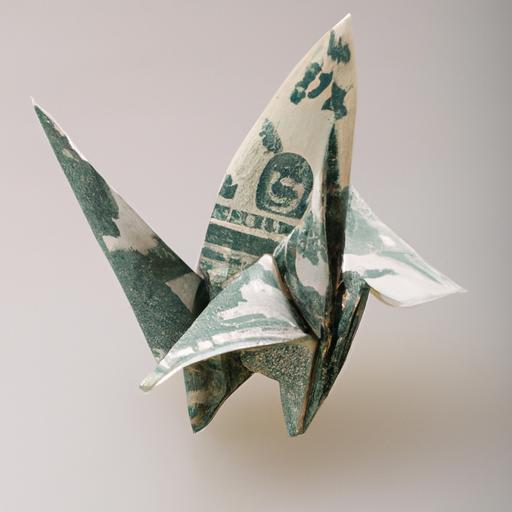
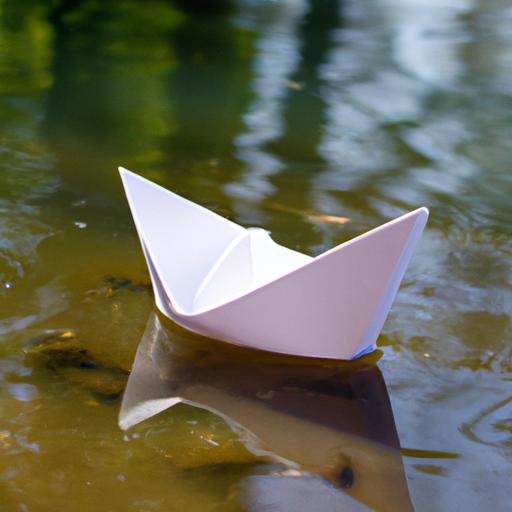
With these basic folds down, you can start creating simple origami designs such as a paper crane, boat, or box.
Advanced Folds
Once you’re comfortable with the basic folds, you can move on to more advanced folds. These folds require more precision and practice, but they also allow you to create more intricate and impressive designs. Some of the advanced folds include pleats, sinks, and crimps.
A pleat is a fold that creates a series of small, parallel folds in the paper. To create a pleat, you’ll need to make several mountain and valley folds in a row. A sink is a fold that involves tucking a flap of paper inside another fold, creating a 3D effect. Finally, a crimp is a fold that creates a zigzag pattern in the paper.
To execute advanced folds, you’ll need to use more complex diagrams and instructions. However, with practice and patience, you’ll be able to create beautiful origami designs such as flowers, animals, and geometric shapes.
Advanced Folds
Now that you’ve mastered the basic folds, it’s time to move on to more advanced folds. These folds will require more precision and patience, but they will also allow you to create more complex and impressive designs. Some of the advanced folds include pleats, sinks, and crimps.
Pleats
A pleat is a fold that creates a series of small, parallel folds in the paper. To create a pleat, you’ll need to make several mountain and valley folds in a row. The number of folds you make will depend on the design you’re creating. Some examples of origami creations that use pleats include fans, curtains, and dresses.
To make a pleat fold, start by creating a mountain fold on the paper. Then, fold the paper back on itself, creating a valley fold. Repeat this process several times, making sure that the folds are parallel and evenly spaced. Once you’ve created all the pleats, you can continue with the rest of the design.
Sinks
A sink is a fold that involves tucking a flap of paper inside another fold, creating a 3D effect. Sinks are often used to create shapes such as flowers, animals, and insects. To make a sink, you’ll need to start with a base fold, such as a bird base or a frog base. Then, you’ll need to create a flap and tuck it inside the base fold, creating a new shape.
To make a sink, start by creating the base fold. Then, create a flap on one side of the paper. Fold the flap back on itself, creating a crease. Then, tuck the flap inside the base fold, making sure that the edges align. Finally, crease the paper to secure the sink.
Crimps
A crimp is a fold that creates a zigzag pattern in the paper. Crimps are often used to create shapes such as stars and flowers. To make a crimp, you’ll need to create a series of mountain and valley folds, alternating between them to create the zigzag pattern.
To make a crimp, start by making a valley fold in the paper. Then, create a mountain fold, folding the paper back on itself. Continue making alternating folds until you reach the end of the paper. Once you’ve made all the folds, you can shape the paper into the desired design.
Tips for Successful Paper Folding
To create beautiful origami designs, it’s important to use the right techniques and materials. Here are some tips to help you achieve success:
Choose the Right Type of Paper
The type of paper you use can have a big impact on the final result of your origami design. Look for paper that is thin and easy to fold, but also sturdy enough to hold its shape. Origami paper is a good option, as it is specifically designed for paper folding. You can also use other types of paper, such as printer paper or wrapping paper, but be aware that they may not hold up as well.
Accurate Measuring and Cutting
To ensure that your folds are precise and even, it’s important to measure and cut your paper accurately. Use a ruler and a sharp pair of scissors to make clean, straight cuts. You may also want to use a cutting mat to protect your work surface.
Techniques for Achieving Crisp Folds
Finally, to create crisp folds, it’s important to use the right techniques. Use your fingers to crease the paper firmly along the fold lines, and use a bone folder or a flat edge, such as a credit card, to reinforce the creases. Make sure that your folds are sharp and even, as this will help to create a clean and polished final result.
Common Mistakes to Avoid
When learning how to fold paper, it’s common to make mistakes. However, with a little practice, you can easily avoid these mistakes and achieve better results. Here are some common mistakes that beginners make and tips to avoid them:
- Using the wrong type of paper: Not all paper is created equal, and some paper is better suited for origami than others. Avoid using paper that is too thin, too thick, or too stiff, as it can be difficult to fold and manipulate. Instead, use paper that is specifically designed for origami or paper that is lightweight and easy to fold.
- Skipping steps: Origami is a process that requires patience and attention to detail. Skipping steps or rushing through the process can lead to mistakes and frustration. Take your time and follow the instructions carefully to ensure that you’re creating the correct folds.
- Forgetting to crease the paper: Creasing the paper is an essential step in origami. Creases help to define the shape of your design and make it easier to fold. Make sure to crease your paper firmly and accurately to achieve the best results.
- Not measuring accurately: Accurate measurement is crucial in origami. Even the slightest deviation can affect the final result. Use a ruler or a bone folder to measure and fold your paper precisely.
- Being too hard on yourself: Learning how to fold paper takes time and practice. Don’t be too hard on yourself if you make mistakes or your designs don’t turn out perfectly. Remember to have fun and enjoy the process.
Conclusion
In conclusion, origami is a fun and creative way to spend your free time. By mastering basic and advanced folds, avoiding common mistakes, and following the tips outlined in this article, you can create beautiful and impressive origami designs. Remember to be patient, take your time, and enjoy the process. With practice, you can become an origami master and explore the countless possibilities of paper folding. So go ahead, grab some paper, and start folding!