Table of Contents
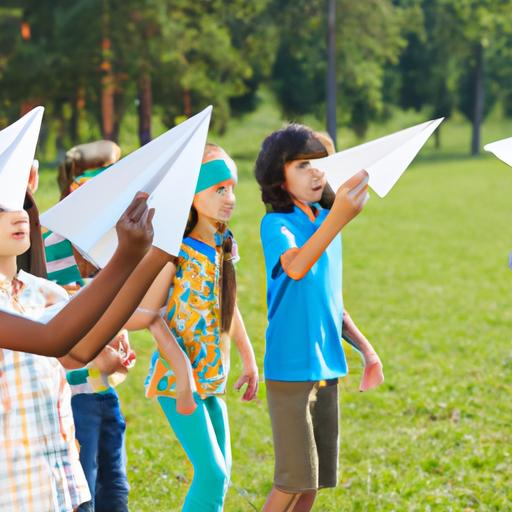
Are you tired of making paper airplanes that don’t fly well? Have you ever wondered how to make a paper airplane that can soar through the air with ease? Look no further than this step-by-step guide on how to make an easy paper airplane. With just a few materials and folding techniques, you can create a paper airplane that will impress your friends and family.
Materials Needed
Before you begin, you will need to gather a few materials. Here is a list of what you will need:
- A piece of paper (standard 8.5″ x 11″ paper works well)
- Scissors (optional)
- Ruler (optional)
The type of paper you use can make a difference in how well your paper airplane flies. Lightweight paper, such as printer paper or origami paper, works best. Avoid using heavier paper, such as construction paper, as it is more difficult to fold and may not fly as well.
If you want to make your paper airplane more decorative, you can use colored or patterned paper. However, keep in mind that heavier paper or paper with a glossy finish may not fly as well as lightweight paper.
Folding Techniques
Now that you have your materials ready, it’s time to start folding your paper airplane. Follow these step-by-step instructions:
-
Begin by folding the paper in half vertically. Make sure the edges are aligned and crease the paper firmly.
-
Unfold the paper and fold the top corners inwards to the center crease. The top edges should meet at the center crease, creating a point at the top of the paper.
-
Fold the top point down to the bottom edge of the paper. Make sure the crease is sharp.
-
Fold the top edges downwards to meet the center crease once again. The edges should be aligned with the bottom edge of the paper.
-
Fold the entire paper in half along the center crease. Make sure the edges are aligned and crease the paper firmly.
-
Fold the wings down at a 45-degree angle. The bottom edge of the wings should be aligned with the bottom edge of the paper airplane.
-
Fold the wings up at a 45-degree angle. The bottom edge of the wings should be aligned with the bottom edge of the paper airplane.
-
Adjust the wings as needed for balance and stability. You can also add small cuts to the wings or tail for added stability and lift.
Congratulations, you have successfully created an easy paper airplane! With a little practice, you can perfect your folding techniques and create a paper airplane that flies even farther and longer.
Now that you know how to fold an easy paper airplane, it’s time to learn some tips and tricks for making it fly even better. Here are a few things you can do to improve the flight of your paper airplane:
Use Lightweight Paper
As mentioned earlier, using lightweight paper is essential for making a paper airplane that flies well. The lighter the paper, the easier it is to fold and the better it will fly. Avoid using heavier paper, such as construction paper, as it is more difficult to fold and may not fly as well.
Experiment with Wing Shapes
The shape of the wings can make a big difference in how well your paper airplane flies. Try experimenting with different wing shapes to see what works best for you. Some popular wing shapes include the delta wing, the swept wing, and the biplane.
Launch Your Paper Airplane Correctly
Launching your paper airplane correctly can also make a difference in how well it flies. Hold the paper airplane by the bottom edges of the wings and launch it gently into the air. Avoid throwing it too hard or at an angle, as this can cause it to crash or fly off course.
Adjust for Wind Conditions
Wind conditions can also affect how well your paper airplane flies. If it’s windy outside, try adjusting the wings or tail of your paper airplane for added stability and lift. You can also experiment with launching it at different angles to see what works best in windy conditions.
Folding Techniques
The folding techniques outlined in the previous section are just the beginning. There are many variations and designs that you can experiment with to create a paper airplane that flies even better. Here are a few additional folding techniques to try:
The Dart
The dart is a simple and classic paper airplane design that is great for beginners. To make a dart, follow these steps:
-
Begin by folding the paper in half vertically. Make sure the edges are aligned and crease the paper firmly.
-
Unfold the paper and fold the top corners inwards to the center crease. The top edges should meet at the center crease, creating a point at the top of the paper.
-
Fold the top point down to the bottom edge of the paper. Make sure the crease is sharp.
-
Fold the wings down at a 45-degree angle. The bottom edge of the wings should be aligned with the bottom edge of the paper airplane.
-
Fold the wings up at a 45-degree angle. The bottom edge of the wings should be aligned with the bottom edge of the paper airplane.
-
Adjust the wings as needed for balance and stability.
The Hammerhead
The hammerhead is a unique paper airplane design that features a large vertical stabilizer at the back. This stabilizer helps to keep the paper airplane flying straight and true. To make a hammerhead, follow these steps:
-
Begin by folding the paper in half horizontally. Make sure the edges are aligned and crease the paper firmly.
-
Unfold the paper and fold the top corners inwards to the center crease. The top edges should meet at the center crease, creating a point at the top of the paper.
-
Fold the top point down to the bottom edge of the paper. Make sure the crease is sharp.
-
Fold the top edges downwards to meet the center crease once again. The edges should be aligned with the bottom edge of the paper.
-
Fold the entire paper in half along the center crease. Make sure the edges are aligned and crease the paper firmly.
-
Fold the top corners down at a 45-degree angle. The edges should be aligned with the center crease.
-
Fold the top point down to the bottom edge of the paper. Make sure the crease is sharp.
-
Fold the bottom corners up to the top point. The edges should be aligned with the center crease.
-
Fold the paper in half along the center crease. Make sure the edges are aligned and crease the paper firmly.
-
Fold the wings down at a 45-degree angle. The bottom edge of the wings should be aligned with the bottom edge of the paper airplane.
-
Fold the wings up at a 45-degree angle. The bottom edge of the wings should be aligned with the bottom edge of the paper airplane.
-
Fold the back of the paper airplane up to create a large vertical stabilizer.
Tips and Tricks
Now that you know how to make a few different paper airplane designs, it’s time to learn some tips and tricks for making them fly even better. Here are a few things to keep in mind:
Common Mistakes to Avoid
There are a few common mistakes that people make when making paper airplanes. Avoid these mistakes to ensure that your paper airplane flies well:
-
Folding the paper too loosely: Make sure you fold the paper firmly and crease it sharply to create a strong and stable paper airplane.
-
Using heavy paper: As mentioned earlier, using lightweight paper is essential for making a paper airplane that flies well. Avoid using heavier paper, such as construction paper, as it is more difficult to fold and may not fly as well.
-
Throwing the paper airplane too hard or at an angle: Launch your paper airplane gently into the air by holding it by the bottom edges of the wings. Avoid throwing it too hard or at an angle, as this can cause it to crash or fly off course.
-
Overcomplicating the design: While it can be fun to experiment with different designs, sometimes simpler is better when it comes to paper airplanes. Stick to basic designs until you master the folding techniques, then experiment with more complex designs.
Variations and Designs
Once you have mastered the basic paper airplane design, it’s time to experiment with different variations and designs. Here are a few popular paper airplane designs to try:
The Dart
The dart is a popular paper airplane design that is easy to make and flies well. To make a dart, follow these steps:
- Begin by folding the paper in half vertically.
- Fold the top corners down to the center crease, creating a point at the top of the paper.
- Fold the top point down to the bottom edge of the paper.
- Fold the wings down at a 45-degree angle.
- Fold the wings up at a 45-degree angle.
The dart is a fast and aerodynamic design that can fly long distances with ease.
The Glider
The glider is a more advanced paper airplane design that requires a bit more time and effort to make. To make a glider, follow these steps:
- Begin by folding the paper in half vertically.
- Fold the top corners down to the center crease, creating a point at the top of the paper.
- Fold the top point down to the bottom edge of the paper.
- Fold the wings down at a 45-degree angle.
- Fold the wings up at a 45-degree angle.
- Fold the wings down again at a 45-degree angle, this time folding them inwards towards the center crease.
- Fold the tips of the wings up at a 45-degree angle, creating winglets.
The glider is a slower and more graceful design that can glide through the air for longer distances.
The Hammerhead
The hammerhead is a unique and eye-catching paper airplane design that is sure to impress. To make a hammerhead, follow these steps:
- Begin by folding the paper in half vertically.
- Fold the top corners down to the center crease, creating a point at the top of the paper.
- Fold the top point down to the bottom edge of the paper.
- Fold the wings down at a 45-degree angle.
- Fold the wings up at a 45-degree angle, but only fold the tips of the wings downwards to create a hammerhead shape.
The hammerhead is a fun and playful design that can fly well with a little practice.
Conclusion
Congratulations, you have learned how to make an easy paper airplane and discovered some popular variations and designs to try. Remember, the key to making a great paper airplane is practice and experimentation. Don’t be afraid to try new things and see what works best for you. With a little creativity and patience, you can create paper airplanes that soar through the air with ease. So, grab some paper and get folding!