
How to Make a Paper Airplane for Kids: A Step-by-Step Guide
Table of Contents
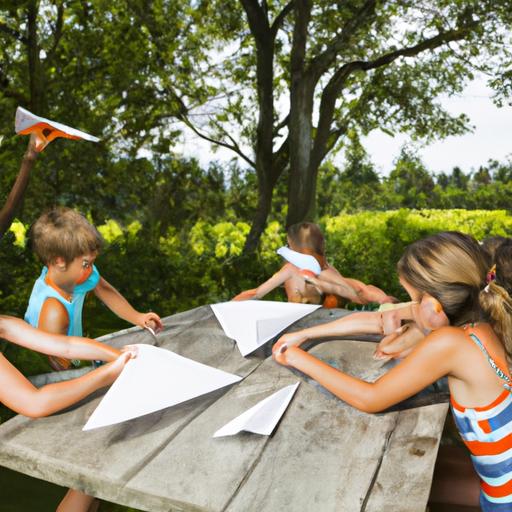
If you’re looking for a fun and simple activity to do with your kids, making paper airplanes is the perfect choice. Not only is it easy and affordable, but it also helps to develop their creativity, motor skills, and hand-eye coordination. In this article, we’ll provide you with a step-by-step guide on how to make a paper airplane for kids.
Materials Needed
Before we get started, let’s gather the necessary materials. You’ll need a few sheets of paper, preferably lightweight and rectangular in shape. A4 or letter-sized paper works well. You’ll also need a pair of scissors to trim the paper if necessary. Lastly, you’ll need some tape or glue to help hold the folds in place.
It’s essential to choose the right paper for your paper airplane. Thicker paper will make it challenging to create the necessary folds, and the airplane won’t fly as well. On the other hand, thinner paper will be too flimsy, and the airplane will fall apart quickly. So, it’s best to use lightweight paper that’s easy to fold and thick enough to hold its shape.
Once you have all the materials, let’s get started on making a basic paper airplane.
Basic Paper Airplane
-
Start by folding the paper in half lengthwise, creasing the center.
-
Unfold the paper and fold the top two corners down to the center crease, creating a triangle shape at the top.
-
Fold the top triangle down to the bottom of the paper, creating a smaller triangle shape.
-
Fold the wings down on each side, creating a crease at the bottom of the triangle.
-
Fold the wings down again, this time creating a crease that aligns with the bottom of the airplane.
-
Turn the airplane over and fold the wings down at a slight angle, creating a wing shape.
-
Finally, create a small fold at the back of the airplane to create a rudder.
Congratulations! You’ve made your first paper airplane. You can experiment with different paper sizes and shapes to see how they affect the flight of the airplane. In the next sections, we’ll explore some advanced paper airplane designs that are sure to impress your kids.
Advanced Paper Airplanes
Now that you’ve mastered the basic paper airplane, it’s time to try some more challenging designs. There are many advanced paper airplanes that you can make, each with its unique characteristics and flight patterns. Here are some of the most popular designs:
The Dart
The dart is a sleek and fast design that’s perfect for long-distance flights. Here’s how to make it:
-
Start with a rectangular piece of paper and fold it in half lengthwise.
-
Fold the top corners down to the center crease, creating a point at the top.
-
Fold the top point down to the bottom of the paper, creating a crease.
-
Fold the wings down on each side, creating a crease at the bottom of the triangle.
-
Fold the wings down again, this time creating a crease that aligns with the bottom of the airplane.
-
Fold the wings up at a slight angle, creating a wing shape.
-
Fold the tip of the wings down slightly to create a small pocket.
The dart is easy to make and flies straight and fast. You can experiment with different paper sizes and shapes to see how they affect the flight of the airplane.
The Glider
The glider is a more complex design that requires some patience and skill to make. Here’s how to make it:
-
Start with a rectangular piece of paper and fold it in half lengthwise.
-
Fold the top corners down to the center crease, creating a point at the top.
-
Fold the top point down to the bottom of the paper, creating a crease.
-
Unfold the paper and fold the top corners down again, this time creating a smaller point.
-
Fold the top point down to the bottom of the paper, creating a crease.
-
Fold the wings down on each side, creating a crease at the bottom of the triangle.
-
Fold the wings up at a slight angle, creating a wing shape.
-
Create a small fold at the back of the airplane to create a rudder.
The glider is a beautiful and graceful design that can fly for long distances. It’s a bit more challenging to make than the dart, but it’s worth the effort.
Tips for Making Paper Airplanes
Making paper airplanes is a fun and rewarding activity, but it can be frustrating if your airplanes don’t fly well. Here are some tips to help you create the perfect paper airplane:
-
Use lightweight paper that’s easy to fold and thick enough to hold its shape.
-
Make sure your folds are sharp and precise. A sloppy fold will affect the flight of the airplane.
-
Experiment with different paper sizes and shapes to see how they affect the flight of the airplane.
-
Don’t overload your airplane with too much weight. Keep it simple and lightweight.
-
Practice makes perfect! Keep practicing and experimenting with different designs until you find the perfect one.
With these tips, you’re sure to create paper airplanes that will fly straight and true. In the next section, we’ll explore some fun paper airplane games and challenges that you can play with your kids.
Tips for Making Paper Airplanes
Now that you know how to make a basic paper airplane let’s dive into some tips that will help you make the perfect one.
1. Choose the right paper
As mentioned earlier, choosing the right paper is essential to making a successful paper airplane. The ideal paper should be lightweight, rectangular in shape, and not too thin or too thick.
2. Make precise folds
Making precise folds is crucial to the success of your paper airplane. Ensure that the folds are sharp and clean by creasing the paper firmly along the fold line. Use a ruler or a flat surface to help you achieve clean folds.
3. Balance the weight
The weight distribution of your paper airplane affects its flight. Ensure that the weight is evenly distributed by folding the paper symmetrically. You can also add weight to the front or back of the airplane to adjust its balance.
4. Adjust the wings
The wings of your paper airplane play a significant role in its flight. Adjust the wings’ angle to find the perfect balance between lift and stability. You can also experiment with different wing shapes to improve its performance.
5. Avoid overhandling
Overhandling your paper airplane can cause it to lose its shape and affect its flight. Be gentle when handling the airplane, and avoid bending or creasing it unnecessarily.
Fun Paper Airplane Games and Challenges
Making paper airplanes is not only a fun activity, but it can also be turned into a game or challenge. Here are some ideas for games and challenges you can try with your kids.
1. Distance Challenge
This challenge involves throwing a paper airplane as far as possible. You can mark the distance with cones or markers and see who can throw the furthest.
2. Target Practice
Create targets using paper cups, cans, or other objects, and see who can hit the targets with their paper airplane.
3. Time in the Air
This challenge involves seeing whose paper airplane can stay in the air the longest. Time each flight with a stopwatch, and the airplane that stays in the air the longest wins.
4. Obstacle Course
Set up an obstacle course using chairs, tables, or other objects, and see whose paper airplane can navigate the course the fastest.
Paper airplanes are a fun and educational activity that kids of all ages can enjoy. With these tips and challenges, you can take your paper airplane-making skills to the next level and have hours of fun while doing it.