Table of Contents
As book lovers, we know that the cover of a book is just as important as the content inside. A visually appealing book cover catches the reader’s attention and makes them more likely to pick up the book and read it. While there are plenty of ready-made book covers available in the market, creating your own book cover is a fun and straightforward process that can add a personal touch to your books.
In this article, we’ll take you through a step-by-step guide on how to make a paper book cover. It’s a simple process that anyone can follow with just a few materials, some creativity, and a bit of patience. The best part? You can customize the design to suit your tastes and preferences.
Materials Needed
Before we get started, let’s gather the materials you’ll need. Here’s a list of things you’ll need to create your paper book cover:
- A large sheet of wrapping paper, construction paper, or any other decorative paper of your choice
- A book to cover
- Scissors
- Double-sided tape or glue
- Ruler
- Pencil
Optional materials that you might find useful include stickers, labels, and markers to decorate your book cover. Once you have all the materials ready, let’s move on to the next step.
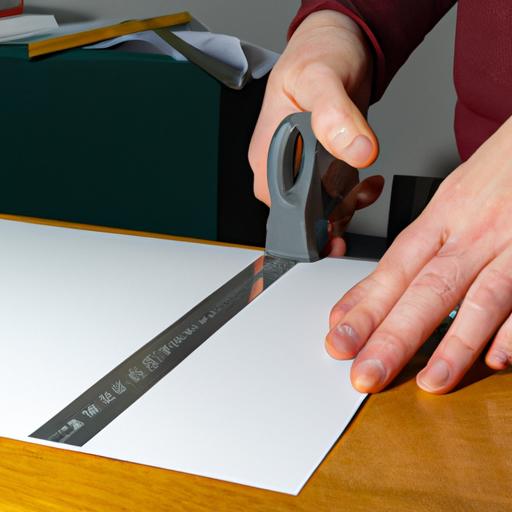
Measuring and Cutting the Paper
The first step in making a paper book cover is to measure the book’s size and cut the paper to fit it. You can use a ruler to measure the length, width, and thickness of the book. Add an extra inch to the length and width measurements to ensure that the cover fits well.
Place the book on the paper, with the front cover facing down. Leave about half an inch of paper on either side of the book. Fold the extra paper over the top and bottom edges of the book and crease the paper. Make sure the paper is snug against the cover, but not too tight.
Using a pair of scissors, cut the paper along the crease, leaving about half an inch of extra paper on the top and bottom edges. Repeat the process for the other side of the book. You should now have a rectangular piece of paper that’s slightly larger than the book.
Now that you have cut the paper to the right size, it’s time to move on to the next step: folding and wrapping the book cover.
Folding and Wrapping the Book Cover
The next step in making a paper book cover is to fold and wrap the book. Place the book in the center of the paper, with the spine facing up. Fold the top and bottom edges of the paper over the book and crease them at the spine.
Fold the paper at the top and bottom of the book again, this time creating flaps that will cover the book’s front and back covers. Use double-sided tape or glue to stick the flaps to the covers. Smooth the paper to ensure there are no wrinkles or bubbles.
Fold the sides of the paper over the book’s edges and crease them at the spine. Trim any excess paper if necessary. Use double-sided tape or glue to secure the paper to the book’s edges. Repeat the process for the other side of the book.
Congratulations, you have successfully folded and wrapped the paper around the book. However, you might want to personalize the book cover further by adding some decorations. In the next section, we’ll talk about how you can decorate your paper book cover.
Decorating the Book Cover
Now that you’ve made your paper book cover, it’s time to add some personal touches to make it unique. There are various ways to decorate your book cover, and it’s entirely up to you to choose the design that best suits your style. Here are some ideas to get you started:
Use stickers and labels
Decorative stickers and labels are an easy and affordable way to add some color and personality to your book cover. You can find stickers and labels in various shapes, sizes, and themes, such as flowers, animals, and quotes. Stick them on the book cover to create a fun and playful design.
Draw or paint your design
If you have some artistic skills, you can draw or paint your book cover design. You can use markers, watercolors, or acrylic paints to create a unique and colorful design that reflects your personality. You can also use stencils or tracing paper to create a more intricate design.
Use patterned paper
Patterned paper is an excellent choice for those who want a simple yet elegant book cover design. You can choose from a wide range of patterns, such as stripes, polka dots, and floral prints. Cut the patterned paper to the size of your book cover and wrap it around the book. You can also add some decorative elements like bows or ribbons.
Conclusion
Making a paper book cover is a fun and creative way to personalize your books. With just a few materials and some creativity, you can create a unique book cover design that reflects your personality and style. In this article, we have provided a step-by-step guide on how to make a paper book cover. We hope you found this article helpful and that you’re inspired to try making your book covers. Remember, the possibilities are endless when it comes to book cover designs, so let your creativity run wild!
Decorating the Book Cover
Now that you have made your paper book cover, it’s time to get creative and add some personal touches to it. Here are some suggestions on how to decorate your book cover:
-
Draw or paint your design: You can use markers, pens, or paint to create your own design on the paper. Let your imagination run wild and create a unique cover that reflects your personality.
-
Add stickers and labels: You can add stickers or labels to your book cover to make it more interesting. You can use different types of stickers, such as letters, numbers, symbols, or images.
-
Use washi tape: Washi tape is a decorative adhesive tape that comes in a variety of patterns and colors. You can use it to create borders, frames, or other designs on your book cover.
-
Print your design: If you’re not confident in your drawing skills, you can create your design on a computer and print it out on the paper. This way, you can create a more intricate and detailed design.
-
Add personal photos: You can add personal photos to your book cover to make it more meaningful. You can use family photos, travel photos, or any other photos that have special meaning to you.
Conclusion
In conclusion, making a paper book cover is a fun and easy way to personalize your books and make them look more appealing. By following the steps outlined in this article, you can create a unique book cover that reflects your personality and style. Remember to gather all the materials you need, measure and cut the paper to fit the book, fold and wrap the paper around the book, and then decorate your cover to your liking.
We hope this guide has been helpful to you, and we encourage you to try making your own paper book cover. It’s a great way to unleash your creativity and make your books stand out on your bookshelf. Happy crafting!