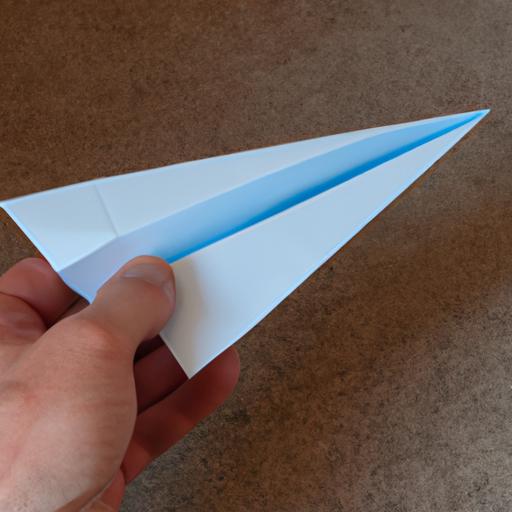
How to Make the Fastest Paper Airplane: A Comprehensive Guide
Table of Contents
Are you tired of making paper airplanes that barely fly? Do you want to impress your friends by creating the fastest paper airplane ever made? Look no further! In this comprehensive guide, we will teach you how to make the fastest paper airplane that will soar through the air with ease.
Introduction

Paper airplanes are more than just a childhood pastime. They can be a fun and educational way to learn about aerodynamics and engineering. Making a paper airplane that flies well requires skill and patience. In this guide, we will provide you with step-by-step instructions and tips that will help you create the fastest paper airplane.
Understanding the Basics of Paper Airplane-Making
To make a paper airplane that flies well, you need to have the right materials and understand the basic folding techniques. Here are the essentials:
Materials Needed
- A sheet of 8.5 x 11-inch paper
- Scissors (optional)
- Ruler (optional)
Basic Folding Techniques
There are three basic folds that you need to know to make a paper airplane:
- Valley fold: folding the paper down the middle, creating a crease that runs parallel to the shorter sides of the paper.
- Mountain fold: folding the paper up along the center crease, creating a crease that runs parallel to the longer sides of the paper.
- Wing fold: folding the paper at an angle to create the wings of the airplane.
Different Types of Paper Airplanes
There are many different types of paper airplanes, each with its unique design and flying characteristics. Some of the most popular paper airplane designs include the dart, glider, and stunt plane. In the next section, we will discuss the techniques you can use to make a faster paper airplane.
Techniques for Making a Faster Paper Airplane
To make a paper airplane that flies faster, you need to focus on three key areas: improving aerodynamics, adjusting weight distribution, and changing the shape of the wings.
Improving Aerodynamics
The key to making a faster paper airplane is to reduce drag and increase lift. To do this, you can try the following:
- Make sure your folds are crisp and clean to reduce air resistance.
- Create a pointed nose to reduce drag.
- Add small flaps to the wings to increase lift.
Adjusting Weight Distribution
The weight distribution of your paper airplane can affect its speed and stability. To adjust the weight distribution, you can try the following:
- Move the wings forward or backward to adjust the center of gravity.
- Add weight to the nose or tail of the airplane to adjust the balance.
Changing the Shape of the Wings
The shape of the wings can affect the lift and stability of your paper airplane. To change the shape of the wings, you can try the following:
- Create a dihedral angle by bending the wings upward at the tips to increase stability.
- Create anhedral angle by bending the wings downward at the tips to increase speed.
Testing and Refining Your Paper Airplane
After you’ve made your paper airplane, it’s time to test it and make any necessary adjustments. Here are the steps to follow:
Conducting Test Flights
- Find a large, open space to test your paper airplane.
- Make sure the conditions are suitable for flying (no wind or rain).
- Hold your paper airplane at the back of the wings and throw it forward with a smooth, level throw.
Analyzing Its Flight Characteristics
- Observe how your paper airplane flies.
- Does it fly straight or veer to one side?
- Does it climb or descend quickly?
- Does it glide or fall quickly?
Making Necessary Adjustments
- Based on your observations, make any necessary adjustments to the weight distribution, the shape of the wings, or the aerodynamics.
- Test your paper airplane again and continue making adjustments until you’re satisfied with its performance.
Tips for Throwing Your Paper Airplane
Making a fast paper airplane is only half the battle. To get the most out of your creation, you need to know how to throw it properly. Here are some tips to help you launch your paper airplane like a pro:
Proper Throwing Technique
Hold the paper airplane at the bottom of the fuselage between your thumb and forefinger. Stand with your feet shoulder-width apart and extend your arm forward. As you release the airplane, give it a slight upward flick to help it gain altitude.
Launching from Different Heights
Launching your paper airplane from different heights can affect its flight path and speed. For example, launching from a higher height will give your airplane more potential energy, allowing it to fly faster and farther. Experiment with launching from different heights to see how it affects your airplane’s performance.
Throwing in Different Wind Conditions
Wind can have a significant impact on your paper airplane’s flight path. If it’s windy outside, try launching your airplane into the wind, so it has more lift. If the wind is blowing across your launch area, adjust your throwing angle accordingly to compensate for the wind’s direction.
Conclusion
In conclusion, making the fastest paper airplane requires more than just folding a piece of paper. By following the techniques outlined in this guide, you can create a paper airplane that is not only fast but also flies well. Remember to experiment with different designs and techniques to find what works best for you. With practice and patience, you’ll soon be creating paper airplanes that soar through the air with ease. So go ahead, grab a piece of paper, and start folding!

