Table of Contents
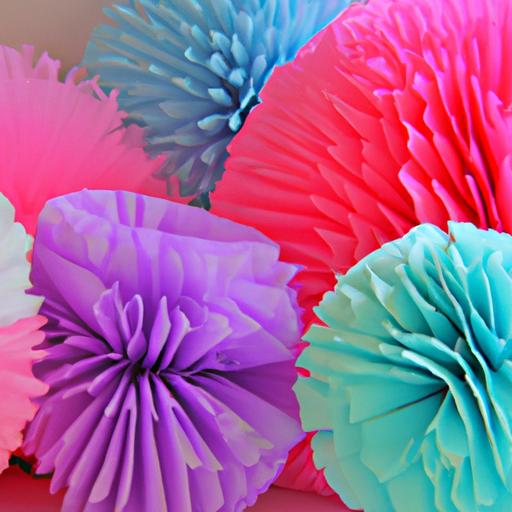
Are you looking for a fun and simple way to add some color and texture to your home décor or party decorations? Look no further than tissue paper pom poms! These fluffy decorations are easy to make and can be customized to fit any color scheme or occasion. In this step-by-step guide, we’ll show you how to make tissue paper pom poms that are sure to impress.
Materials Needed

Before you get started, you’ll need a few supplies. Here’s what you’ll need to make tissue paper pom poms:
- Tissue paper: You’ll need 8-10 sheets of tissue paper per pom pom. You can use all one color or mix and match different colors for a fun, festive look.
- Scissors: A pair of scissors will be used to cut the tissue paper.
- Thin wire: You’ll need a piece of thin wire, such as floral wire, to secure the tissue paper in the center.
- Ribbon: You’ll need a piece of ribbon to hang the pom pom once it’s finished.
Step-by-Step Guide on How to Make Tissue Paper Pom Poms
Now that you have your supplies, it’s time to get started! Follow these simple steps to make tissue paper pom poms:
Step 1: Fold the Tissue Paper
Take 8-10 sheets of tissue paper and fold them accordion-style, making each fold about 1 inch wide. Once you’ve folded the tissue paper, trim any excess paper from the ends, creating a neat, square stack.
Step 2: Tie the Wire Around the Center
Take a piece of thin wire and wrap it tightly around the center of the tissue paper stack. Twist the wire to secure it, leaving a long tail of wire on one side.
Continue to sections 3 and 4.
Step 3: Cutting the Edges
Using a pair of sharp scissors, cut the edges of the tissue paper stack into a rounded shape or a point, depending on the look you want. You can also cut the edges into a scalloped or jagged shape for a more unique look. Be sure to cut through all the layers of tissue paper.
Step 4: Fluffing the Pom Pom
Once you’ve cut the edges, it’s time to fluff the pom pom. Starting with one side of the tissue paper stack, carefully separate each layer of tissue paper, pulling it towards the center of the pom pom. Repeat on the other side of the tissue paper stack until all the layers have been fluffed and separated.
To give your pom pom a more rounded shape, gently pull the layers of tissue paper towards the center of the pom pom, giving it a slight squeeze as you go. Once you’re happy with the shape of your pom pom, tie a piece of ribbon around the wire you used to secure the center of the pom pom.
Tips and Tricks
Now that you know how to make a basic tissue paper pom pom, here are some tips and tricks to help you customize your pom poms:
Using Different Colors of Tissue Paper
Mix and match different colors of tissue paper to create a unique look for your pom poms. You can use all one color or alternate colors to create a striped effect. You can also use complementary colors to create a more cohesive look.
Cutting the Edges in Different Shapes
Experiment with different shapes when cutting the edges of your tissue paper. You can create a rounded shape for a classic look or try a pointy shape for a more whimsical look. You can also try cutting the edges into a scalloped or jagged shape for a more unique look.
Varying the Size of the Pom Poms
You can make pom poms in a variety of sizes to fit your needs. Use smaller pom poms as accents on gift wrapping or larger pom poms as statement pieces for party decorations. You can also vary the size of the tissue paper sheets to create pom poms of different sizes.
Creative Ways to Use Tissue Paper Pom Poms
Now that you know how to make tissue paper pom poms, it’s time to put them to use! Here are a few creative ways to incorporate tissue paper pom poms into your décor and celebrations:
Home Décor
Tissue paper pom poms are a great way to add a pop of color and texture to your home décor. Hang them from the ceiling in your living room or bedroom, or use them to create a fun centerpiece for your dining room table. You can even mix and match different colors and sizes to create a unique and eye-catching display.
Parties and Events
Tissue paper pom poms are the perfect decoration for any party or event. Hang them from the ceiling or use them to create a fun photo backdrop. You can even use them to decorate the tables or chairs at your event. And the best part? Tissue paper pom poms are inexpensive and easy to make, so you can create a lot of them to really make a statement.
DIY Gifts
Tissue paper pom poms also make great DIY gifts. You can use them to decorate a gift bag or box, or even attach them to a piece of jewelry or other small gift. Your friends and family will love the handmade touch, and you’ll love how easy and affordable they are to make.
Conclusion
In conclusion, tissue paper pom poms are a fun and versatile decoration that you can use in a variety of ways. By following our step-by-step guide, you can create beautiful pom poms that are sure to impress. Whether you’re decorating your home, planning a party, or making DIY gifts, tissue paper pom poms are a great way to add some color and texture to your life. So why not give them a try today?