Table of Contents
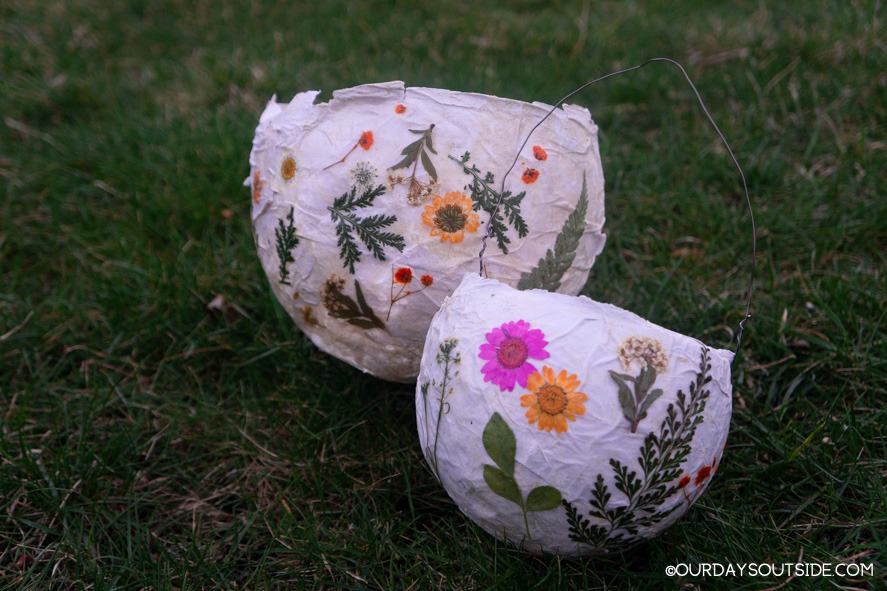
Lately, I’ve been captivated by the beauty of pressed flowers in our nature crafts. The idea of creating DIY paper lanterns using this delicate touch has been on my mind for quite some time. The combination of the ethereal nature elements and the soft glow radiating from within these lanterns is truly enchanting.
Imagine the possibilities! These handcrafted lanterns can be used to decorate both indoor and outdoor spaces. My little guy even hung his in his room as a whimsical nightlight. They can also set a perfect ambiance for twilight outdoor parties or around a cozy campfire. And for a touch of magic, why not bring them along for a nighttime stroll?
Let me guide you through the process of making your very own fabulous DIY paper lanterns!
1. Gather Your Materials
Here’s what you’ll need:
- Balloons
- Tissue paper
- All-purpose flour
- Bowls
- Permanent marker
- Mod Podge
- Pressed flowers (or you can press your own)
- Wire
- Hole punch
- Pliers

2. Craft Your Paper Mache
To achieve the desired shape for your lanterns, start by inflating the balloons to your preferred size. If you’re unsure, smaller-sized balloons tend to work best for this project. Place the balloons in bowls with the knot side facing down to secure them while you work. If you’d like, you can draw a line around the balloon as a reference for the paper mache coverage.
Now it’s time to create your paper mache mixture. It’s a simple process, although you may need to experiment with the flour-to-water ratio. I recommend starting with a 1:1 ratio, using 1 cup of flour and 1 cup of water. Adjust the consistency by adding more water if necessary until it feels right.
3. Cover Your Balloons
Tear or cut the tissue paper into strips. Dip each strip into the bowl of paper mache, remove the excess with your fingers, and start covering the balloons. To ensure sturdy lanterns, try overlapping the strips in a crisscross pattern, going in different directions.

Make sure to cover the entire surface with at least three layers of tissue paper and paper mache. You may need to spot-check and cover any missed spots. Pay extra attention to the rim area as it needs to be strong enough to hold the hole and wire for the lanterns.
This step can get messy, but it’s also the most enjoyable part for kids. Let them get their hands into the “goopy” mixture! Remember to protect your workspace by covering it with brown paper bags or old newspapers.

4. Let It Dry
Once you’ve finished covering the balloons, it’s time to let them dry. Depending on the thickness of the layers and the surrounding environment, drying can take around twenty-four hours. Leave the balloons in the bowls, ensuring that no wet paper strips touch any surface while they dry.
5. Decorate!
After the balloons have dried completely, it’s time to unleash your creativity and decorate your lanterns. Start by gently popping the balloons with a needle, leaving you with the hollow paper mache shells to work with.

Apply a thick layer of Mod Podge and carefully position your pressed flower pieces on top. Once in place, add another layer of Mod Podge to securely hold the botanical accents.

For added strength, remember to coat the entire surface of the lanterns with Mod Podge. To make decorating easier, prop the lanterns over water bottles while applying the final layer. Take your time, and when you’re satisfied, your DIY paper lanterns are nearly complete!

6. Attach the Handle
Using a hole punch, create holes on opposite sides of each lantern. Make sure to leave a small gap between the hole and the top of the lantern to prevent tearing. Strengthen the holes by applying additional Mod Podge both inside and outside.
Once dry, cut a piece of wire to your preferred length using pliers. Thread each end of the wire through the holes, forming a handle. Now you’re ready to hang or carry your lanterns! Simply place an LED tealight inside, and watch them radiate their magical charm.
Now it’s time to decide how you’ll enjoy these beautiful DIY paper lanterns. Whether you choose to adorn your interior spaces or illuminate your outdoor gatherings, these enchanting creations are sure to add a touch of wonder to your surroundings.
Looking for more nature-inspired crafts? Check out these lovely pressed flower necklaces!
Remember, your crafting journey with Quill And Fox awaits you. Let your imagination soar as you explore the art of crafting with nature.