
How to Make Easy Paper Airplanes: The Ultimate Guide
Table of Contents
Are you looking for a fun and easy way to pass the time? Making paper airplanes is a classic pastime that has been enjoyed by people of all ages for generations. Not only is it a fun activity to do alone, but it’s also a great way to bond with friends and family. In this article, we will provide you with a comprehensive guide on how to make easy paper airplanes that everyone can enjoy.
Introduction to Paper Airplanes
Paper airplanes are a type of toy aircraft made from paper or cardboard. They are typically designed to be lightweight and can be thrown by hand. While paper airplanes are often associated with children, they are enjoyed by people of all ages. Making paper airplanes is not only a fun activity, but it can also help develop hand-eye coordination, fine motor skills, and creativity.
Materials Needed
To begin making paper airplanes, you will need a few basic materials:
- Paper: The best paper for making paper airplanes is lightweight and thin, such as printer paper. Avoid using thicker paper or cardstock, as it will be harder to fold and may not fly as well.
- Scissors: You will need scissors to cut the paper to the appropriate size and to make any necessary cuts.
- Ruler: A ruler is helpful for making precise measurements when folding the paper.
- Pencil: A pencil can be used to mark the paper where it needs to be folded or cut.
Once you have gathered all of the necessary materials, it’s time to start making paper airplanes. In the next section, we will go over some basic paper airplane designs that you can try at home.
Basic Paper Airplane Designs
Basic Dart Paper Airplane
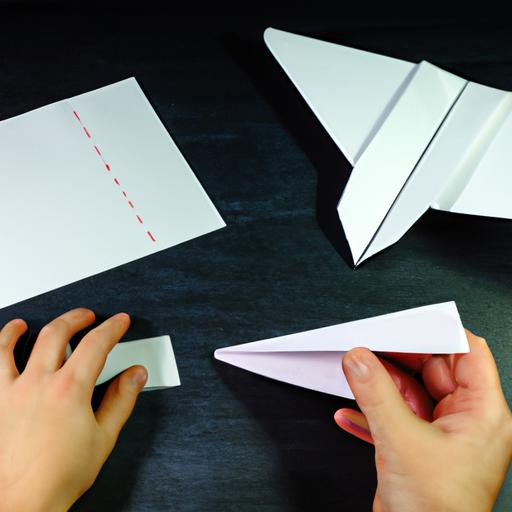
The basic dart paper airplane is one of the most straightforward designs to make. It’s perfect for beginners and is a great starting point for more complicated designs. Here’s how to make it:
- Start by folding a piece of paper in half lengthwise.
- Open the paper back up and fold the top corners down to the center crease, creating two triangles.
- Fold the top edges down again, lining them up with the center crease.
- Fold the paper in half along the center crease.
- Fold the wings down, making sure they are even on both sides.
- Fold the tail up to create stability.
Classic Paper Airplane
The classic paper airplane design is a favorite among many. It’s easy to make and flies very well. Here’s how to make it:
- Begin by folding a piece of paper in half lengthwise.
- Unfold the paper and fold the top corners down to the center crease, creating two triangles.
- Fold the top edges down again, lining them up with the center crease.
- Fold the paper in half along the center crease.
- Fold the wings down, making sure they are even on both sides.
- Fold the wings up slightly to create lift.
In the following sections, we will provide you with a step-by-step guide on how to make these paper airplanes and more.
Basic Paper Airplane Designs
In addition to the basic dart and classic paper airplanes, there are many other paper airplane designs that you can try. One popular design is the bulldog dart paper airplane. This design is similar to the basic dart, but with a few modifications that make it fly farther and faster. Here’s how to make it:
Bulldog Dart Paper Airplane
- Begin by folding a piece of paper in half lengthwise.
- Unfold the paper and fold the top corners down to the center crease, creating two triangles.
- Fold the top edges down again, lining them up with the center crease.
- Fold the paper in half along the center crease.
- Fold the wings down, making sure they are even on both sides.
- Fold the wings up along the bottom edge, creating a sharp point.
- Fold the tail up to create stability.
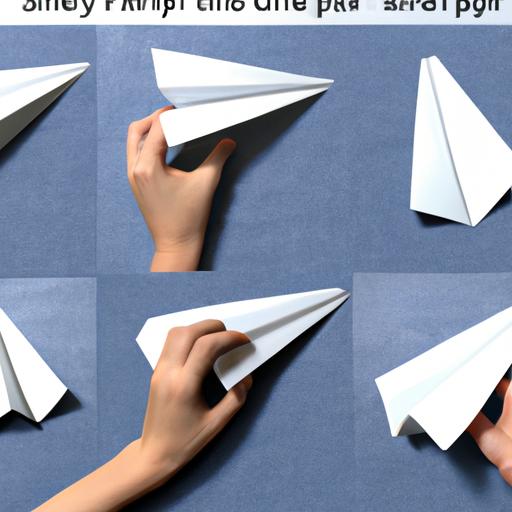
Step-by-Step Guide on Making Paper Airplanes
Now that you have an idea of some basic paper airplane designs, let’s take a closer look at how to make them. Follow these step-by-step instructions to create your own paper airplanes:
Basic Dart Paper Airplane
- Start with a rectangular sheet of paper.
- Fold the paper in half lengthwise and crease it.
- Unfold the paper and fold the top corners down to the center crease, creating two triangles.
- Fold the top edges down again, lining them up with the center crease.
- Fold the paper in half along the center crease.
- Fold the wings down, making sure they are even on both sides.
- Fold the tail up to create stability.
- Make sure all folds are crisp and secure.
Classic Paper Airplane
- Begin with a rectangular sheet of paper.
- Fold the paper in half lengthwise and crease it.
- Unfold the paper and fold the top corners down to the center crease, creating two triangles.
- Fold the top edges down again, lining them up with the center crease.
- Fold the paper in half along the center crease.
- Fold the wings down, making sure they are even on both sides.
- Fold the wings up slightly to create lift.
- Make sure all folds are crisp and secure.
Bulldog Dart Paper Airplane
- Start with a rectangular sheet of paper.
- Fold the paper in half lengthwise and crease it.
- Unfold the paper and fold the top corners down to the center crease, creating two triangles.
- Fold the top edges down again, lining them up with the center crease.
- Fold the paper in half along the center crease.
- Fold the wings down, making sure they are even on both sides.
- Fold the wings up along the bottom edge, creating a sharp point.
- Fold the tail up to create stability.
- Make sure all folds are crisp and secure.
By following these step-by-step instructions, you can create your own paper airplanes with ease. In the next section, we will provide you with some tips on how to create the perfect paper airplane.
Tips for Creating the Perfect Paper Airplane
While the designs we’ve outlined in the previous section are easy to make, there are a few tips you can follow to create the perfect paper airplane:
Choosing the Right Paper
Using the right paper is essential for making a good paper airplane. As mentioned earlier, lightweight and thin paper works best, such as printer paper. Avoid using thick paper or cardstock, as they will be harder to fold and may not fly as well.
Making Precise Folds
Making precise folds is crucial for creating a well-balanced paper airplane that will fly straight and true. Use a ruler to make sure your folds are straight and even, and use a pencil to mark where the paper needs to be folded. Take your time and be patient – rushing through the folding process can result in a poorly made paper airplane.
Adjusting the Wings and Tail
Once you’ve made your paper airplane, you can adjust the wings and tail to make it fly better. If the airplane is flying too high, bend the wings down slightly. If it’s flying too low, bend them up. If the airplane is turning to one side, adjust the tail by bending it in the opposite direction. Small adjustments can make a big difference in how well your paper airplane flies.
Conclusion
In conclusion, making paper airplanes is a fun and easy activity that can be enjoyed by people of all ages. With a few basic materials and some patience, you can create a variety of paper airplane designs that will provide hours of entertainment. Remember to choose the right paper, make precise folds, and adjust the wings and tail as needed to create the perfect paper airplane. So go ahead and give it a try – you may just discover a new hobby that you love!