
How to Make a Kunai Out of Paper: A Step-by-Step Guide
Table of Contents
If you’re a fan of anime and manga, you’ve probably seen ninja characters wielding kunai. A kunai is a Japanese dagger that was used as a tool for scaling walls and digging, but it’s often portrayed as a weapon in popular culture. Making a kunai out of paper is a fun and easy DIY project that you can do at home. In this article, we’ll show you step-by-step how to make a kunai out of paper.
Materials Needed
Before we get started, let’s gather the materials you’ll need to make a paper kunai. Most of these materials can be found around your house, so no need to make a special trip to the craft store.
- One sheet of rectangular paper (8.5 x 11 inches or A4 size)
- Scissors
- Ruler
- Pencil
- Optional: markers or paint for decorating the kunai
The type of paper you choose will affect the final result. Thicker paper will hold its shape better, but it can be more difficult to fold and cut. Thinner paper, such as origami paper, is easier to manipulate but may not hold up as well over time. Choose the paper that works best for you.
Folding the Paper
Once you’ve gathered your materials, it’s time to start folding the paper into the shape of a kunai.
- Start by folding the paper in half lengthwise. Crease the fold with your finger, and then unfold the paper.
- Fold the top two corners of the paper down to the center crease. This will create a diamond shape at the top of the paper.
- Fold the bottom of the paper up so that the edge meets the bottom of the diamond shape.
- Fold the paper in half along the center crease so that the diamond shape is on top.
- Fold the top of the paper down to the bottom of the diamond shape.
- Fold the paper in half again so that the diamond shape is on the outside.
- Fold the top two corners of the paper down to the center crease, forming two triangles at the top.
- Fold the bottom of the paper up to meet the bottom of the triangles.
- Fold the paper in half one final time so that the triangles are on the outside.
Cutting and Shaping the Kunai
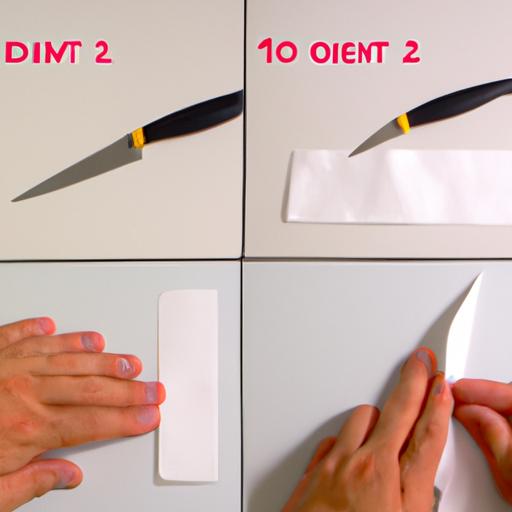
Now that you have folded the paper into the basic shape of a kunai, it’s time to cut and shape it into its final form.
- Use your scissors to cut off the top two triangles of the paper. This will create a straight edge at the top of the kunai.
- Round off the corners of the bottom of the kunai with your scissors. This will give the kunai a more polished look.
- Cut a slit in the middle of the straight edge at the top of the kunai. This will create the blade of the kunai.
- Fold the top of the kunai down along the center crease. This will create a point at the top of the blade.
- Use your scissors to round off the tip of the blade. This will make the kunai safer to handle.
Remember to take your time while cutting and shaping the kunai. It’s better to make small cuts and adjustments rather than trying to make big changes all at once. You can always trim more off, but you can’t put it back once it’s been cut.
It’s also important to be careful while handling the scissors. Make sure you’re using sharp scissors and that you’re not cutting towards your fingers. If you’re a beginner, it might be helpful to have an adult supervise you while cutting.
Decorating the Kunai
Now that you’ve made your paper kunai, it’s time to add some personality to it with decorations. Here are a few ideas to get you started:
- Use markers or paint to add designs to the blade of the kunai.
- Add some color to the handle of the kunai with markers or paint.
- Use metallic markers or paint to make the kunai look more like metal.
- Use stickers or washi tape to add patterns or designs to the kunai.
Remember to be creative and have fun with your decorations. You can make your kunai look however you want it to look. Just make sure that you’re not covering up any important parts of the kunai, like the blade or the point at the top.
Once you’ve finished decorating your kunai, you can use it as a prop for cosplay or just display it on your desk. Making a kunai out of paper is a fun and easy DIY project that anyone can do. With a little bit of patience and some creativity, you’ll have a kunai that looks like it came straight out of your favorite anime or manga series.
Decorating the Kunai
Now that you’ve made your paper kunai, it’s time to add some personality to it. Here are some suggestions for decorating your kunai:
- Use markers or paint to add color to the kunai. You can make it look like a traditional kunai with a black handle and silver blade, or you can get creative and use your favorite colors.
- Add designs to the kunai. You can draw symbols or patterns on the blade and handle, or you can create a design that reflects your personality.
- Use washi tape or duct tape to add texture to the kunai. You can create a grip on the handle or add stripes to the blade.
There are endless possibilities when it comes to decorating your paper kunai. Just have fun and be creative!
Conclusion
Congratulations, you’ve made your very own paper kunai! Making a kunai out of paper is a fun and easy DIY project that anyone can do. By following the steps outlined in this article, you can create your own kunai in just a few minutes.
Remember, the type of paper you choose and the way you fold and cut it will affect the final result. Experiment with different techniques to find what works best for you. And don’t be afraid to add your own personal touches to your kunai. Whether you’re a fan of anime, a ninja enthusiast, or just looking for a fun craft project, making a paper kunai is a great way to spend an afternoon.
So what are you waiting for? Grab some paper and scissors, and start making your own paper kunai today!