
How to Make the Best Paper Airplane for Distance
Table of Contents
Introduction
Are you tired of throwing paper airplanes that barely make it across the room? Do you want to impress your friends with your paper airplane skills? If so, you’ve come to the right place. In this article, we’ll show you how to make the best paper airplane for distance. Whether you’re a beginner or an experienced paper airplane maker, this article will give you tips and techniques to create a paper airplane that can soar through the air.
Paper airplanes have been around for centuries, and they continue to fascinate people of all ages. From simple designs to complex creations, paper airplanes are a fun and inexpensive way to explore aerodynamics and physics. So, grab a piece of paper and let’s get started.
Choosing the Right Paper
The first step in making the best paper airplane for distance is choosing the right paper. Not all paper is created equal, and the type of paper you use can affect how your paper airplane flies. Here are some factors to consider when choosing paper for paper airplanes:
Weight
The weight of the paper is an important factor to consider when making paper airplanes. If the paper is too heavy, it will be difficult to fold and may not fly well. If the paper is too light, it may not have enough weight to fly far. The ideal weight for paper airplanes is between 70 and 90 grams per square meter.
Size
The size of the paper can also affect how your paper airplane flies. Larger paper airplanes may have more surface area and be able to stay in the air longer, but they may also be more difficult to fold. Smaller paper airplanes may be easier to fold but may not fly as far. The most common size for paper airplanes is 8.5 x 11 inches.
Texture
The texture of the paper can also make a difference in how your paper airplane flies. Smooth paper can be easier to fold and may create less drag, allowing your paper airplane to fly farther. Textured paper may create more drag, which can slow down your paper airplane. However, textured paper can also add stability to your paper airplane, making it easier to fly.
When choosing paper for paper airplanes, it’s best to experiment with different types of paper to see which works best for you. Some recommended types of paper for distance include printer paper, lightweight cardstock, and origami paper.
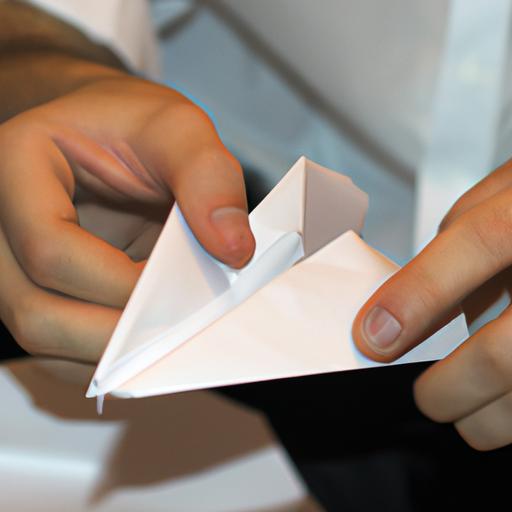
Folding Techniques
Once you’ve chosen the right paper, it’s time to start folding. There are many different folding techniques for paper airplanes, but we’ll start with the basics.
Basic Folding Techniques for Paper Airplanes
The most basic paper airplane design is the dart. To make a dart, start with a piece of paper and fold it in half vertically. Then, fold the top corners down to the center crease, creating two triangles. Finally, fold the top point down to the bottom edge of the paper, creating a triangle-shaped nose. This design is simple but can still fly a decent distance.
Another basic design is the classic, which is similar to the dart but with an additional fold. To make a classic paper airplane, fold the paper in half vertically and then unfold it. Next, fold the top corners down to the center crease, just like in the dart design. Then, fold the top point down to the bottom edge of the paper, creating a nose. Finally, fold the wings down so that their tips meet at the bottom edge of the paper. This design has slightly more lift than the dart and can fly farther.
Advanced Folding Techniques for Distance
If you’re looking to make a paper airplane that can really fly, you’ll need to use some advanced folding techniques. One technique is to add wing flaps to your paper airplane. To do this, fold the wings down as you would for the classic design, then fold them back up about an inch from the bottom edge of the paper. This creates a small flap on each wing that can help stabilize the paper airplane and keep it in the air longer.
Another advanced technique is to create a tail on your paper airplane. To do this, fold a small section of the back of the paper up and then fold it back down, creating a small tab. This tab can help balance the paper airplane and keep it from diving or stalling in the air.
Adjusting the Design
Once you’ve folded your paper airplane, you may need to adjust the design to get the maximum distance. Here are some factors to consider when adjusting your paper airplane:
Factors That Affect the Distance of Paper Airplanes
-
Weight: The weight of your paper airplane can affect how far it flies. If your paper airplane is too heavy, it may not be able to stay in the air for long. If it’s too light, it may not have enough momentum to fly far.
-
Balance: The balance of your paper airplane is also important. If it’s too front-heavy, it may dive in the air. If it’s too back-heavy, it may stall. Make sure your paper airplane is balanced by adjusting the wings and tail.
-
Wingspan: The wingspan of your paper airplane can affect how far it flies. Longer wings can create more lift, but they can also create more drag. Shorter wings may not create as much lift, but they can fly faster.
How to Adjust the Design for Maximum Distance
To adjust your paper airplane for maximum distance, try experimenting with different designs and making small adjustments to the weight, balance, and wingspan. You can also try adjusting the angle of the wings or adding wing flaps or a tail. Don’t be afraid to try different things and see what works best for your paper airplane. With a little practice and experimentation, you’ll be able to make a paper airplane that can fly farther than you ever imagined.
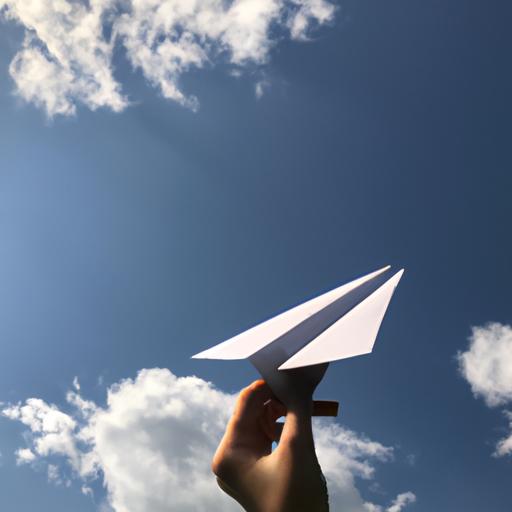
Launching Techniques
Once you have folded your paper airplane, it’s time to launch it into the air. The way you launch your paper airplane can make a big difference in how far it flies. Here are some proper ways to launch a paper airplane:
Overhead Launch
The overhead launch is the most common way to launch a paper airplane. To do an overhead launch, hold the paper airplane by the bottom with your fingertips. Raise your arm up above your head and release the paper airplane. Make sure to release the paper airplane with a smooth motion and not throw it.
Glider Launch
The glider launch is another way to launch a paper airplane. To do a glider launch, hold the paper airplane by the bottom with your fingertips. Hold the paper airplane up to your eye level and gently toss it. This launch is good for paper airplanes that have a lot of lift.
Bounce Launch
The bounce launch is a fun way to launch a paper airplane. To do a bounce launch, fold the wings of the paper airplane up slightly. Hold the paper airplane by the bottom with your fingertips and drop it from the height of your hips. The paper airplane should bounce off the ground and into the air.
Here are some tips for launching your paper airplane for maximum distance:
- Make sure your paper airplane is folded properly and has a symmetrical shape.
- Launch your paper airplane at a slight upward angle to give it lift.
- Avoid throwing your paper airplane too hard or too fast, as it can cause it to stall or crash.
- Launch your paper airplane in an open space with minimal wind.
Conclusion
Making paper airplanes is a fun and educational activity that anyone can enjoy. With the right paper, folding techniques, design adjustments, and launching techniques, you can create a paper airplane that can fly farther than you ever imagined. Remember to experiment with different types of paper and designs to find what works best for you. So, grab some paper and start folding your way to the best paper airplane for distance.