
Toilet Paper Roll Snowflakes
Table of Contents
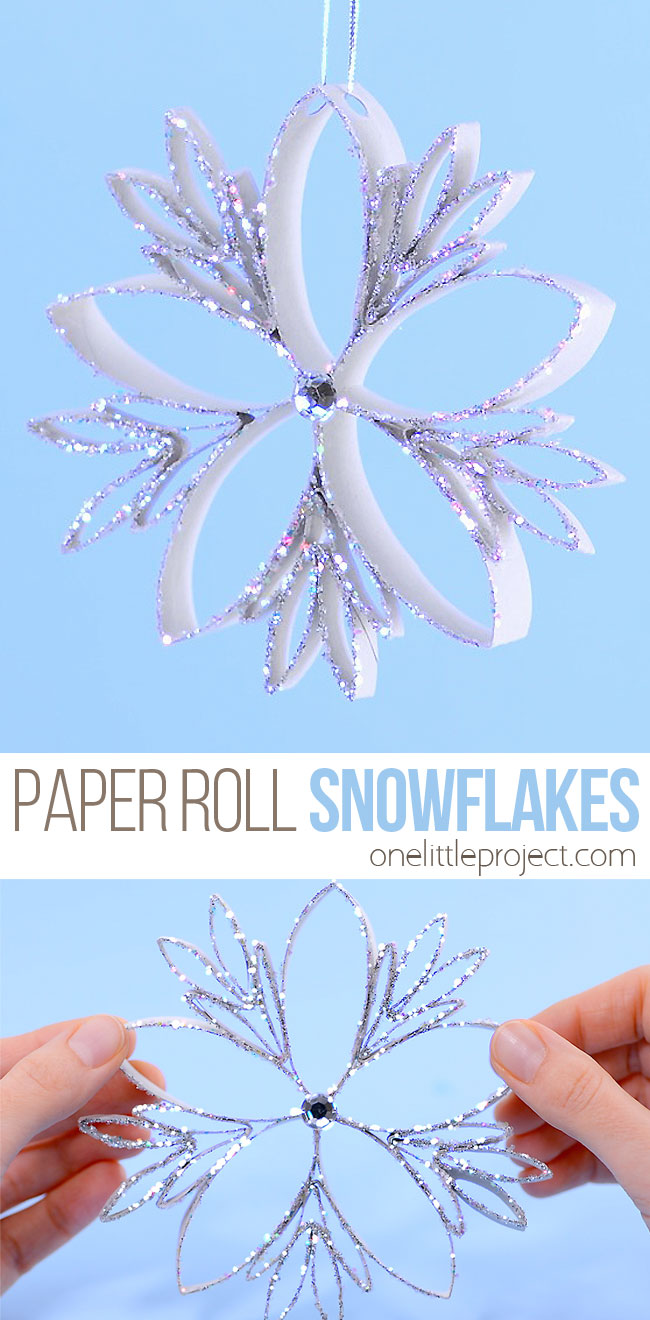
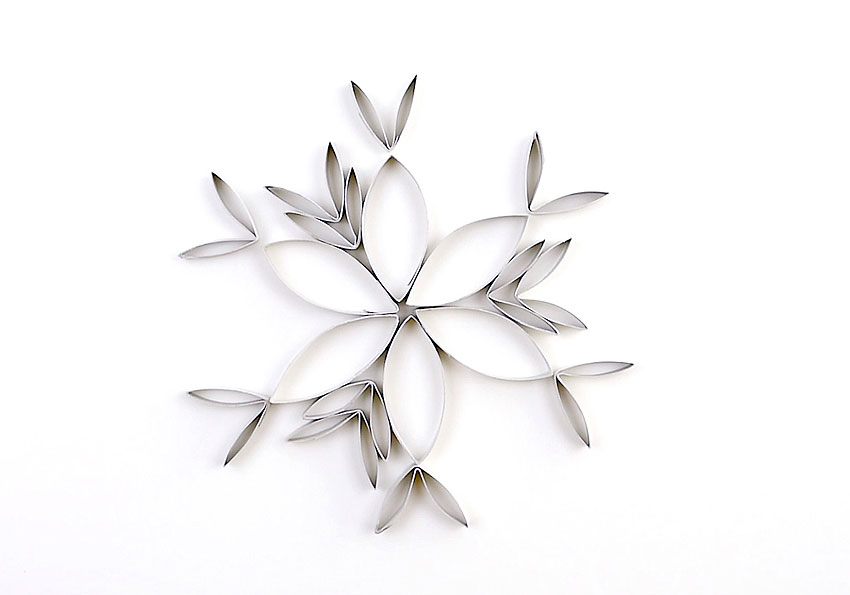
These paper roll snowflakes are SO PRETTY! No one would ever guess they were made from paper rolls. Who knew such a simple, recycled material could look so beautiful?! With a little planning, some glue and lots of glitter, you can make these stunning winter-y decorations in no time at all!
Even though the holidays are over, we’re still in the middle of winter up here in Canada. Which is great, because snow themed crafts are so much fun! These beautiful, sparkly decorations can stay up for Christmas, right until the end of winter. They’re fairly easy and super fun to make!
One of the best things about this craft is you can make your snowflakes as simple or as complicated as you choose. It’s so much fun to come up with different snowflake patterns! It’s easiest to use white toilet paper rolls (if you have any), but if all you have is brown ones, you can paint them white. Or cover them in more glitter. Because really, that just sounds even more beautiful!
Feel free to use different colours and sizes of glitter. I tried a bunch of different glitters and found that silver mixed with a bit of larger iridescent glitter was the prettiest. But light blues, pinks, and purples would also look gorgeous!
Once you cut your paper roll strips, the sky’s the limit on what designs and patterns you can create. I recommend planning ahead, and laying out your design before you start gluing. It’s so much easier to glue them in sections so having a game plan at the beginning will make the process much smoother. (You’ll see what I mean in the video below…)
And if you don’t have any paper rolls, no problem! Did you know you can buy empty paper rolls on Amazon?! They really DO have everything!?
Check out our video for how to make Paper Roll Snowflakes:
Feeling inspired to make even more snowflake themed crafts? Here are a few of our favourites:
Coffee Filter Snowflakes
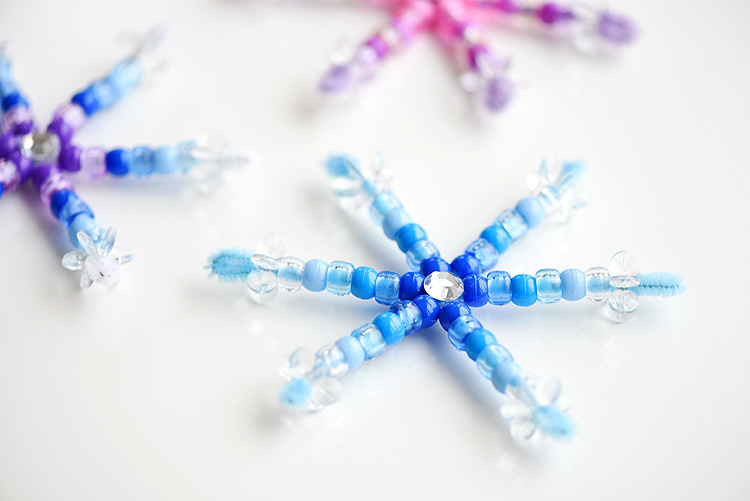
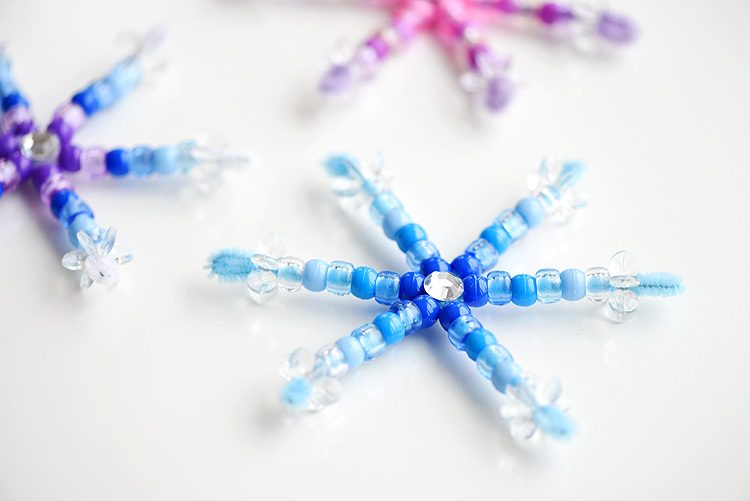
Beaded Pipe Cleaner Snowflakes
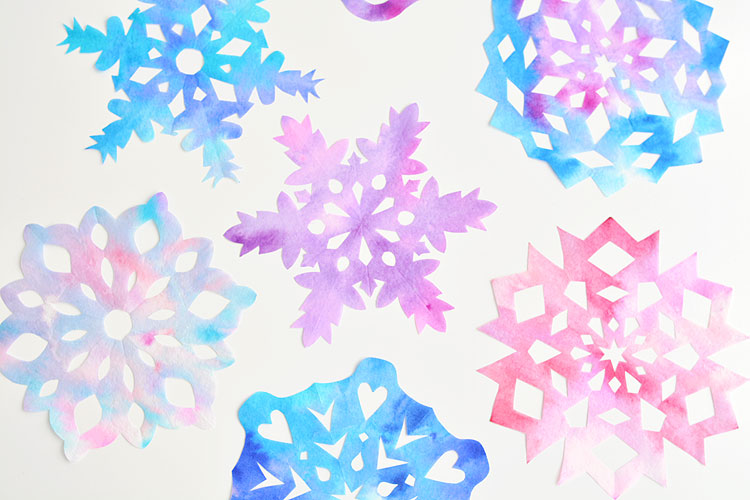
Magic Salt and Watercolor Snowflake Art
How to make Paper Roll Snowflakes:
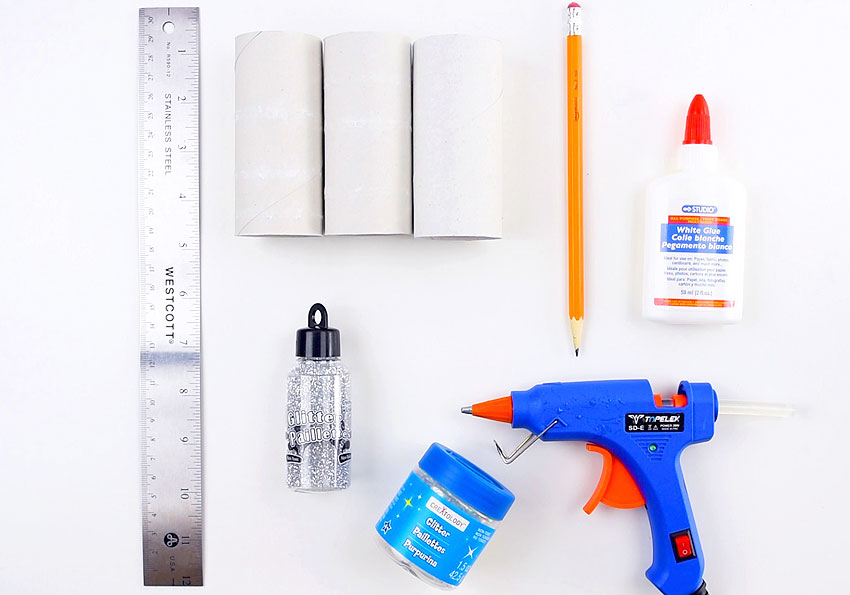
Here’s a list of what you’ll need. The affiliate links below will take you to products on Amazon that are similar to the supplies we used to make this craft:
- Toilet Paper Rolls (I needed 3 for the medium sized snowflake)
- White Craft Glue
- Glitter
- Clear Rhinestones
- String
- Glue Gun
- Scissors
- Disposable Plates
- Ruler
- Pencil
Other than the paper rolls, we were able to find everything to make these paper roll snowflakes at the dollar store. You really only need a glue gun, white glue and some glitter.
The white paper rolls I used were a little over 4 inches long. You may need to adjust the measurements slightly depending on the size of the rolls you use.
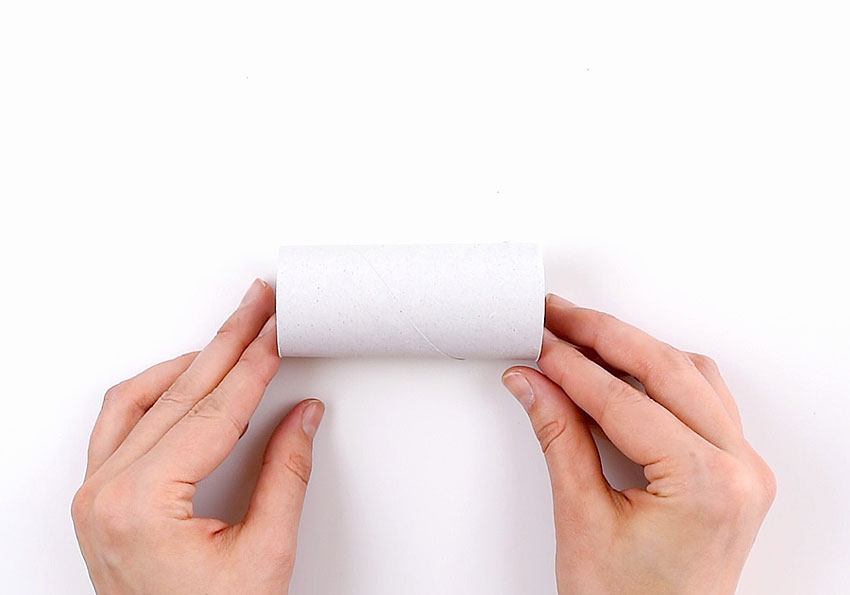
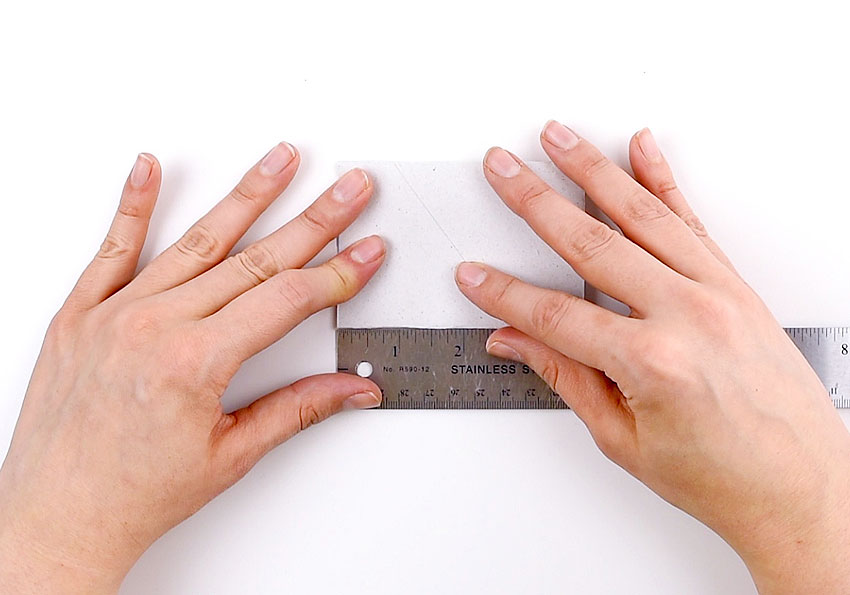
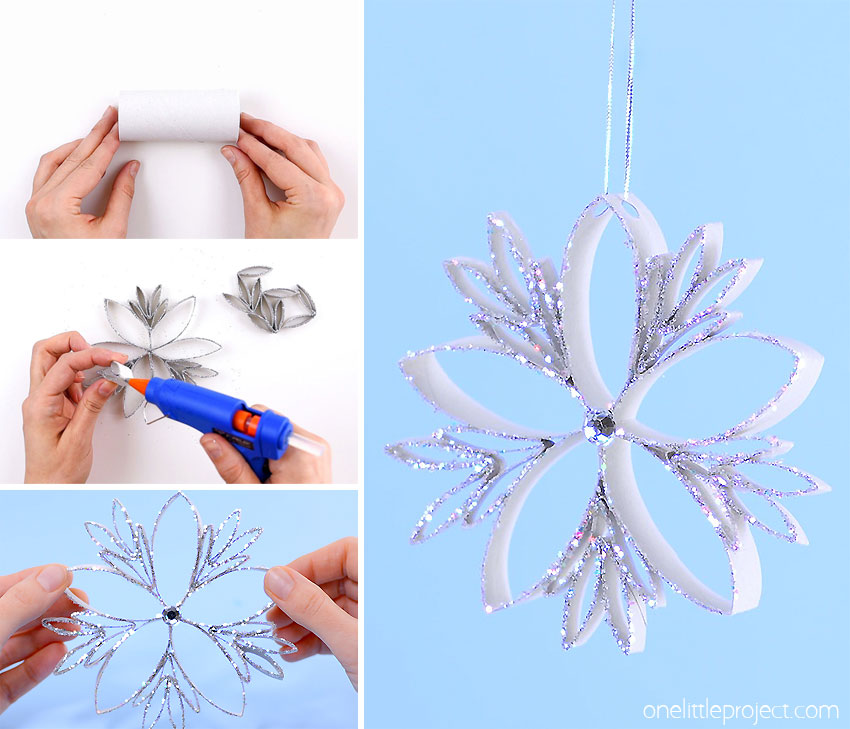
Start by pressing down on the toilet paper roll to flatten it.
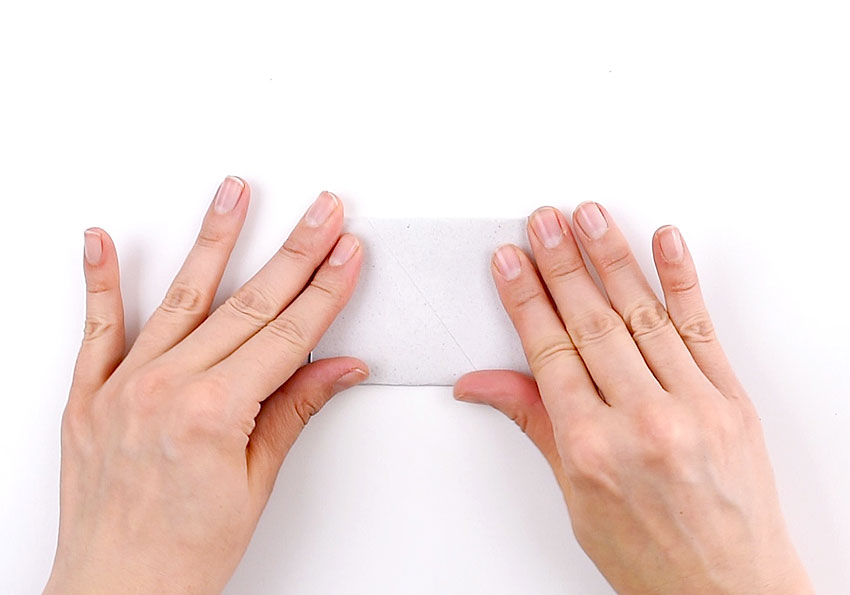
Use a ruler to measure your cuts – we made ours 1/2 inch, but 3/8 inch and possibly even 1/4 inch would also look beautiful.
The thinner you make the strips, the more delicate the snowflake will look. But keep in mind, that thicker strips are MUCH easier to work with.
I measured out 1/2 inch sections and marked each one with a pencil. You could even make the strips larger than 1/2 inch. But the smaller the strips, the more you’ll get from each roll.
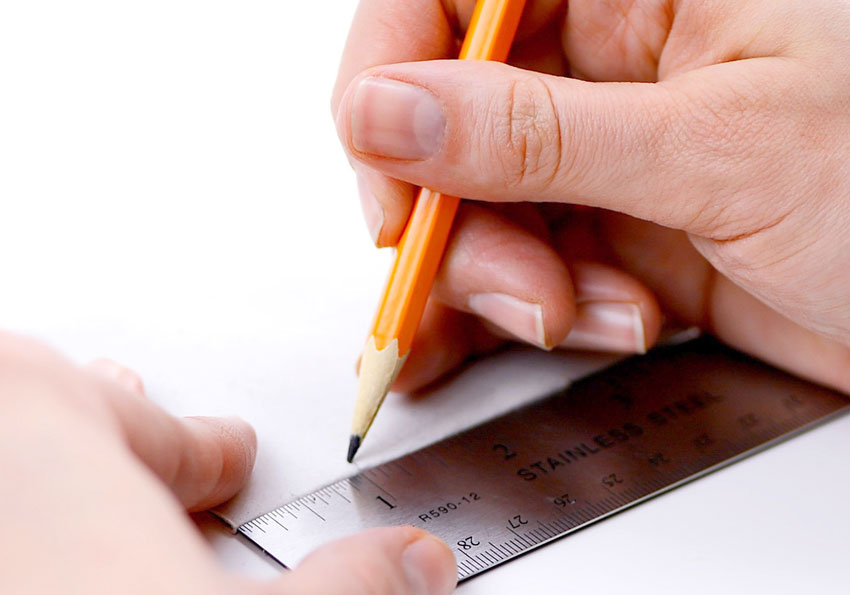
Using the pencil marks as a guide, cut your strips.
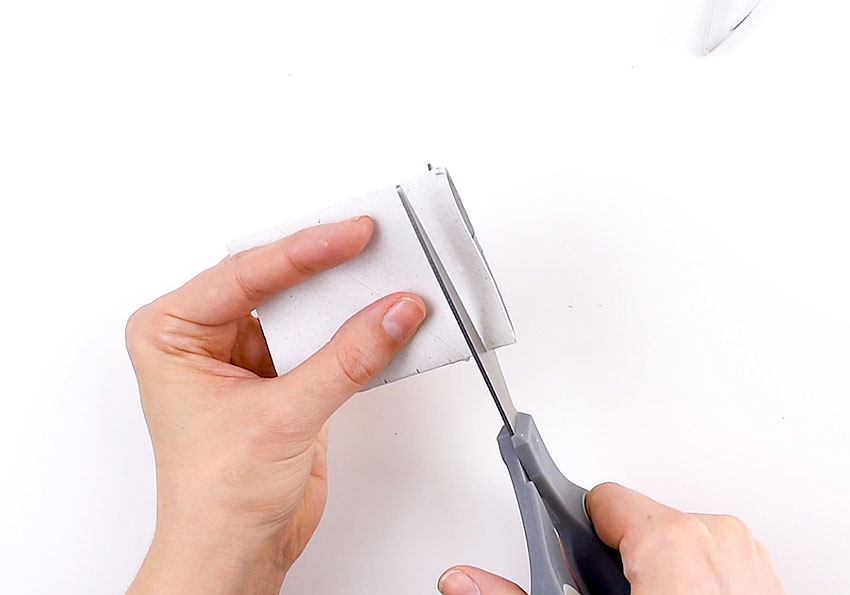
I managed to cut 8 equally sized strips from each of my rolls. You’ll need 18 paper roll strips to complete this design.
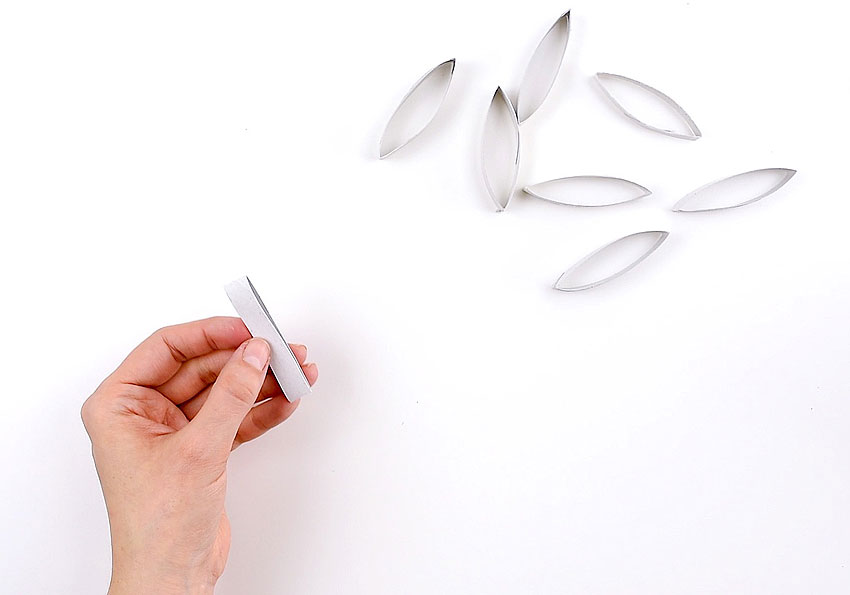
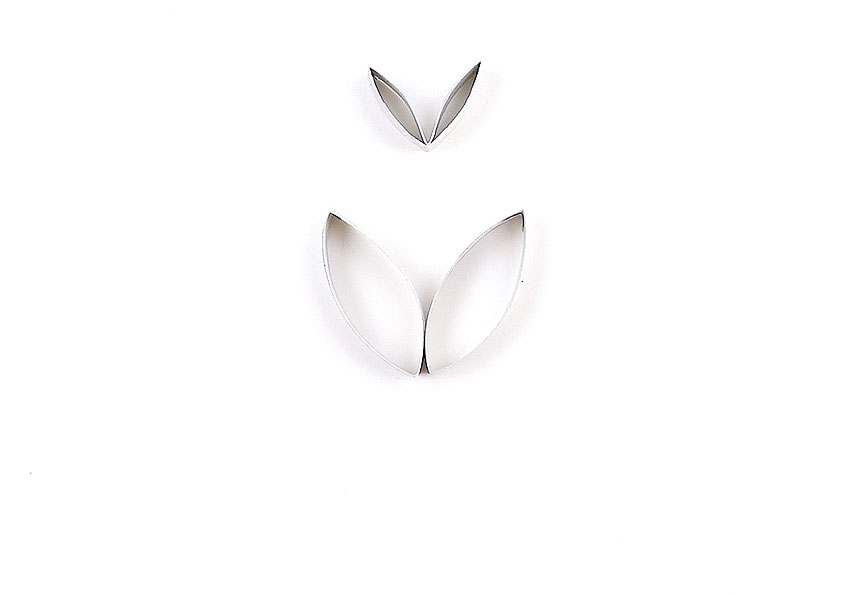
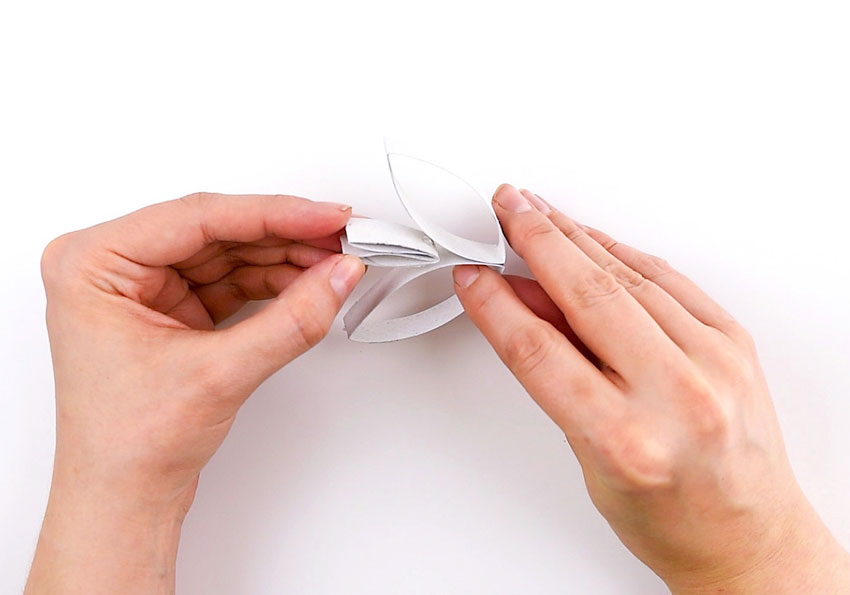
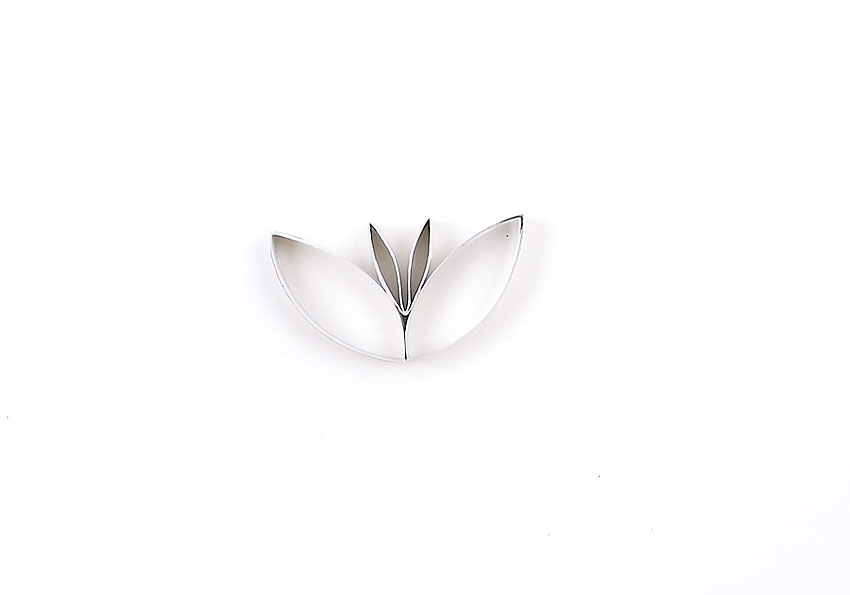
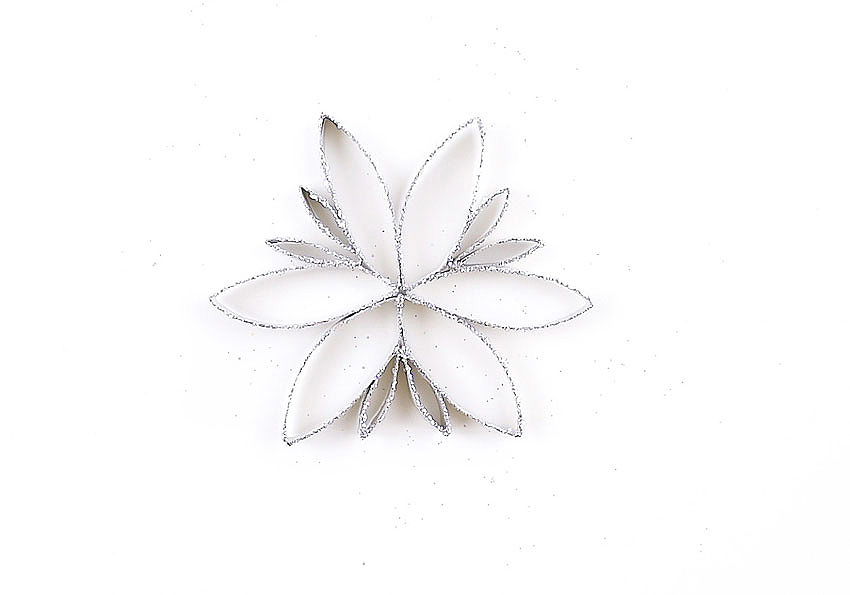
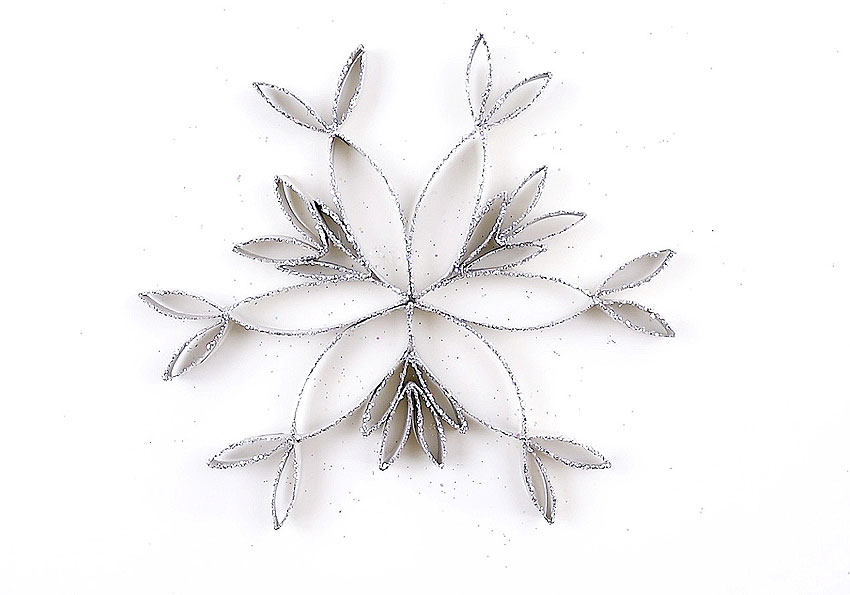
The paper roll strips have a cool oval shape. Start with 6 of these for the core of your snowflake and then build and design around it. To make some more intricate shapes, fold some of your strips in half, into V’s or “bunny ears” and place them in between the larger ones. I layered two together and then added one to the end of each of the large pieces.
To create the snowflake in this post, you’ll need 6 large pieces and 12 smaller folded ones.
I strongly recommend laying your design out before you start gluing anything. Figure out your entire design beforehand, then you can decide what sections to glue and in what order.
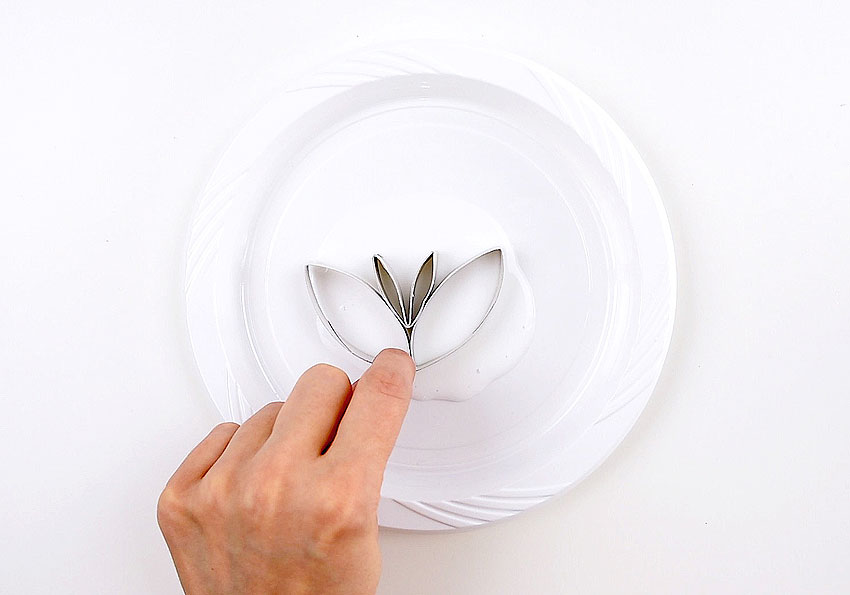
Choose a small section of your design with 2-3 pieces. (see photo below.) By gluing your snowflake in smaller sections, you will be able to get a more consistent coverage with the glue and glitter.
It’s also easier to work with smaller portions than having to dip an entire snowflake all at once. (You’d need a REALLY big plate for the whole snowflake!)
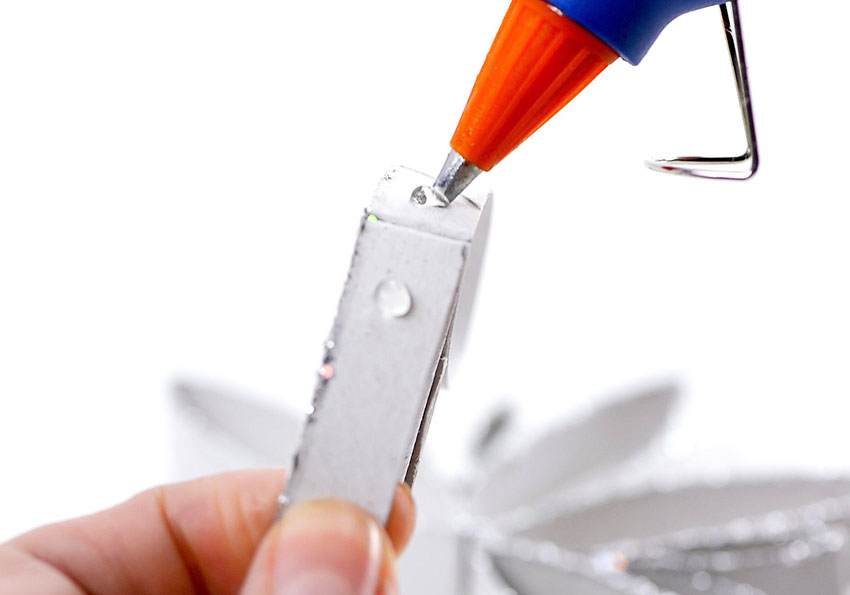
Using hot glue, squeeze small amounts at the base of each of the larger pieces. Gently press them together and hold for a few seconds until cool.
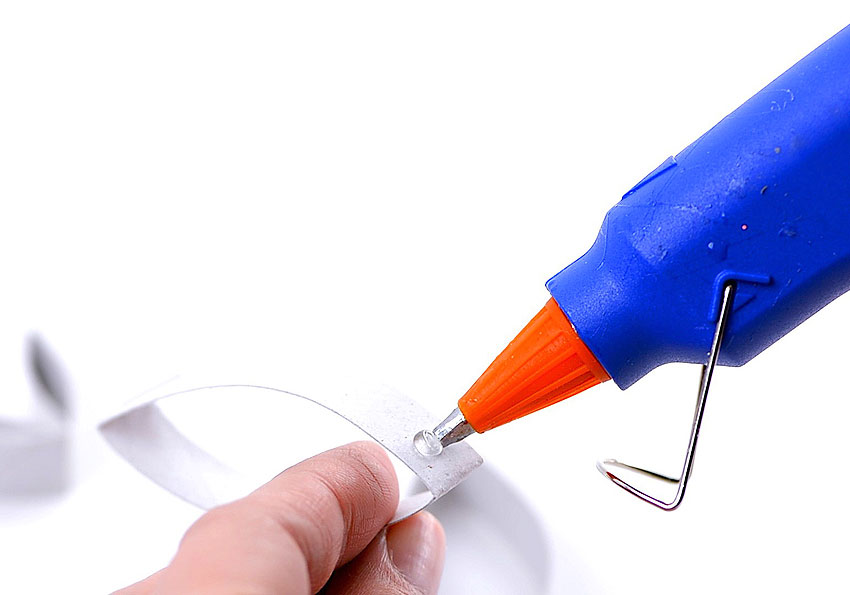
Once your larger pieces are attached, take one of the smaller, folded shapes and put a small dot of glue on either side of the bottom of the V. Wedge it down between the larger pieces you just finished gluing. Hold until cool.
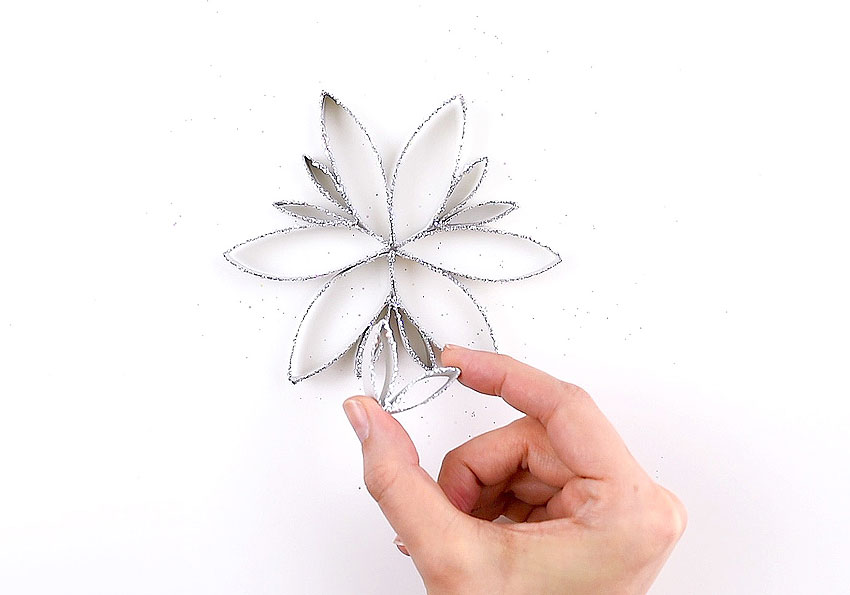
Once your small section has dried, repeat the process with the remaining portions of your snowflake. Once all 3 of the smaller sections are built, you can start dipping!
Pour a good amount of white craft glue onto a disposable plate. Tilt the plate side to side to stretch the glue into a larger puddle. The glue puddle should be larger than the pieces you’ll be dipping.
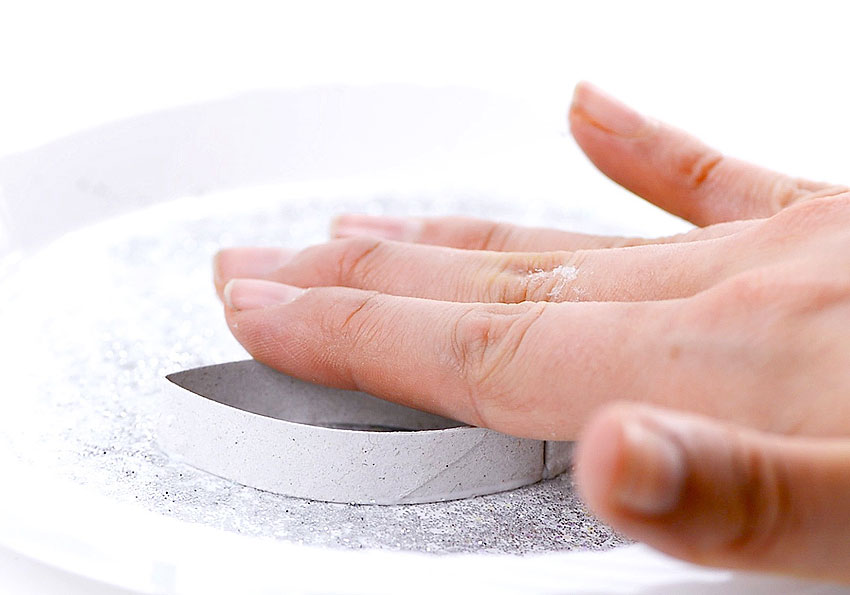
Grabbing one section at a time, dip each one into the glue, pressing down to ensure the entire surface is covered.
Grab another disposable plate and pour a generous amount of glitter into it. The more the better – you’ll want to make sure it sticks to every part of the surface where there’s glue. You can use one kind of glitter or combine silver and iridescent like I did.
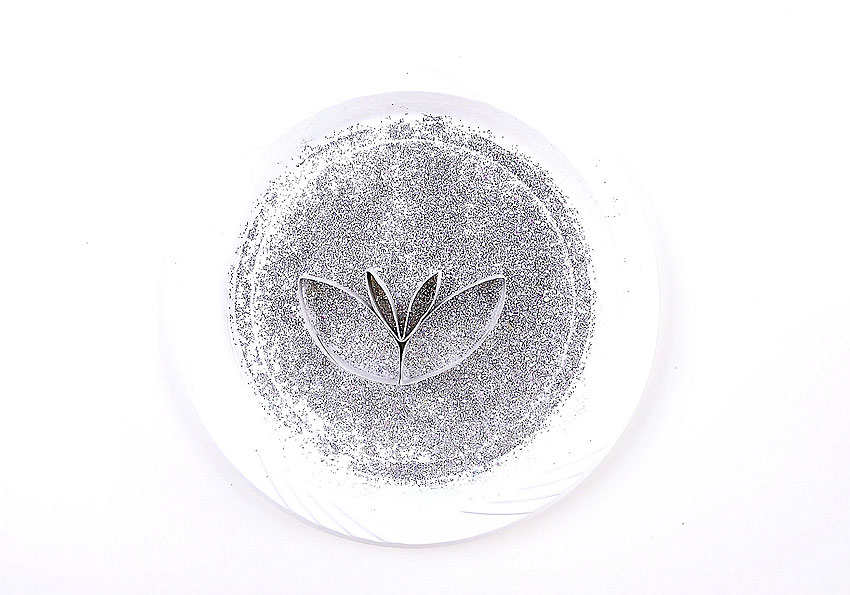
Immediately after dipping your pieces in glue, dip them in glitter. Press down on each piece to make sure you have even and consistent coverage.
Once all 3 of your smaller sections are glittered, leave them to dry. Then follow the same glue and glitter process with the rest of your pieces.
You should have 9 smaller folded pieces left. It’s important to let them dry completely, otherwise the cardboard won’t hold its shape as well and the pieces could end up looking a little pinched.
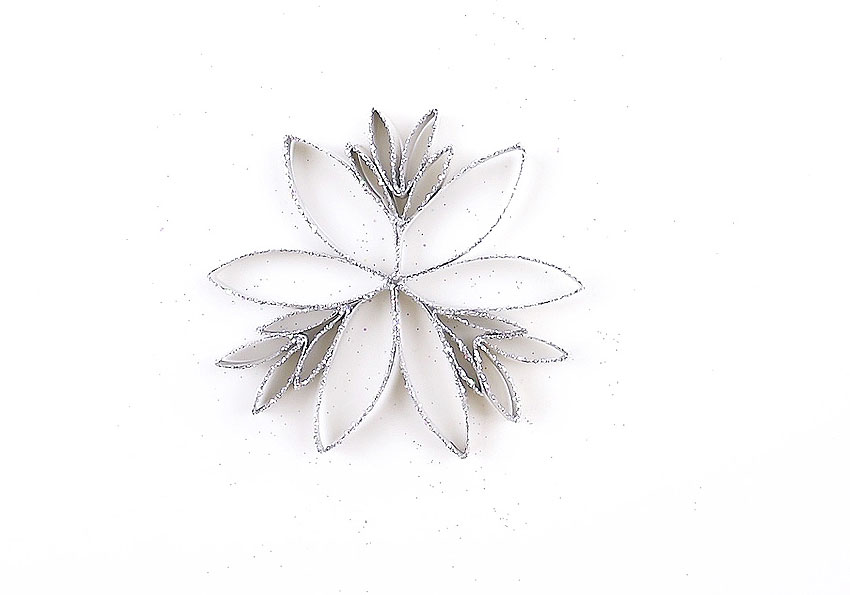
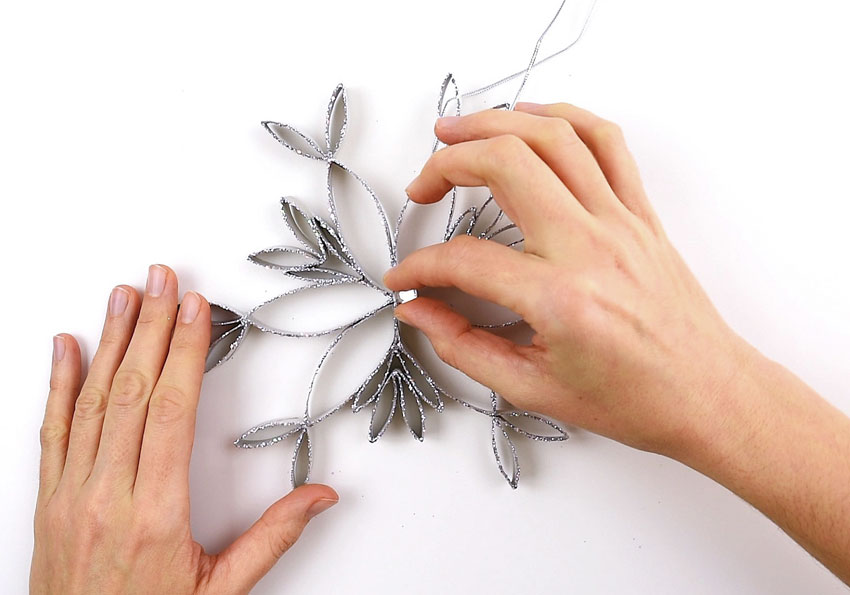
Once your glittered pieces have dried you can finish assembling your snowflake! Attach each of your large sections together with hot glue.
Once each of the 3 sections are glued together, you can add the smaller more intricate pieces.
Add a second folded piece of glittered paper roll into each of the three already glued ones to form a double V.
Now your snowflake is starting to come together! Time to add the last few pieces! There should only be 6 left.
Squeeze a small strip of hot glue onto the folds of each of the smaller pieces then attach them to the tips of each of the larger ones.

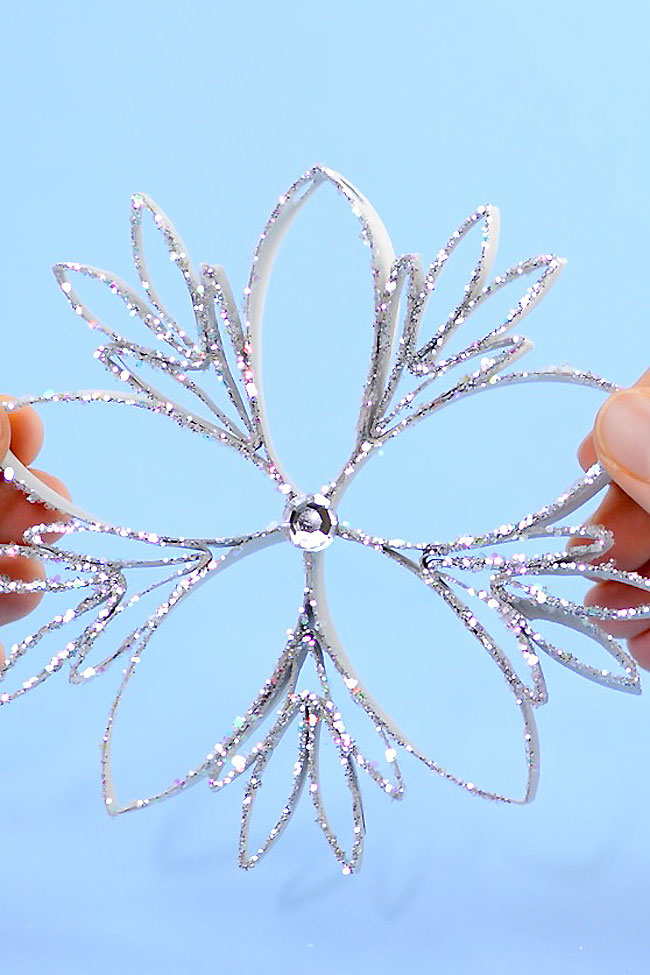
Isn’t it SO pretty?! Photos really don’t do them justice, so be sure to check out our video to see them really come to life!
I added a rhinestone in the centre for a little extra bling! It was the perfect final touch!
Look at it sparkle!! Doesn’t it look beautiful!?
If you want to hang it, add some silver ribbon by threading it through one of the pieces at the top and securing with a knot. They look beautiful hung in the window or even on the front door.
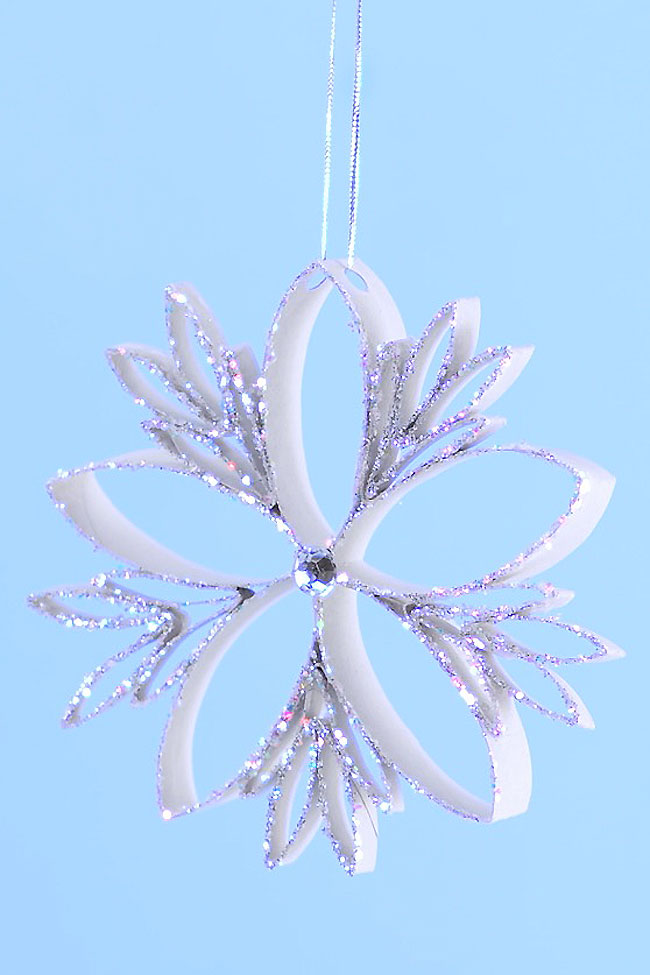
These paper roll snowflakes are SO BEAUTIFUL and really easy to make! This is such a great Christmas craft that you can leave up all winter long. Hang them on the Christmas tree, or in the window as a beautiful winter decoration. This is such a great winter craft idea and a fun way to recycle empty toilet paper rolls!
For even more snowflake themed crafts be sure to check these out:
Coffee Filter Snowflakes
Beaded Pipe Cleaner Snowflakes

Magic Salt and Watercolor Snowflake Art
Our book Low-Mess Crafts for Kids is loaded with 72 fun and simple craft ideas for kids! The projects are fun, easy and most importantly low-mess, so the clean up is simple!
Where to buy:
You can purchase Low-Mess Crafts for Kids from Amazon, or wherever books are sold:
Amazon | Barnes and Noble | Books- A- Million | Indiebound | Indigo | Amazon Canada