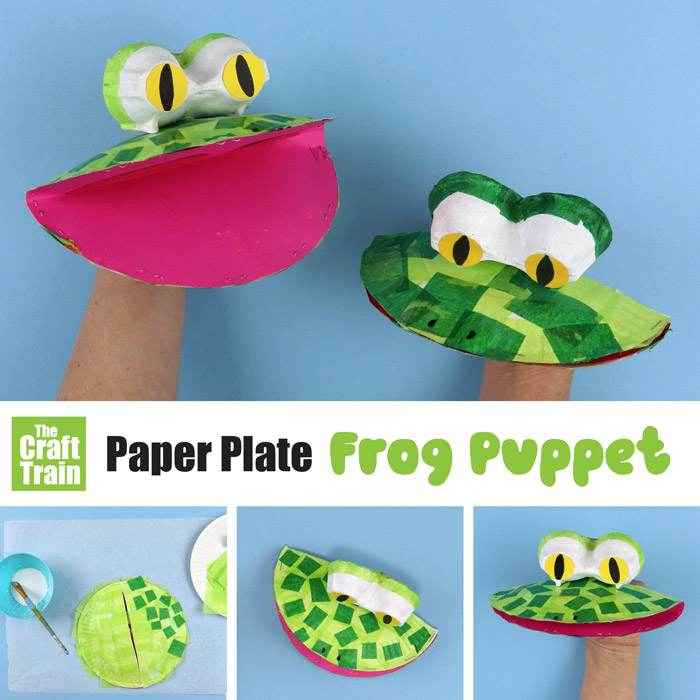
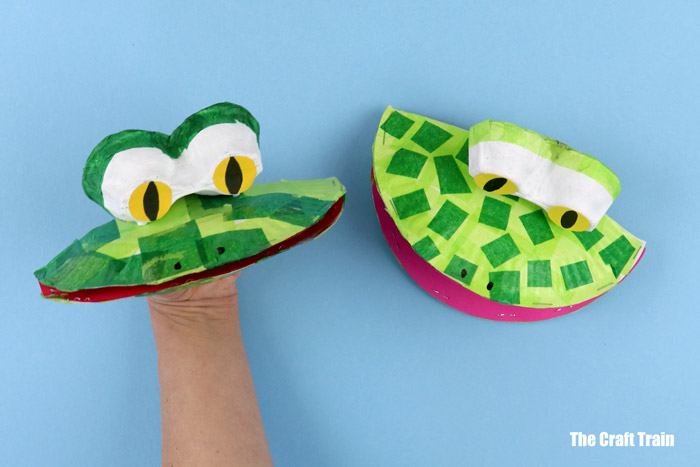
Create a snapping paper plate frog puppet!
This easy frog craft is a fun DIY toy to make and play with. It’s perfect for kids who are learning about frogs or lifecycles and makes a fun Spring or Summer craft idea. It’s also super easy to put together.
This kids craft idea was first published in 2013 and has been updated and reshared for today’s audience.
You might also like our frog on a lilypad craft

These easy frog puppets are a craft that’s been triggered by a childhood memory. I loved to make paper plate puppets back when I was a kid, so when I had kids of my own I wanted to share this activity with them too.
I had a fun afternoon putting these together with my preschoolers. They really loved them! Here is a pic of my daughter playing with one of the original frog puppets I made…
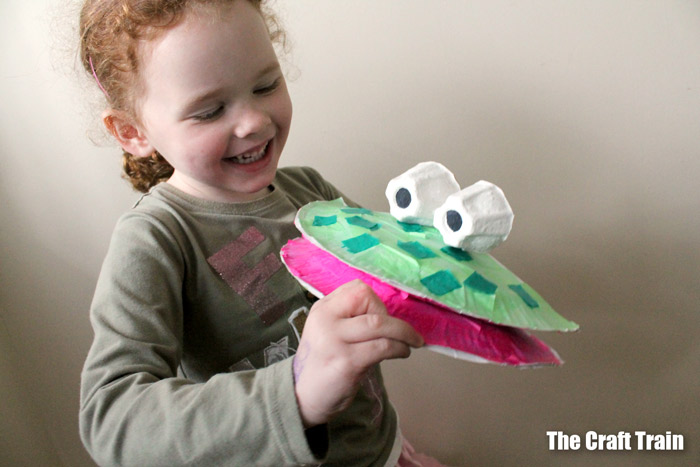
Cute, right? My how they change in seven years.
Today’s frog puppet has been modified slightly. You might notice that my adult hands are a bit too big to fit properly in the smaller-sized paper plates I’ve used this time around. For this reason, I’d suggest using the regulare-sized plates if you want your frog’s mouth to open fully (unless the owner will have preschool-sized hands – haha).
If you want you can add a long curling paper tongue inside the frog’s mouth, but we decided to leave it without.
How to make a paper plate frog puppet
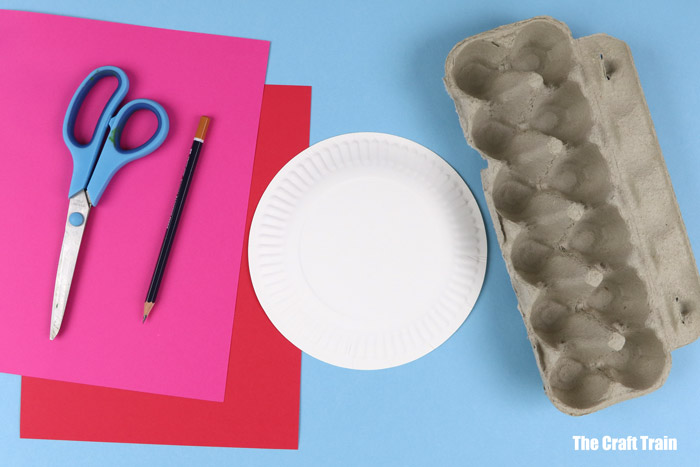
You will need:
- one paper plate per frog
- construction card stock in two shades of red or pink – note, if you are using a large paper plate you’ll need a larger than standard piece of card stock, heavy scrapbook paper would probably be perfect. If you’re using paper plates in the smaller size ordinary A4 or US Letter sized card stock is fine
- a piece of egg carton for the eyes
- tissue paper (we’ve used two shades of green)
- acrylic paint in white
- pva glue
- paint brush
- scissors
- lead pencil
- stapler
- black sharpie marker
- a small scrap of yellow paper
How to:
- Trace around your paper plate to get a matching circle shape of cardboard. Cut it out and fold it in half.
- Fold the paper plate in half and use the fold line as a guide to cut it in half.
- Trace around a half paper plate onto a different shade of red and use a lead pencil to sketch a “back of throat” shape including the hangy ball at the back (officially known as the palatine uvula – but nobody would know what I was talking about if I called it that). Cut the shape out and glue onto the top half of your folded piece of card stock.
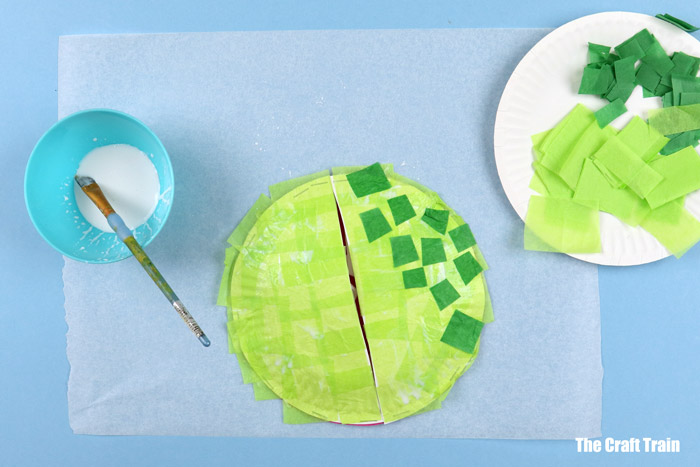
- Cut two shades of green tissue paper into squares. There are no rules for how big your squares need to be, you can make them all slightly different sizes if you like.
- Staple the two half paper plates to the outside of the folded red cardboard to get your snapping frog framework. Stuff the inside pieces where your hands will go with newspaper or paper towel so that they keep their shape while gluing on the tissue paper squares. If you skip this step, the paper plate will distort in shape from the wet glue.
- Mix your pva glue with water at a 50:50 ratio to create some DIY mod podge (or if you prefer you can use real mod podge).
- Paint the paper plate with the glue and water mixture, and stick down the tissue paper squares. You can mix the two shades of green around at random or create more of a patter.
- Paint more glue mix over the top of your squares to give it a shiny coating.
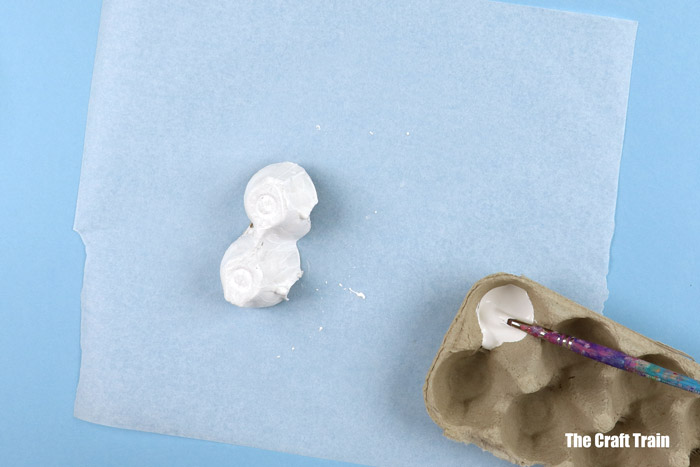
- While that dries, trim a piece of egg carton into two cups to use as eyes, and paint them white.
- Find a small circular object to trace around for the pupils in the eyes, we’ve used a small plastic lid. Trace a circle shape onto a small piece of yellow paper, fold the piece in half, then cut the shape out. Draw a black pupil in the centre of the eyes with your sharpie. Glue the round circles onto the egg carton so it looks like a set of eyes.
- Once your paper plate has dried, trim the excess tissue paper away from the edges of your frog’s mouth.
- Staple the eyes into place (or alternatively use a hot glue gun).
- Draw to nostrils with your sharpie marker.
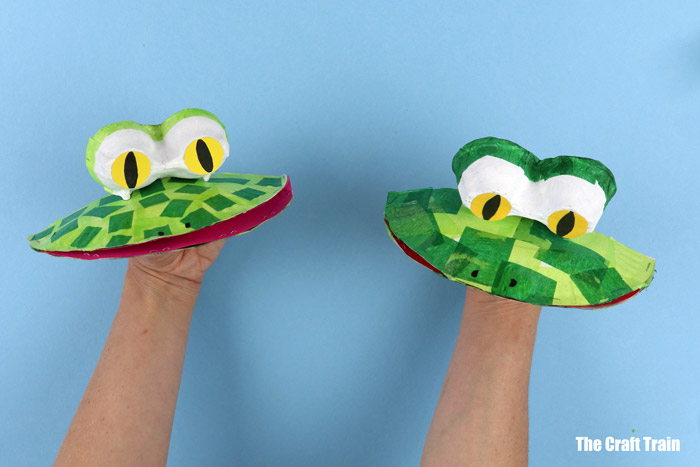
Now it’s time for the puppet show!
More frog crafts and activities
- Make a paper frog based of the green tree frog from Tropical North Queensland
- Set up a tadpole to frog observation tank in your home to watch the metamorphosis take place
- This frog on a lilypad craft is lots of fun
- Create a paper roll frog using our printable shape template
- Make a frog habitat small world garden in your back yard