
How Do You Make Paper Airplanes – A Comprehensive Guide
Table of Contents
Introduction
Are you looking for a fun and creative activity to do at home? Making paper airplanes is a great way to unleash your creativity and develop your crafting skills. Not only is it a fun activity for kids, but it is also a great stress reliever for adults. In this comprehensive guide, we’ll provide you with step-by-step instructions on how to make basic and advanced paper airplanes, decorating tips, and flight techniques.
Before we dive into the specifics, let’s go over the basic materials you’ll need. First, you’ll need paper. Standard printer paper works well, but you can also use construction paper or origami paper for more intricate designs. You’ll also need a flat surface to work on and a ruler or straight edge to ensure precise folds.
Basic Paper Airplane
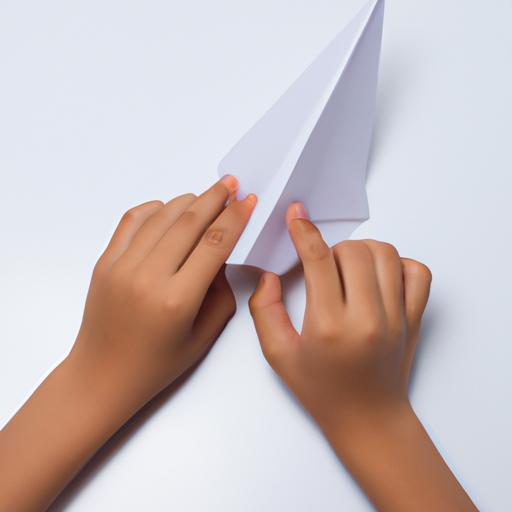
Let’s start with the basics. To make a simple paper airplane, follow these steps:
- Start with a rectangular piece of paper.
- Fold the paper in half, lengthwise.
- Unfold the paper and fold the top corners down to the center crease.
- Fold the top edges down to the center crease again.
- Fold the paper in half, along the center crease.
- Fold the wings down, angling them slightly upward.
- Fold the wings down again to create wing flaps.
- Fold the wing tips up slightly to create wingtips.
Congratulations, you’ve made a basic paper airplane! Now it’s time to test it out. Hold the airplane at the bottom and throw it gently, making sure to launch it level with the ground. Adjust the wings as needed to improve the flight.
Advanced Paper Airplanes
Once you’ve mastered the basic paper airplane, you can move on to more advanced designs. Here are a few different types of paper airplanes you can try:
The Dart
The Dart is a classic paper airplane design that is easy to make and flies well. Follow these steps to create your own Dart:
- Start with a rectangular piece of paper.
- Fold the paper in half, lengthwise.
- Fold the top corners down to the center crease.
- Fold the top edges down to the center crease again.
- Fold the paper in half, along the center crease.
- Fold the wings down, angling them slightly upward.
- Fold the wings down again to create wing flaps.
- Fold the wing tips up slightly to create wingtips.
To fly the Dart, hold it at the bottom and throw it gently, making sure to launch it level with the ground. Adjust the wings as needed to improve the flight.
The Glider
The Glider is a more complex paper airplane design that requires a bit more skill to create. Follow these steps to create your own Glider:
- Start with a rectangular piece of paper.
- Fold the paper in half, lengthwise.
- Fold the top corners down to the center crease.
- Fold the top edges down to the center crease again.
- Fold the paper in half, along the center crease.
- Fold the wings down, angling them slightly upward.
- Fold the wings down again to create wing flaps.
- Fold the wingtips up and back to create a tail.
To fly the Glider, hold it at the bottom and launch it forward like a frisbee. Adjust the wings and tail as needed to improve the flight.
With these advanced paper airplane designs, you can challenge your creativity and develop your crafting skills even further. Try experimenting with different types of paper and wing designs to create your own unique paper airplanes.
Decorating Paper Airplanes
Now that you’ve mastered the art of paper airplane folding, it’s time to add a personal touch to your creations. Decorating your paper airplanes can make them look more eye-catching and unique. Here are a few tips on how to decorate your paper airplanes:
- Use markers or colored pencils to add designs or patterns to the wings or body of the airplane.
- Use stickers or cutouts to add images or words to the airplane.
- Use glitter or metallic tape to add a shiny or reflective element to the airplane.
- Use paint or spray paint to add a more permanent design to the airplane.
Remember, when decorating your paper airplanes, it’s important not to add too much weight to the airplane, as it can affect the flight. Keep your decorations light and minimal, and test the airplane’s flight after each addition to ensure it still flies well.
Tips for Flying Paper Airplanes
Now that you’ve created your perfect paper airplane, it’s time to launch it into the air. Here are a few tips for flying your paper airplanes:
- Launch the airplane at a level angle, not too high or too low.
- Use a smooth, gentle throw to launch the airplane.
- Check the wings and adjust as needed before launching.
- Adjust the tail or wing flaps as needed during flight to improve the airplane’s trajectory.
Remember, practice makes perfect. Keep experimenting and trying new designs and techniques to improve your paper airplane skills.
Conclusion
Learning how to make paper airplanes is a fun and rewarding activity for people of all ages. With this comprehensive guide, you now have the knowledge and skills to create basic and advanced paper airplanes, decorate them to your liking, and launch them into the air. Not only is it a fun hobby, but it can also improve your hand-eye coordination and creativity. So grab some paper and get folding – the possibilities are endless!
Tips for Flying Paper Airplanes
Now that you’ve created your paper airplanes, it’s time to test them out. Here are some tips for flying your paper airplanes:
Launching Techniques
When launching your paper airplane, make sure to hold it at the bottom and throw it gently, making sure to launch it level with the ground. Avoid throwing it too hard or too high, as this can cause the airplane to stall or crash.
Factors that Affect Flight
There are several factors that can affect the flight of your paper airplane. These include:
- Weight: The weight of the paper airplane can affect its flight. A heavier airplane may fly faster but have a shorter flight time, while a lighter airplane may fly slower but have a longer flight time.
- Wing Shape: The shape of the wings can affect the lift and stability of the airplane. Experiment with different wing shapes to see how they affect the flight.
- Wind: Wind can affect the flight of your paper airplane. Try launching your airplane on a calm day to get the best results.
By taking these factors into consideration, you can improve the flight of your paper airplanes and achieve longer, smoother flights.
Conclusion
Learning how to make paper airplanes is a fun and rewarding activity that can be enjoyed by people of all ages. Whether you’re a beginner or an experienced paper airplane maker, there are endless possibilities for creativity and experimentation.
In this comprehensive guide, we’ve provided you with step-by-step instructions on how to make basic and advanced paper airplanes, decorating tips, and flight techniques. By following these tips and experimenting with different designs, you can create your own unique paper airplanes and achieve longer, smoother flights.
So next time you’re looking for a fun and creative activity to do at home, grab some paper and start folding!