
How to Make a Paper Airplane: Step-by-Step Guide
Table of Contents
Are you looking for a fun and easy DIY activity that doesn’t require any special skills or materials? Making a paper airplane is a classic pastime that has been enjoyed by people of all ages for generations. In this step-by-step guide, we’ll walk you through the process of making a basic paper airplane, as well as some more advanced designs.
Materials Needed
Before you get started, you’ll need a few simple materials. Here’s what you’ll need:
- A sheet of paper (8.5 x 11 inches is ideal)
- Scissors (optional)
- Ruler (optional)
- Pencil (optional)
When it comes to choosing the right paper for your airplane, you have a few options. Regular printer paper works well and is easy to fold, but if you want your airplane to fly farther, you may want to use a lighter weight paper. You can also experiment with different colors and patterns to make your airplane more visually appealing.
Basic Paper Airplane
Now that you have your materials, it’s time to start folding! Follow these steps to make a basic paper airplane:
- Fold the paper in half vertically. Make sure the edges are lined up evenly and crease the fold.
- Unfold the paper and fold the top corners down to the center crease. Make sure the corners are even and crease the folds.
- Fold the top of the paper down to the bottom edge. Crease the fold tightly.
- Fold the wings down on each side. Line up the edges with the bottom of the airplane body and crease the folds.
- Fold the wings down again, this time angling them slightly upward to create lift. Crease the folds and you’re ready to fly!
Congratulations, you’ve made a paper airplane! Adjust the wings and tail as needed to make your airplane fly straight and true. If you want to make more advanced paper airplanes, keep reading for more instructions and tips.
Different Types of Paper to Use
While printer paper is the most common type of paper used for making paper airplanes, you can also experiment with other types of paper to see how they affect your airplane’s flight. Here are a few options:
- Origami paper: This is a lightweight, square paper that comes in a variety of colors and patterns. It’s perfect for making more intricate and decorative paper airplanes.
- Newspaper: If you’re feeling eco-friendly, try making a paper airplane out of old newspapers. The paper is thin and light, but you may need to experiment with the folding technique to get it to fly properly.
- Construction paper: Thicker and stiffer than regular printer paper, construction paper can make a more substantial and durable paper airplane. You can also use different colors to create a more visually interesting airplane.
Experiment with different types of paper to see how they affect your paper airplane’s flight. Remember, the lighter the paper, the farther your airplane will fly.
Basic Paper Airplane
The basic paper airplane we made earlier is a great starting point, but there are a few tips and tricks you can use to make it fly even better.
- Use a ruler to make sure your folds are straight and even. This will help your airplane fly straight.
- Crease your folds tightly to make them as sharp as possible. This will help your airplane hold its shape and fly farther.
- Experiment with different wing angles to see how they affect your airplane’s flight. Angling the wings slightly upward can create lift, while angling them downward can create more stability.
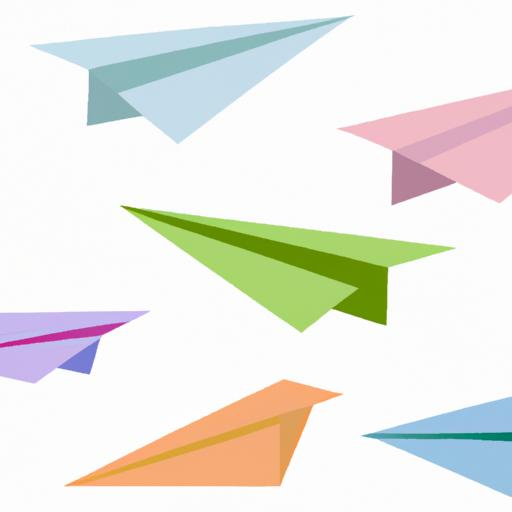
Advanced Paper Airplanes
Once you’ve mastered the basic paper airplane, you can start experimenting with more complex designs. Here are a few ideas to get you started:
- The dart: This sleek design is perfect for long-distance flights. Start with a square piece of paper, fold it in half diagonally, and then fold the corners down to create a point. Fold the wings down and you’re ready to fly!
- The glider: This design is all about creating lift and staying in the air as long as possible. Start with a rectangular piece of paper, fold it in half horizontally, and then fold the corners down to create a triangle. Fold the wings down and adjust the angles to create lift.
- The hammerhead: This design is all about stability and control. Start with a rectangular piece of paper, fold it in half vertically, and then fold the top corners down to the center crease. Fold the top of the paper down to create the body of the airplane, and then fold the wings down and adjust the angles to create lift.
There are countless other designs to try, so don’t be afraid to get creative and experiment with different folds and shapes. Just remember to crease your folds tightly and adjust the wings and tail as needed to achieve the desired flight path.
With these tips and instructions, you’re ready to make your own paper airplanes and see how far they can fly. Whether you’re a beginner or an experienced paper airplane maker, there’s always something new to learn and explore. So grab some paper, get folding, and let your imagination take flight!
Tips for Flying Paper Airplanes
Now that you’ve made your paper airplane, it’s time to test it out! Here are some tips for getting the most out of your paper airplane flights:
How to Properly Launch a Paper Airplane
To launch your paper airplane, hold it at the bottom of the body and throw it forward gently. Make sure you give it enough speed to fly, but not too much that it crashes. Launch it at a slight upward angle to give it lift and keep it flying longer.
Techniques for Adjusting the Flight Path
If your airplane isn’t flying straight or is crashing too soon, there are a few adjustments you can make:
- Adjust the wings: If your airplane is veering to one side, try adjusting the wings on that side to make them straighter.
- Adjust the tail: If your airplane is dipping or climbing too much, try adjusting the tail to make it more level.
- Adjust the launch: If your airplane isn’t flying far enough, try launching it with more force or at a higher angle.
Experiment with different adjustments to see how they affect your airplane’s flight path.
Conclusion
Making a paper airplane is a fun and easy activity that anyone can enjoy. Whether you’re a kid or an adult, making paper airplanes is a great way to exercise your creativity and have some fun. In this guide, we’ve shown you how to make a basic paper airplane and provided instructions for more advanced designs. We’ve also given you tips for flying your paper airplane and adjusting its flight path. So why not give it a try? Grab some paper and start folding! Who knows, you might just discover your inner paper airplane champion.