Table of Contents
Are you looking for a fun and inexpensive way to spend your leisure time? Look no further than learning how to fold paper airplanes! Not only is this a great activity for children, but it can also be a stress-reliever for adults.
In this comprehensive guide, we’ll walk you through the steps of creating your own paper airplanes from start to finish. We’ll cover everything from choosing the right paper to flight tips, so you can create a fleet of airplanes that soar through the skies.
Getting Started
Before we dive into the folding process, it’s essential to have the right tools and materials. First and foremost, you’ll need paper. While any paper will do in a pinch, the best paper for making paper airplanes is standard 8.5 x 11 inch printer paper.
You’ll also need something to cut the paper with, such as a pair of scissors or a paper cutter. While not required, a ruler or straight edge can also be beneficial for creating precise folds.
Once you have your tools and materials ready, it’s time to prepare your paper for folding. If you’re using printer paper, make sure it’s flat and free from any creases or wrinkles. If you’re using a different type of paper, such as construction paper, you may need to flatten it out by placing it under a heavy book for a few hours.
Now that you have your paper prepped and ready to go, let’s move on to the basic folds.
Basic Folds
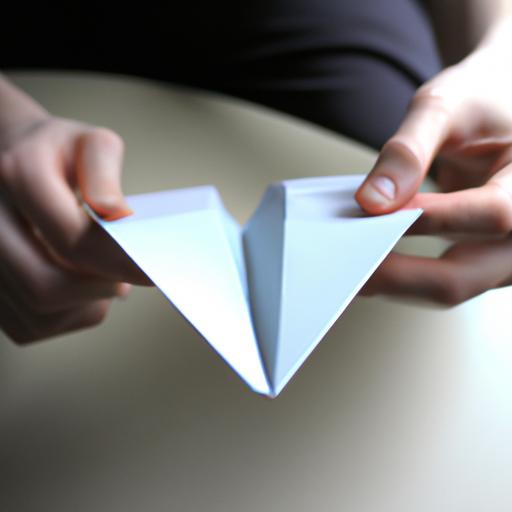
There are several basic folds that are used in most paper airplane designs. These include the valley fold, mountain fold, and diagonal fold.
The valley fold is when you fold the paper towards you, creating a “V” shape. The mountain fold is when you fold the paper away from you, creating a mountain-like shape. The diagonal fold is when you fold the paper diagonally, creating a triangle shape.
To create these folds, start by placing your paper on a flat surface with the side you want to be the exterior facing down. Then, use your ruler or straight edge to create a crease along the fold line. Finally, use your fingers to press down on the crease, making it as sharp as possible.
With these basic folds under your belt, you’re ready to move on to more advanced folding techniques and designs.
Folding Techniques and Designs
There are countless techniques and designs when it comes to paper airplanes. Some of the most popular designs include the dart, glider, and stunt plane.
The dart design is the simplest of the three and is a great place to start for beginners. It involves creating a basic dart shape with the paper, which can fly straight and far. The glider design is more complex, involving multiple folds and adjustments to create a plane that can stay in the air for an extended period. Finally, the stunt plane design is the most advanced and involves creating a plane that can perform various tricks and maneuvers.
When it comes to folding techniques, there are many ways to customize your paper airplane. For example, you can adjust the angle of the wings or add flaps to improve its flight trajectory. Experimenting with different designs and techniques is part of the fun of making paper airplanes, so don’t be afraid to get creative!
In the next sections, we’ll dive deeper into flight tips and how to launch and fly your paper airplanes.
Basic Folds
Now that you have an understanding of the tools and materials needed to create paper airplanes, let’s dive into the basic folds.
The first fold is the valley fold. To create a valley fold, take the top edge of the paper and fold it down towards you. Use your finger to create a crease along the fold line. The valley fold is used primarily to create the wings and body of the paper airplane.
Next, we have the mountain fold. To create a mountain fold, take the bottom edge of the paper and fold it away from you, creating a “mountain” shape. Use your finger to create a sharp crease along the fold line. The mountain fold is used primarily to create the tail and nose of the paper airplane.
Finally, we have the diagonal fold. To create a diagonal fold, take one corner of the paper and fold it diagonally across to the opposite corner. Use your fingers to create a sharp crease along the fold line. The diagonal fold is used to create a variety of features, including wings, flaps, and stabilizers.
Folding Techniques and Designs
Now that you have an understanding of the basic folds used in paper airplane making, let’s explore some different techniques and designs.
One popular technique is adjusting the wing angle. By folding the wings at different angles, you can create different flight paths and distances. For example, a lower wing angle will create a more stable flight, while a higher wing angle will create a steeper ascent and descent.
Another technique is adding flaps to your paper airplane. Flaps, which are small sections of paper that are folded down or up, can help improve stability and lift. Try experimenting with different flap sizes and positions to see how it affects your paper airplane’s flight.
When it comes to designs, the dart, glider, and stunt plane are some of the most popular. The dart is a simple design that is great for beginners. To create a dart, fold the paper in half vertically, then fold the top corners down to create the wings. The glider, on the other hand, is a more complex design that involves multiple folds and adjustments. To create a glider, start with a dart shape, then add flaps and adjust the wing angle to achieve the desired flight path.
Finally, the stunt plane is the most advanced design and is perfect for those who want to take their paper airplane making to the next level. To create a stunt plane, start with a dart shape, then add flaps, adjust the wing angle, and add stabilizers to create a plane that can perform various tricks and maneuvers.
By using these different techniques and designs, you can create a fleet of paper airplanes that range in flight path, distance, and trick performance. Don’t be afraid to experiment and try new things – that’s part of the fun!
In the next sections, we’ll dive deeper into flight tips and how to launch and fly your paper airplanes.
Flight Tips
Now that you have your paper airplane folded and ready to go, let’s talk about flight tips. There are several factors that can affect the flight of your paper airplane, including weight, balance, and wind conditions.
To improve your paper airplane’s flight, consider adjusting the design. For example, adding weight to the front of the plane can help it fly straighter and farther. You can also adjust the angle of the wings or add flaps to improve its trajectory.
When it comes to launching and flying your paper airplane, there are a few things to keep in mind. First, make sure you’re in an open space with plenty of room to fly. Indoors can work, but be careful not to throw the plane too hard and damage anything.
To launch the plane, hold it at the bottom of the fuselage (the body of the plane) and throw it gently with a flick of the wrist. Aim for a slight upward angle to give the plane some lift. Once it’s in the air, try adjusting the angle of the wings or flaps to see how it affects the flight path.
Conclusion
In conclusion, learning how to fold paper airplanes is a fun and rewarding activity for all ages. Not only is it a great way to spend your leisure time, but it can also improve your creativity and problem-solving skills.
By following the steps outlined in this guide, you’ll be able to create a fleet of paper airplanes that soar through the skies. Remember to experiment with different designs and techniques to find what works best for you. Happy folding!