
How to Fold Paper into an Envelope: A Step-by-Step Guide
Table of Contents
Are you tired of buying envelopes every time you need to send a letter? Or do you want to add a personal touch to your letters by creating your own envelopes? Whatever the reason may be, learning how to fold paper into an envelope is a useful skill that can save you time and money. In this article, we will provide you with a step-by-step guide on how to fold paper into an envelope.
Materials Needed

Before we start, let’s gather the materials needed to create an envelope.
- A rectangular piece of paper (8.5 x 11 inches is a good size)
- Scissors
- Glue or double-sided tape (optional)
The paper you choose to use is important. Using a thicker paper like cardstock or construction paper will result in a sturdier envelope. However, regular printer paper works just fine too.
Now that we have our materials ready, let’s move on to the next section.
Creating an envelope from a piece of paper may seem daunting at first, but it’s actually quite simple once you get the hang of it. Follow these steps to create your own envelope:
Step 1: Choose the Right Paper
As mentioned earlier, the paper you choose to use is important. A rectangular piece of paper measuring 8.5 x 11 inches is a good size for creating an envelope.
Step 2: Fold the Paper in Half
Fold the paper in half horizontally, making sure the edges meet perfectly. Crease the fold to make it crisp.
Step 3: Open the Paper and Fold the Top Corners
Open the paper and fold the top corners down to the center crease. The tips of the corners should meet at the center crease.
Step 4: Fold the Top Edge Down
Fold the top edge of the paper down, so that the edge meets the bottom of the triangle created in step 3.
Step 5: Fold the Bottom Edge Up
Fold the bottom edge of the paper up, so that the edge meets the top of the triangle created in step 3.
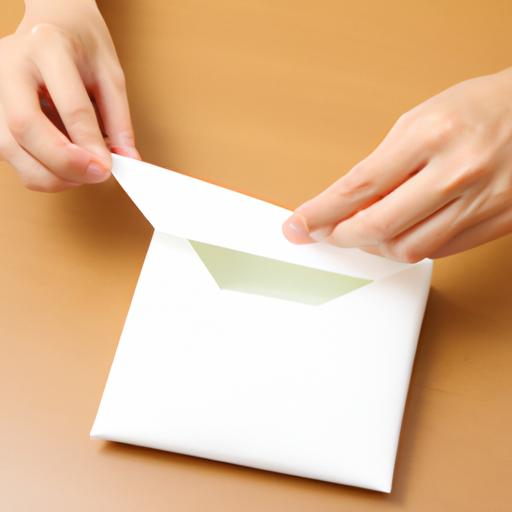
Step 6: Tuck the Bottom Flap
Tuck the bottom flap of the paper into the pocket created by the top edge in step 4.
Step 7: Secure the Edges
If you want to make sure your envelope stays closed, you can secure the edges with glue or double-sided tape.
Congratulations, you have successfully created your own envelope! This method can be adjusted to create different sizes and styles of envelopes. In the next section, we will provide you with some tips and tricks to make the process easier.
Step-by-Step Guide (Continued)
Let’s go over the steps in more detail:
Step 1: Choose the Right Paper
As mentioned earlier, a rectangular piece of paper measuring 8.5 x 11 inches is a good size for creating an envelope. You can use any type of paper, but thicker paper like cardstock or construction paper will result in a sturdier envelope.
Step 2: Fold the Paper in Half
Fold the paper in half horizontally, making sure the edges meet perfectly. Crease the fold to make it crisp.
Step 3: Open the Paper and Fold the Top Corners
Open the paper and fold the top corners down to the center crease. The tips of the corners should meet at the center crease.
Step 4: Fold the Top Edge Down
Fold the top edge of the paper down, so that the edge meets the bottom of the triangle created in step 3.
Step 5: Fold the Bottom Edge Up
Fold the bottom edge of the paper up, so that the edge meets the top of the triangle created in step 3.
Step 6: Tuck the Bottom Flap
Tuck the bottom flap of the paper into the pocket created by the top edge in step 4.
Step 7: Secure the Edges
If you want to make sure your envelope stays closed, you can secure the edges with glue or double-sided tape.
Tips and Tricks
Now that you know how to fold paper into an envelope, let’s go over some tips and tricks to make the process easier:
Tip 1: Use a Bone Folder
A bone folder is a tool used for creasing paper. It can help you make crisp folds and create a more professional-looking envelope. If you don’t have a bone folder, you can use the edge of a credit card or a ruler.
Tip 2: Practice with Scrap Paper
Before you start folding your final piece of paper, practice with scrap paper. This will help you get the hang of the folding process and avoid making mistakes on your final product.
Tip 3: Use Decorative Paper
If you want to add a personal touch to your envelopes, use decorative paper. You can find decorative paper at any craft store or online. Just make sure the paper is sturdy enough to hold its shape.
Expert Advice: Make Perfect Folds
To make perfect folds, use your fingers to press down on the creases. This will help create sharp, crisp folds. Additionally, make sure to fold the paper slowly and carefully to avoid making mistakes.
By following these tips and tricks, you can create beautiful envelopes that are both functional and stylish. With a little practice, you’ll be folding paper into envelopes like a pro in no time!
Variations
Now that you know how to create a basic envelope, let’s explore some variations that you can try out to make your envelopes unique.
Square Envelope
To create a square envelope, start with a square piece of paper instead of a rectangular one. Follow the same steps as outlined in the previous section, but adjust the folding accordingly. The top and bottom edges should meet at the center crease, and the side edges should form triangles. Fold the triangles inwards, creating a diamond shape. Fold the bottom edge up and tuck it into the pocket created by the top edge.
Heart Envelope
A heart-shaped envelope is perfect for Valentine’s Day or any special occasion. Start with a rectangular piece of paper and fold it in half horizontally. Draw half of a heart shape along the fold and cut it out. Unfold the paper and follow the same steps as outlined in the previous section to create the envelope.
Origami Envelope
Origami envelopes are intricate and beautiful. Start with a square piece of paper and follow an origami envelope tutorial to create a unique and personalized envelope.
Conclusion
Knowing how to fold paper into an envelope is a useful skill that can save you time and money. By creating your own envelopes, you can add a personal touch to your letters and cards. In this article, we provided a step-by-step guide on how to create a basic envelope, as well as some variations that you can try out. Remember to choose the right paper, follow each step carefully, and have fun with your creations!