
How to Make a Ninja Star with 1 Paper
Table of Contents
Ninja stars, also known as shuriken, have been an essential weapon for ninjas for centuries. They are versatile, lightweight, and can be used for both long-range and close-range attacks. While traditionally made of metal, paper ninja stars are a fun and easy alternative that anyone can make at home. In this article, we will show you how to make a ninja star with just one paper.
Materials Needed

Before we get started, gather the following materials:
- One square sheet of paper (8.5 x 11 inches or A4 size)
- Scissors (optional)
It’s essential to use a square sheet of paper to ensure that the folds are even and the ninja star is symmetrical. If you don’t have a square sheet of paper, you can cut one from a rectangular sheet.
Once you have all the necessary materials, let’s dive into the step-by-step guide to make a ninja star with 1 paper.
Step-by-Step Instructions for Making a Ninja Star with 1 Paper
Follow these simple instructions to make a ninja star with 1 paper:
- Start with a square sheet of paper. Fold it in half diagonally to form a triangle. Crease the fold and unfold the paper.
- Fold the paper in half diagonally again, but this time in the opposite direction. Crease the fold and unfold the paper.
- Fold the paper in half vertically and horizontally. Crease the folds and unfold the paper.
- Fold the four corners towards the center of the paper. The corners should meet at the center point.
- Flip the paper over and fold the four corners towards the center again. The corners should meet at the same point as before.
- Fold the paper in half along the horizontal crease, bringing the top edge down to the bottom edge.
- Take one of the top flaps and fold it down diagonally towards the center of the paper. Repeat with the other flap.
- Tuck the flaps into the pockets created by the previous folds.
- Flip the paper over and repeat steps 7 and 8 on the other side.
- Your ninja star is complete! Give it a test throw and see how it performs.
These steps may seem complicated at first, but with a little practice, you’ll be able to make ninja stars with ease. Now that you know how to make a basic ninja star with 1 paper, let’s move on to some tips for making a perfect ninja star.
Making a perfect ninja star takes practice and patience. Here are some tips to help you get it right:
Use Thin Paper
Using thin paper, such as origami paper, will make it easier to fold and create sharp creases. Thicker paper can be more challenging to fold and may not hold its shape as well.
Be Precise with Your Folds
Pay close attention to each fold and make sure they are as precise as possible. Even small deviations from the instructions can affect the final result.
Practice Makes Perfect
Don’t be discouraged if your first few attempts don’t turn out as expected. Keep practicing, and you’ll soon be making ninja stars like a pro.
Decorate Your Ninja Stars
Once you’ve mastered the art of making ninja stars, try decorating them with markers or stickers. This will give your ninja stars a personalized touch and make them even more fun to use.
By following these tips, you’ll be able to create perfect ninja stars every time. Now that you know how to make a basic ninja star and some tips for making it perfect, let’s move on to some variations of ninja stars that you can make with paper.
Step-by-Step Instructions for Making a Ninja Star with 1 Paper
Let’s take a closer look at each step of making a ninja star with 1 paper:
- Fold the paper diagonally to form a triangle.
- Fold the paper in half diagonally again, but this time in the opposite direction.
- Fold the paper in half vertically and horizontally, crease the folds, and unfold the paper.
- Fold the four corners of the paper towards the center of the paper. The corners should meet at the center point.
- Flip the paper over and fold the four corners towards the center again. The corners should meet at the same point as before.
- Fold the paper in half along the horizontal crease, bringing the top edge down to the bottom edge.
- Take one of the top flaps and fold it down diagonally towards the center of the paper. Repeat with the other flap.
- Tuck the flaps into the pockets created by the previous folds.
- Flip the paper over and repeat steps 7 and 8 on the other side.
- Your ninja star is complete! Practice throwing it and enjoy your new homemade weapon.
While the instructions may seem complicated at first, each step is crucial to ensure that the ninja star looks and performs as intended. Pictures or diagrams can be especially helpful in illustrating each step of the folding process, so don’t be afraid to look up visual aids to assist you.
Tips for Making a Perfect Ninja Star
Making a perfect ninja star isn’t just about following the steps correctly. Here are some additional tips to help you avoid common mistakes and improve the accuracy of your folds:
Use a Flat Surface
Folding on a flat surface, such as a table or desk, will help ensure that your folds are straight and even. Avoid folding on an uneven or soft surface, such as a bed or couch.
Use a Ruler or Bone Folder
Using a ruler or bone folder can help you make more precise folds by providing a straight edge to press against. This is especially useful when folding thicker paper.
Be Patient
Rushing through the folding process can lead to mistakes and an uneven final product. Take your time and focus on each fold, ensuring that it’s as accurate as possible before moving on to the next step.
Practice with Scrap Paper
If you’re new to making ninja stars, practice with scrap paper before using your final sheet. This will help you get a feel for the folding process and identify any areas that you may need to improve on.
By following these tips, you’ll be able to make a ninja star that looks and performs as intended. Remember to be patient, take your time, and have fun while making your ninja star.
Variations of Ninja Stars
While the basic ninja star made with 1 paper is fun to make and play with, there are many other types of ninja stars that you can make with paper. Here are a few variations that you can try:
Double-sided Ninja Star
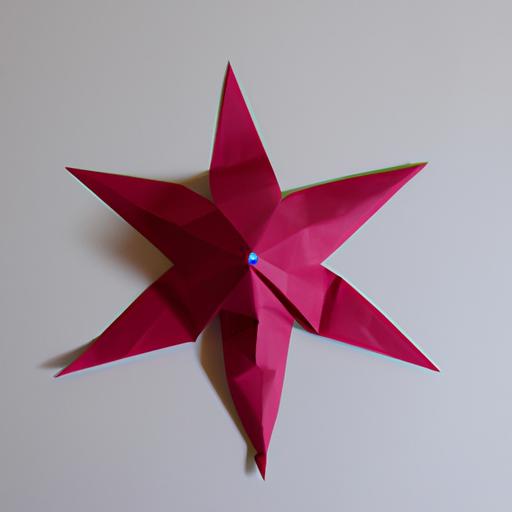
The double-sided ninja star is a unique variation that requires two sheets of paper. It’s also known as the “8-pointed star” and has twice as many points as the basic ninja star.
To make a double-sided ninja star, follow these steps:
- Take two square sheets of paper and fold each in half diagonally to form a triangle. Crease the folds and unfold the paper.
- Fold each paper in half diagonally again, in the opposite direction. Crease the folds and unfold the paper.
- Place the two papers together, with the folds facing each other.
- Fold both papers in half along the horizontal crease, bringing the top edge down to the bottom edge.
- Take one of the top flaps from each paper and fold them down diagonally towards the center of the papers. Repeat with the other flaps.
- Tuck the flaps into the pockets created by the previous folds.
- Flip the papers over and repeat steps 5 and 6 on the other side.
- Your double-sided ninja star is complete! Give it a test throw and see how it performs.
16-Pointed Ninja Star
The 16-pointed ninja star is another variation that has twice as many points as the basic ninja star. It requires four square sheets of paper and is a bit more challenging to make.
To make a 16-pointed ninja star, follow these steps:
- Take four square sheets of paper and fold each in half diagonally to form a triangle. Crease the folds and unfold the paper.
- Fold each paper in half diagonally again, in the opposite direction. Crease the folds and unfold the paper.
- Fold each corner towards the center of the paper. The corners should meet at the center point.
- Flip the paper over and repeat step 3 on the other side.
- Fold the paper in half vertically and horizontally. Crease the folds and unfold the paper.
- Take one of the top flaps and fold it down diagonally towards the center of the paper. Repeat with the other three flaps.
- Tuck the flaps into the pockets created by the previous folds.
- Flip the paper over and repeat steps 6 and 7 on the other side.
- Your 16-pointed ninja star is complete! Give it a test throw and see how it performs.
These are just two examples of the many variations of ninja stars that you can make with paper. Experiment with different sizes and colors to create your own unique designs.
Conclusion
In conclusion, making a ninja star with 1 paper is a fun and easy activity that anyone can do. By following the step-by-step instructions and using the tips provided, you can create a perfect ninja star every time. Additionally, by trying out the variations of ninja stars, you can expand your skills and create more complex designs.
Learning how to make a ninja star with 1 paper is not just a fun activity, but it also provides an opportunity to improve your hand-eye coordination and fine motor skills. So, grab a sheet of paper and start making your own ninja stars today!