
How to Make a Really Good Paper Airplane
Table of Contents
Are you looking for a fun and creative activity to do with your kids, or maybe just a way to destress and unwind after a long day? Making paper airplanes is a classic activity that has been enjoyed by people of all ages for generations. But, what separates a mediocre paper airplane from a truly great one? In this article, we will explore step-by-step instructions on how to create a paper airplane that will soar through the air with ease.
Materials Needed

Before we begin, it’s important to gather all of the necessary materials. Don’t worry, the materials needed are simple and can be found in your home or office. You will need a standard 8.5 x 11-inch piece of paper, preferably with a weight of 20-24 lb. This size is perfect for folding and creating a paper airplane. You will also need a flat surface to work on and a pair of scissors, which are optional.
When choosing the paper for your airplane, it’s crucial to consider the weight and thickness of the paper. A lightweight paper will result in an airplane that is too flimsy, while a heavy paper may be too stiff to fold correctly. The ideal weight of the paper is around 20-24 lb, which is commonly used for printing and copying.
Once you have all of the materials ready, it’s time to start folding!
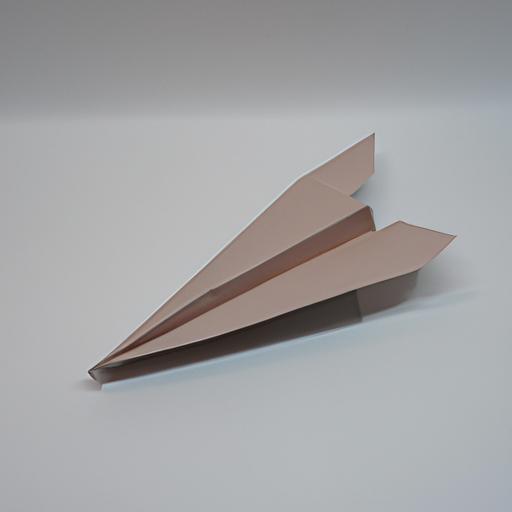
Folding Techniques
The first step in creating a paper airplane is to fold the paper in half lengthwise. Make sure the edges are lined up evenly and crease the fold. This will create a centerline that will serve as a guide for the rest of the folds.
Next, fold the top corners of the paper down towards the centerline, creating a triangle shape at the top. Make sure the edges are lined up evenly and that the creases are sharp.
(Next Sections: Testing and Adjusting, Additional Tips)
Testing and Adjusting
Once you have completed the initial folds, it’s time to test your paper airplane. Find an open area with plenty of space to launch your airplane. Grip the airplane at the bottom of the triangle shape and launch it forward with a flick of the wrist. Observe how the airplane flies and adjust as necessary.
If the airplane dives down quickly or doesn’t fly at all, try adjusting the angle of the wings. You can do this by gently bending the back edges of the wings up or down. This will change the angle of the wings and affect the airplane’s lift and stability.
Another way to adjust your paper airplane is to experiment with the weight distribution. If the airplane is too heavy on the front, it will nose-dive quickly. If it’s too heavy on the back, it will fly upward but quickly lose speed. Try adding small weights, such as paper clips or tape, to different areas of the airplane to see how it affects the flight.
Additional Tips
To make your paper airplane truly exceptional, there are a few additional tips to keep in mind. One of the most important factors to consider is the symmetry of the airplane. Make sure that each wing is folded evenly and that the centerline is straight. This will ensure that the airplane flies straight and true.
Another tip is to experiment with different folding techniques. There are countless ways to fold a paper airplane, each with its unique flight pattern. Try out different designs and see which one flies the farthest or stays in the air the longest.
Lastly, don’t forget to have fun! Making paper airplanes is a great way to unleash your creativity and enjoy some lighthearted fun. Invite your friends or family members to join in on the fun and create a paper airplane contest to see whose airplane flies the farthest.
Conclusion
In conclusion, making a really good paper airplane requires attention to detail and a bit of experimentation. By following the steps outlined in this article, you will be able to create a paper airplane that soars through the air with ease. Remember to test and adjust as necessary, and have fun with the process!
Additional Tips
Now that you have the basic folding techniques down, it’s time to add some extra features to your paper airplane to make it fly even better. One simple addition is to add wing flaps to the back of the airplane. To create the flaps, fold the edges of the paper up towards the centerline at a 45-degree angle. This will create small flaps that will help stabilize the airplane during flight.
Another tip is to add weight to the nose of the airplane. This will help the airplane fly farther and more accurately. You can add weight by placing a paper clip or small piece of tape at the front of the airplane.
Lastly, practice makes perfect! Don’t be discouraged if your first few attempts don’t result in a perfect paper airplane. With practice and patience, you’ll be able to create a paper airplane that can soar through the air with ease.
Conclusion
In conclusion, making a really good paper airplane is a fun and easy activity that can be enjoyed by people of all ages. By following the folding techniques outlined in this article and adding some extra features like wing flaps and weight, you can create a paper airplane that will soar through the air with ease. Remember to practice and have fun. Happy folding!