Table of Contents
Are you looking for an easy and affordable way to package your gifts or store your trinkets? Look no further than a paper box! Making your paper box is a fun and creative activity that can be enjoyed by people of all ages. Not only is it an enjoyable pastime, but it’s also cost-effective and environmentally friendly. In this article, we will provide you with a step-by-step guide on how to make a paper box that you can use for a variety of purposes.
Materials and Tools Needed
Before we dive into the step-by-step process, let’s first go over the materials and tools you’ll need to make a paper box. The items you need are commonly found in most households, so you won’t need to spend a lot of money on supplies.
Materials
- Paper: The type of paper you use will depend on the purpose of your box. For example, if you’re making a gift box, you may want to use decorative paper. If you’re making a storage box, you may want to use cardboard or thicker paper.
- Glue: You can use any type of glue, but we recommend using a glue stick or double-sided tape for convenience.
- Pencil: You’ll need a pencil to mark your paper before cutting and folding.
- Ruler: A ruler will help you measure your paper accurately.
- Scissors: You’ll need a pair of scissors to cut your paper to size.
Tools
- Bone folder: A bone folder is a tool used to create creases in paper. It’s optional but can be helpful to create sharp folds.
- Scoring tool: A scoring tool is a tool that allows you to create a crease in paper without cutting it. It’s optional but can be helpful for more precise folds.
Now that you have your materials and tools ready, let’s move on to the step-by-step process of making a paper box.
Steps in Making a Paper Box
In this section, we will provide you with a detailed guide on how to make a paper box. Follow these steps carefully, and you’ll be able to create a box in no time.
Step 1: Measuring the Paper
The first step in making a paper box is to measure your paper. The size of your paper will determine the size of your box. Use a ruler to measure your paper, and mark the dimensions with a pencil. Once you have your measurements, you can proceed to the next step.
Step 2: Folding the Paper
Once you have measured your paper, it’s time to fold it. Use a bone folder or scoring tool to create sharp creases in your paper. Follow the folding pattern below:
- Fold your paper in half horizontally.
- Unfold your paper and fold it in half vertically.
- Unfold your paper and fold each corner to the center crease.
- Fold the top and bottom edges to the center crease.
- Unfold the top and bottom edges and fold them to the first crease made in step 3.
- Fold the sides to the center crease.
- Unfold the sides and fold them to the second crease made in step 3.
Congratulations! You’ve successfully folded your paper box. Now it’s time to move on to the next step.
Note: The next sections will be written in the following order: Steps 3 and 4, Tips and Tricks, Creative Ways to Decorate a Paper Box, Conclusion.
Step 3: Cutting the Paper
Now that you have your folded paper box, it’s time to cut it to size. Use your scissors to cut along the creases you created in step 2. Be careful not to cut too much or too little, as this can affect the final shape of your box.
Step 4: Forming the Box
Once you have cut your paper, it’s time to form it into a box. Gently press the sides of your paper box to create the shape. If you’re having difficulty getting the box to stay in shape, you can use a scoring tool or bone folder to create sharper creases.
Step 5: Gluing the Box
The final step in making a paper box is to glue it together. Apply glue to the flaps on the sides of your box and fold them inward to create a secure seal. You can also use double-sided tape for a quicker and cleaner finish. Allow the glue to dry completely before using your paper box.
Tips and Tricks
Here are some tips and tricks to help you make the perfect paper box:
- Use a bone folder: A bone folder can help you create sharp creases and folds, resulting in a more polished finish.
- Score the paper before folding: Scoring your paper before folding it can help you create more precise creases and folds.
- Use a scoring tool: A scoring tool can make it easier to create creases in your paper without tearing or damaging it.
- Choose the right type of paper: The type of paper you use will depend on the purpose of your box. For example, if you’re making a gift box, you may want to use decorative paper. If you’re making a storage box, you may want to use cardboard or thicker paper.
- Use a template: If you’re new to making paper boxes, using a template can help you get started. You can find templates online or create your own using cardboard or paper.
By following these tips and tricks, you’ll be able to make a paper box that looks like it was made by a professional. Now that you know the steps and best practices for making a paper box, it’s time to get creative and experiment with different types of paper and decorations.
Creative Ways to Decorate a Paper Box
Now that you have made your paper box, it’s time to make it stand out with some creative decoration. Here are some fun and easy ways to decorate your paper box:
Stickers
Stickers are a simple and effective way to add a personal touch to your paper box. You can either use pre-made stickers or make your own with a sticker-making machine. You can choose stickers that match the theme of your box or use a mix of different designs for a fun and eclectic look.
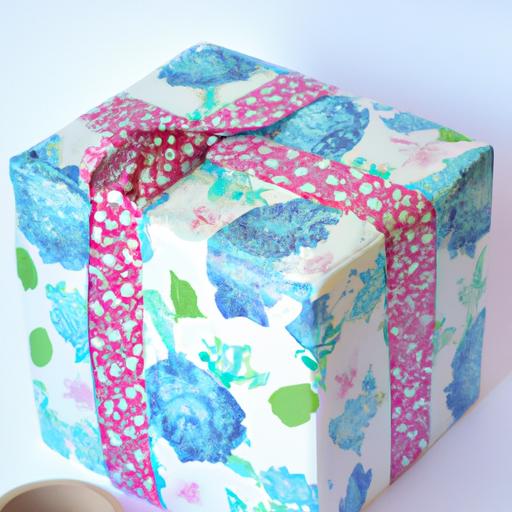
Washi Tape
Washi tape is a decorative tape that comes in a variety of colors and patterns. It’s a great way to add some color and personality to your paper box. You can use washi tape to create stripes, geometric shapes, or any other design that you like.
Ribbon
Adding a ribbon to your paper box is an elegant way to dress it up. You can use a ribbon that matches the color of your box or choose a contrasting color for a bold look. You can tie the ribbon into a bow or knot for a beautiful finish.
Paint
If you’re feeling artistic, you can paint your paper box with acrylic or watercolor paint. You can create a simple design or paint a beautiful scene on the box. If you’re not confident in your painting skills, you can use stencils or stamps to create a design.
Stamps
Stamps are a fun and easy way to add some character to your paper box. You can use rubber stamps or create your own stamps with foam or potatoes. You can choose stamps that match the theme of your box or use a mix of different designs for a unique look.
Conclusion
In conclusion, making a paper box is a simple and fun activity that anyone can enjoy. Not only is it a cost-effective way to package your gifts or store your trinkets, but it’s also environmentally friendly. By following the step-by-step process outlined in this article, you can create a beautiful paper box in no time. Remember to use the materials and tools that we recommended, and to decorate your box with stickers, washi tape, ribbon, paint, or stamps for a personalized touch. We hope you enjoyed this guide on how to make a paper box and that you’ll try it out for yourself soon!