Table of Contents
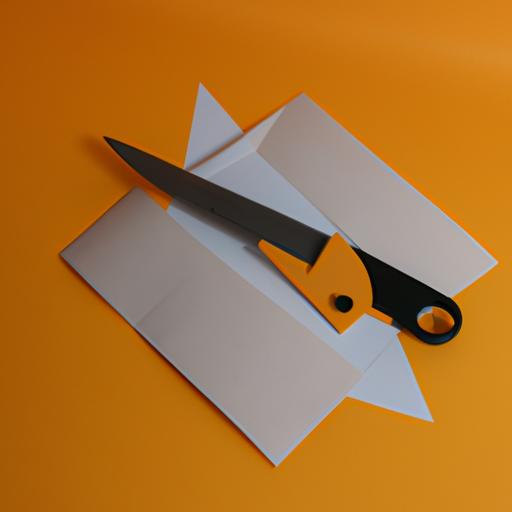
Paper knives are a fun and easy craft project that you can make with just a few materials. Whether you’re looking for a creative way to pass the time or want to add a unique touch to your desk or workspace, making a paper knife is a great option.
In this article, we’ll walk you through the process of making a paper knife from start to finish. You’ll learn about the materials you’ll need, step-by-step instructions for creating your knife, and tips and tricks to help you get the most out of your project.
So, grab your supplies and get ready to make your very own paper knife!
Materials Needed
Before we get started, let’s take a look at the materials you’ll need to make a paper knife. Don’t worry – you won’t need anything too fancy or expensive.
Paper
The first thing you’ll need is a sheet of paper. Any type of paper will do, but we recommend using printer paper or construction paper. You can choose any color you like, but white or light-colored paper will make it easier to see your folds.
Scissors
Next, you’ll need a pair of scissors. Any type of scissors will work, but we recommend using a pair of sharp scissors to make your cuts as clean as possible.
Ruler
You’ll also need a ruler to help you make precise measurements and ensure your folds are straight. A standard 12-inch ruler will work just fine.
Pencil
Finally, you’ll need a pencil to mark your measurements and guide your cuts. Any type of pencil will work, but we recommend using a sharp pencil with a clean eraser.
Now that you have your materials, let’s get started on making your paper knife!
Step-by-Step Instructions
In this section, we’ll walk you through the process of making a paper knife step-by-step. Follow these instructions carefully, and you’ll have your very own paper knife in no time!
Step 1: Cut Your Paper
The first step is to cut your paper into a square. Use your ruler to measure and mark a square on your paper, making sure that all sides are the same length. Then, use your scissors to cut along the lines you’ve drawn.
Step 2: Fold Your Paper
Next, you’ll need to fold your paper in half diagonally to create a triangle. Use your ruler to help you make a precise fold, and then use your fingers to crease the paper along the fold.
To be continued…
Step-by-Step Instructions (continued)
Step 3: Fold Your Paper Again
Now, fold your triangle in half again, this time bringing the two corners together to create a smaller triangle. Use your ruler to help you make a precise fold, and then use your fingers to crease the paper along the fold.
Step 4: Make Your Cuts
Using your ruler and pencil, mark a line along the longest edge of your triangle, about an inch from the bottom. Then, use your scissors to make a cut along the line, stopping about an inch from the top of the triangle.
Next, make a second cut from the top of the triangle down to the end of the first cut, creating a V-shape in the paper. This will be the blade of your paper knife.
Step 5: Shape Your Knife
Carefully fold the two flaps of paper on either side of the blade down and crease them firmly. Then, fold the bottom edge of the triangle up to create a handle for your knife.
Finally, use your scissors to trim any excess paper from the handle, and use your fingers to smooth out any creases or bumps in the paper.
Congratulations – you’ve just made your very own paper knife!
Tips and Tricks
Now that you know how to make a paper knife, here are a few tips and tricks to help you get the most out of your project:
Common Mistakes to Avoid
- Cutting too close to the top of the triangle can result in a weak blade that won’t hold up to use.
- Forgetting to crease your folds can result in a lopsided or crooked knife.
- Using dull scissors can result in jagged or uneven cuts.
Tricks to Make the Process Easier and Faster
- Use a bone folder or the edge of a credit card to make clean, crisp folds.
- Use a paper cutter or rotary cutter to make quick and precise cuts.
- Experiment with different types of paper to create unique and interesting designs.
By following these tips and tricks, you’ll be able to create paper knives that are both beautiful and functional. So, grab your supplies and get started – the possibilities are endless!
Variations and Customization
Now that you know how to make a basic paper knife, you can experiment with different designs and shapes to make your knife truly unique. Here are a few ideas to get you started:
Blade Shape
Instead of a straight blade, try creating a knife with a curved blade or a serrated edge. You can also experiment with different blade lengths and widths to create a custom shape that suits your needs.
Handle Design
The handle of your paper knife is another area where you can get creative. Try adding a grip to the handle by folding the paper in a different way or adding a layer of tape or glue for extra texture. You could also try adding decorations like stickers, drawings, or even beads to make your knife stand out.
Conclusion
Congratulations – you’ve successfully made your own paper knife! With just a few simple materials and a little bit of patience, you can create a custom knife that’s perfect for all sorts of tasks.
To recap, here’s what you need to do to make your own paper knife:
- Cut your paper into a square.
- Fold your paper in half diagonally to create a triangle.
- Fold the triangle in half again to create a smaller triangle.
- Fold the top of the triangle down to create the handle of your knife.
- Fold the bottom of the triangle up to create the blade of your knife.
- Use your scissors to carefully cut along the folded lines to create your blade.
We hope you’ve enjoyed this tutorial on how to make a paper knife. Remember to experiment with different designs and shapes to create a knife that’s truly your own. Happy crafting!