Table of Contents
If you’re a smoker, you know that rolling papers are an essential part of the experience. Rolling papers are thin, flat sheets that are used to roll tobacco, herbs, or other smoking materials into a cigarette or joint. While it’s easy to buy rolling papers from a store, making your rolling paper can be a fun and satisfying experience.
In this article, we’ll guide you through the process of making rolling papers from scratch. From the materials you’ll need to the step-by-step instructions, we’ve got you covered.
Materials Needed
Before you begin making rolling papers, you’ll need to gather some materials. Here’s what you’ll need:
1.1. Parchment Paper
Parchment paper is a type of paper that’s resistant to grease and moisture. It’s perfect for making rolling papers because it’s thin, flexible, and easy to work with. You can find parchment paper at your local grocery store or online.
1.2. Scissors
You’ll need a pair of scissors to cut the parchment paper into the desired size and shape.
1.3. Pen or Pencil
A pen or pencil will be used to draw lines on the parchment paper, which will help you cut it into the right size and shape.
1.4. Ruler
A ruler will help you draw straight lines on the parchment paper and ensure that your rolling papers are uniform in size.
1.5. Glue or Gum
You’ll need glue or gum to seal the rolling papers once they’re rolled. You can use regular glue or gum, or you can use specialized rolling paper glue or gum.
1.6. Optional: Flavoring
If you want to add flavor to your rolling papers, you can use essential oils or extracts. Just be sure to use a small amount, as too much can make your rolling papers soggy and difficult to roll.
Preparing the Parchment Paper
Now that you’ve gathered your materials, it’s time to prepare the parchment paper for rolling papers. Here’s how:
2.1. Cut the Parchment Paper
Using your scissors, cut the parchment paper into the desired size and shape. A typical size for rolling papers is 3 inches by 3 inches, but you can make them larger or smaller depending on your preference.
2.2. Draw Lines on the Parchment Paper
Using your ruler and pen or pencil, draw lines on the parchment paper to help guide you when cutting it into the right size and shape. Be sure to draw the lines lightly, so they don’t show up on the finished rolling papers.
Rolling the Papers
Now that you’ve prepared the parchment paper, it’s time to roll the papers. Here’s how:
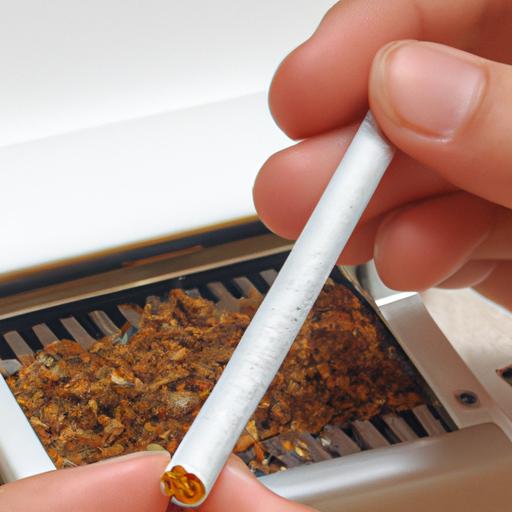
3.1. Place the Tobacco or Herbs on the Parchment Paper
Place the tobacco or herbs on the parchment paper, making sure to leave enough space around the edges to roll the paper.
3.2. Roll the Paper
Using your fingers, roll the parchment paper around the tobacco or herbs, being careful not to tear the paper. Once the paper is rolled, use your fingers to seal the edge.
3.3. Seal the Paper
Apply a small amount of glue or gum to the edge of the paper and press it down to seal the rolling paper.
3.4. Optional: Add Flavoring
If you want to add flavor to your rolling paper, you can apply a small amount of essential oils or extracts to the paper before rolling it.
Drying and Storing the Rolling Papers
Once you’ve rolled your papers, you’ll need to dry and store them properly. Here’s how:
4.1. Let the Rolling Papers Dry
Place the rolling papers on a flat surface and allow them to dry completely. This can take anywhere from a few hours to a day, depending on the humidity in your environment.
4.2. Store the Rolling Papers
Once the rolling papers are dry, store them in an airtight container to prevent them from getting damp or damaged. You can use a small plastic bag or a rolling paper holder to store them.
4.3. Use the Rolling Papers
When you’re ready to use the rolling papers, simply take one out of the container and roll your tobacco or herbs into a cigarette or joint. Remember to use caution when smoking and always follow local laws and regulations.
By following these simple steps, you can create your rolling papers and enjoy a more customized smoking experience. Making your rolling papers can be a fun and rewarding activity, so why not give it a try?
Rolling the Papers
Now that your rolling papers are ready, it’s time to roll them. Here’s how:
5.1. Add the Smoking Material
Place your smoking material in the center of the rolling paper. Be sure not to add too much, or it will be difficult to roll.
5.2. Create the Cylinder
Using your fingers, gently roll the paper back and forth to create a cylinder shape. Be sure to tuck in the sides as you go, so the smoking material doesn’t fall out.
5.3. Seal the Rolling Paper
Using your glue or gum, seal the rolling paper by applying a small amount to one end and rolling it up. Be sure to press down firmly to ensure a tight seal.
5.4. Optional: Add Flavoring
If you want to add flavor to your rolling papers, you can add a drop or two of essential oil or extract to the glue or gum before sealing the paper. This will give your smoking experience a unique flavor.
Conclusion
Making your rolling papers is a fun and easy process that can enhance your smoking experience. By following the steps above, you can create rolling papers that are tailored to your exact specifications. From the materials you’ll need to the step-by-step instructions, we’ve covered everything you need to know to make rolling papers from scratch.
So, the next time you’re in the mood for a smoke, consider making your rolling papers. Not only will you have a sense of satisfaction from creating something yourself, but you’ll also have a unique smoking experience that you won’t find anywhere else.