Table of Contents
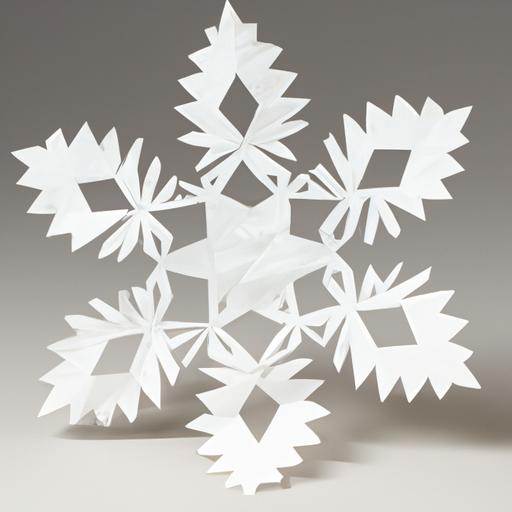
Are you looking for a fun and easy way to get into the holiday spirit? Making snowflakes out of paper is a timeless craft that is perfect for all ages. Whether you want to decorate your home, create DIY holiday cards, or just have fun with your family, making paper snowflakes is a great way to get creative and enjoy the winter season.
In this article, we will provide you with a step-by-step guide on how to make snowflakes out of paper. We will cover everything from the materials you need to the folding and cutting techniques required to create beautiful, unique snowflakes. So, grab some paper and let’s get started!
Materials Needed
Before we get started, let’s gather the materials you’ll need to make your paper snowflakes. Here’s what you’ll need:
- White paper (printer paper, construction paper, or any other thin paper will work)
- Scissors
- Pencil
- Ruler
- Optional: Glitter, markers, or other decorative materials
Make sure that your paper is a square shape, as this will ensure that your snowflake is symmetrical. If your paper is not already a square, you can simply fold it diagonally and cut off the excess to create a square shape. Once you have all of your materials, let’s move on to the next step.
Folding Techniques
To create a snowflake, you need to start with a square piece of paper. Once you have your square, follow these steps to fold it properly:
- Fold the paper in half diagonally to create a triangle.
- Fold the triangle in half again to create a smaller triangle.
- Take the left corner of the triangle and fold it towards the center of the triangle. Do the same with the right corner, so that they meet in the middle.
- You should now have a smaller triangle with a crease down the middle. Fold the top corner of the triangle down towards the bottom, making sure to leave about an inch of space at the bottom.
- Flip the paper over and repeat the same fold on the other side.
Congratulations, you have now folded your paper in preparation for cutting your snowflake design! Keep reading to learn how to cut your paper into a beautiful snowflake.
Cutting Techniques
Now that you have folded your paper, it’s time to cut out the snowflake design. Follow these steps to create a beautiful snowflake:
- Using your pencil and ruler, draw your snowflake design on one side of the folded paper. You can create any design you like, but make sure to leave some spaces between the lines so that your snowflake doesn’t fall apart.
- Once you have your design, carefully cut along the lines with your scissors. Make sure to cut through all layers of paper, but don’t cut too close to the edges, or your snowflake might fall apart.
- Once you have finished cutting, carefully unfold your paper to reveal your snowflake. If you notice any uneven spots or mistakes, you can use your scissors to carefully trim the edges until you are satisfied with your snowflake.
Finishing Touches
Congratulations, you have now created a beautiful snowflake out of paper! But why stop there? Here are some ideas for how to add some extra pizzazz to your snowflakes:
- Add glitter or sequins to your snowflake to make it sparkle.
- Use colorful markers or pens to draw on your snowflake and create unique designs.
- String together several snowflakes to create a festive garland.
- Attach your snowflakes to a ribbon or string and hang them in windows or from the ceiling.
The possibilities are endless, so get creative and have fun with your snowflakes! Whether you’re making them as a fun activity with your family or using them to decorate your home, paper snowflakes are a great way to add some winter magic to your life.
Finishing Touches
Now that you’ve folded and cut your paper snowflake, it’s time to add some unique details and embellishments. Here are some tips on how to make your snowflakes stand out:
- Add glitter: Sprinkle some glitter on your snowflake to give it some sparkle and shine. You can use a glue stick to add a thin layer of glue to your snowflake before sprinkling on the glitter.
- Use markers: If you want to add some color to your snowflake, use markers to draw on your snowflake. You can add designs, patterns, or even words to personalize your snowflake.
- Experiment with different paper: While white paper is classic for snowflakes, you can also use colored or patterned paper to make your snowflakes unique. Just make sure that your paper is thin enough to fold and cut easily.
- Cut out shapes: To add some extra dimension to your snowflake, use your scissors to cut out small shapes from the edges of your snowflake. You can cut out triangles, circles, or any other shape you like.
Conclusion
In conclusion, making snowflakes out of paper is a simple and fun craft that anyone can enjoy. With just a few materials and some easy folding and cutting techniques, you can create beautiful, unique snowflakes to decorate your home, give as gifts, or just enjoy with your family.
We hope that this step-by-step guide has been helpful for you in creating your own paper snowflakes. Remember to experiment with different materials and designs to make your snowflakes truly unique. So, grab some paper and scissors, and start creating!