
Create Stunning Paper Star Lanterns for Your Nighttime Oasis
Table of Contents
Introduction
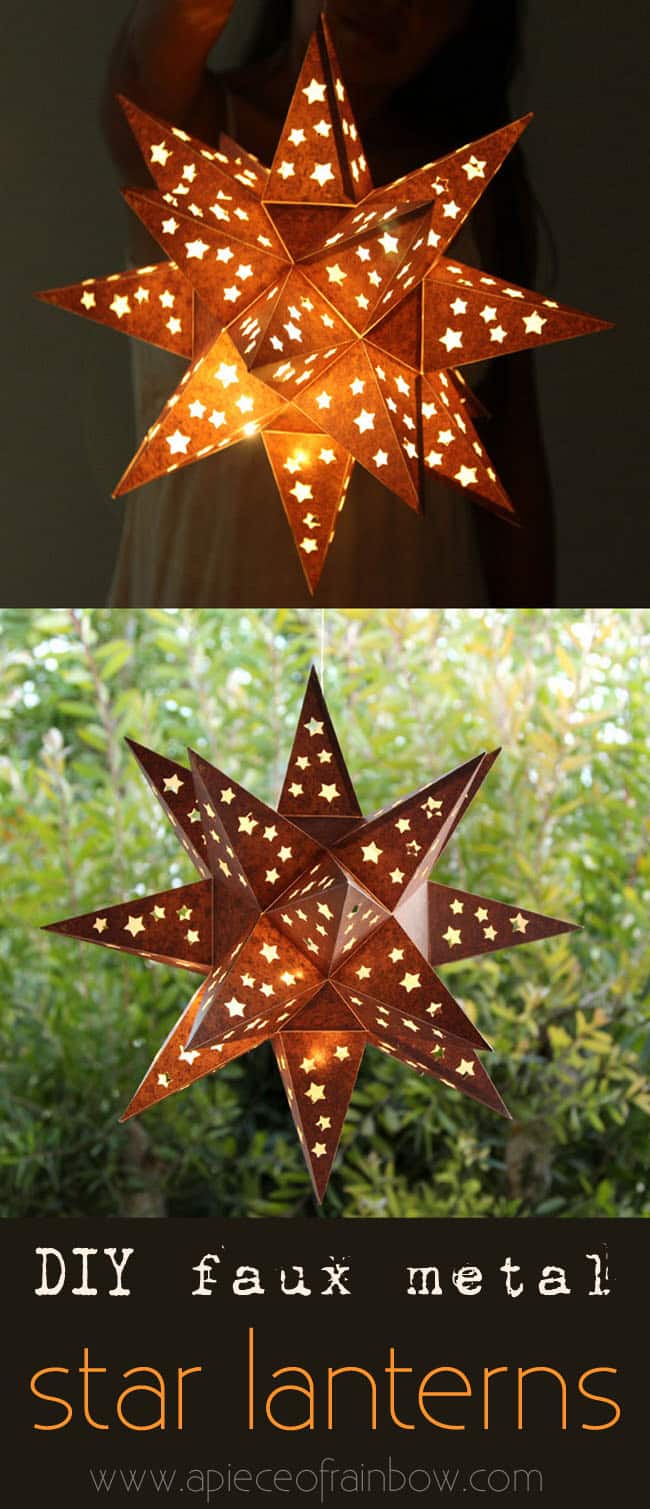
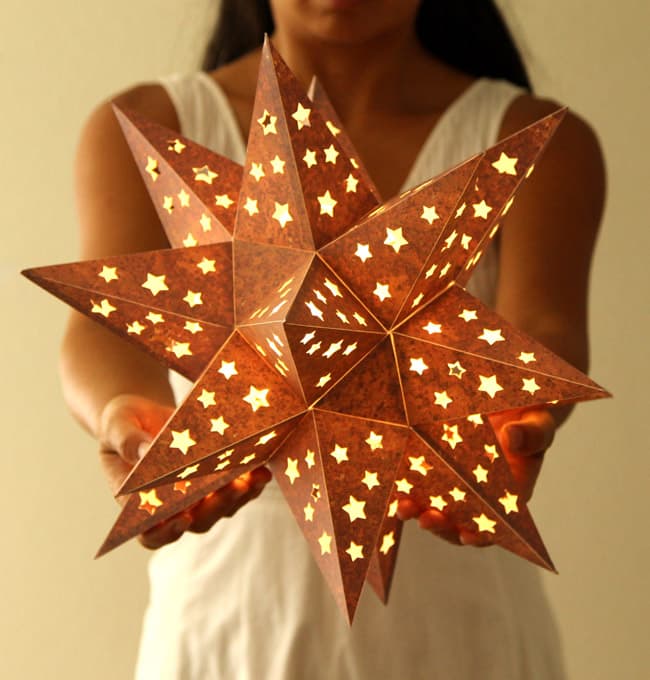
Have you ever wished that metalworking could be as simple as folding paper? Well, today your wish comes true! In this article, we will guide you through the process of creating a DIY paper star lantern inspired by Mexican Tin Star lanterns. This lantern looks like it’s made out of rusty metal but is actually crafted from paper. Lit with LED fairy lights, it is the perfect addition to your covered patio or table decor. And guess what? We have a free paper star template for you to download at the end!
Materials and Tools
To make your own paper star lantern, you will need the following materials and tools:
- Sturdy 110lb index card stock (such as the ones available here) – this will provide the perfect balance of weight and shape retention.
- Micro LED Warm White String Lights – light, bright, and ideal for this lantern.
- Silhouette Portrait / Cameo or an X-acto knife (or a star hand punch) for cutting the designs.
- Clear Bead Cord or fishing line to hang the lanterns.
- Glue.
- And lastly, enter your email below to receive the free templates download link!
Step 1: Print and Cut the Paper Star Template
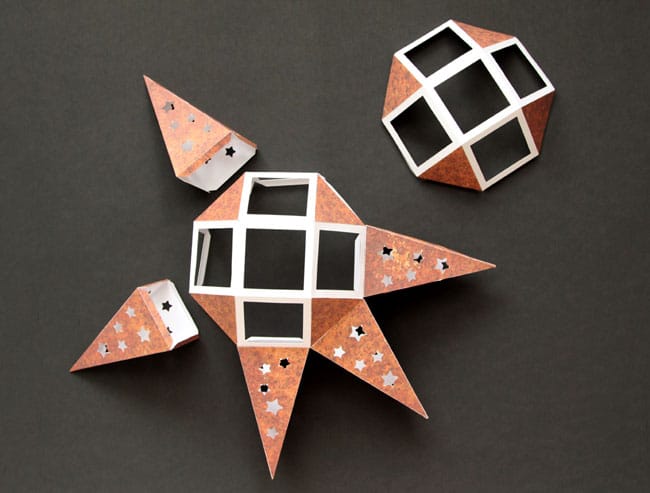
Print pages 1, 2, and 3 once, and page 4 nine times. If you prefer a white paper star lantern, that’s all the printing you need. However, if you want a rusty “metal” look, print the rust texture (included in the downloads) on the back side of page 4. Cut along the blue lines and score along the orange lines. For this project, I recommend using 8.5×11 110lb card stock, which I have used for other crafts like the birch forest shadow box and watercolor paintings.
Step 2: Make the Paper Star Tips
Here’s a helpful trick for gluing the paper star lantern: fold the piece along the score line in the middle and press down the glue dotted tab. This makes it much easier to glue without struggling with the lantern’s 3D form! Also, remember to glue the triangles cut from page 4 to all the triangle shapes on pages 1 to 3. (Note: Skip this step if you are making a white star.)

Step 3: Assemble the Paper Star
Start by making the polyhedron shape, then glue on all but one of the paper star tips. We leave one tip unglued because it serves as the “doorway” to add and remove LED lights easily.

Step 4: Create an Opening for LED Lights
To ensure you can insert and remove the LED lights, leave one side of the last paper star tip unglued. This opening should be big enough to accommodate LED string lights or tea lights.
Step 5: Illuminate Your Paper Star Lantern
To close the star, poke two small holes and thread a piece of clear fishing line or bead cord through them. Tie a knot to secure the star. Your paper star lantern is now ready to create a warm and cozy ambience in your space.

Conclusion
Congratulations on making your very own paper star lantern! Whether it’s adorning your table or hanging from your patio, this stunning creation will surely impress. For the free templates download link, simply enter your email below. Enjoy the beautiful shadows and starry nights!
Unzip with Stuffit Expander. If you encounter any download issues, it might be a browser-related problem. Feel free to ask your friends to download and email it to you!

You may also like:
- Cherry blossoms in moonlight: how to paint on black paper.
- Make magical Dandelion lanterns.
Wishing you countless beautiful days and nights! =)