Table of Contents
Origami is the Japanese art of paper folding that has been enjoyed for centuries. It’s a therapeutic and creative hobby that can be enjoyed by people of all ages. Among the many origami figures, the paper crane is perhaps the most popular and well-known. In this article, we’ll teach you how to fold a paper crane step-by-step, from the materials you need to the advanced techniques you can use to create a more intricate crane.
Materials Needed
Before starting, it’s essential to gather all the materials you need. You don’t need to spend a lot of money on fancy paper or tools. You can use any paper you have on hand, from printer paper to origami paper. However, keep in mind that thinner paper is easier to fold, and the color of the paper will affect the final look of your crane.
The tools required for folding a paper crane are minimal. You’ll need a flat surface to work on, a ruler to make precise folds, and a pair of scissors to trim the paper. You can also use a bone folder or a spoon to help you make crisp folds.
Once you have all the materials you need, we can move on to the next step.
Basic Steps
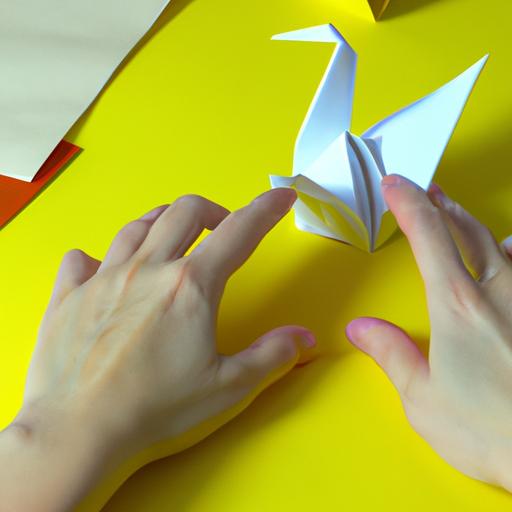
Now it’s time to start folding your paper crane. Follow these step-by-step instructions to create your first paper crane:
- Start with a square sheet of paper, with the colored side facing down.
- Fold the paper in half diagonally, crease it well, and then unfold it.
- Fold the paper in half diagonally in the opposite direction, crease it well, and then unfold it.
- Fold the paper in half horizontally, crease it well, and then unfold it.
- Fold the paper in half vertically, crease it well, and then unfold it.
- Fold the paper in half diagonally, crease it well, and then unfold it.
- Fold the paper in half diagonally in the opposite direction, crease it well, and then unfold it.
- Fold the paper in half vertically, crease it well, and then leave it folded.
- Fold the top layer of the right side of the paper diagonally to the center crease, crease it well, and then unfold it.
- Repeat step 9 on the left side of the paper.
- Fold the top layer of the paper diagonally to the center crease, crease it well, and then unfold it.
- Rotate the paper and repeat steps 9-11 on the other side.
- Fold the top layer of the paper along the horizontal crease, crease it well, and then unfold it.
- Fold the top layer of the paper along the vertical crease, crease it well, and then unfold it.
- Push the top layer of the paper inward along the diagonal creases, and flatten it down into a diamond shape.
- Fold the top layer of the paper up along the horizontal crease, and crease it well.
- Fold the top layer of the paper down along the vertical crease, and crease it well.
- Fold the top layer of the paper along the diagonal crease, and crease it well.
- Tuck the top layer of the paper inside the folds, and crease it well to create the head of the crane.
- Fold the wings of the crane down to create the body of the crane.
Congratulations! You’ve folded a paper crane. With some practice, you’ll be able to fold a paper crane in just a few minutes with ease.
Tips for Beginners
Folding a paper crane may seem daunting at first, but with some practice and patience, you’ll be able to master this origami figure. Here are some tips to help you get started:
- Start with a bigger sheet of paper, as it’s easier to fold.
- Make sure your folds are precise and sharp for a clean finish.
- Use a ruler or bone folder to make crisp folds.
- Practice makes perfect. Don’t be discouraged if your first few cranes don’t turn out as expected.
- Have fun and enjoy the process. Origami is a therapeutic activity that can help you relax and unwind.
Common Mistakes to Avoid
Folding a paper crane requires precision and patience. Here are some common mistakes to avoid:
- Rushing through the steps without making precise folds.
- Using paper that is too thick or too thin.
- Not creasing the folds well enough, which can lead to a messy finish.
- Skipping steps or folding the paper in the wrong direction.
If you encounter any of these mistakes, don’t worry. You can always start over or try to fix the mistake by unfolding the paper and redoing the fold.
Advanced Techniques
Once you’ve mastered the basic steps, you can try out some advanced techniques to create more intricate and unique paper cranes. Here are some techniques you can try:
Different Variations of Paper Crane
There are many variations of the paper crane, each with its unique style and design. Some popular variations include:
- Flapping crane: This paper crane can flap its wings when you pull its tail.
- Modular crane: This crane is made up of multiple smaller cranes connected together.
- Winged crane: This crane has wings that can be spread open.
- Origami crane mobile: This is a mobile made up of multiple paper cranes suspended from strings.
Adding Details and Embellishments
You can add details and embellishments to your paper crane to make it stand out. Some ideas include:
- Adding eyes to the head of the crane.
- Folding the wings in different patterns.
- Using patterned or textured paper for a unique look.
- Adding a beak or tail to the crane.
Techniques for Making Larger or Smaller Cranes
You can adjust the size of your paper crane by starting with a larger or smaller square sheet of paper. However, some techniques can help you make larger or smaller cranes without changing the size of the paper. For example:
- Making smaller folds: By making smaller folds, you can create more intricate details in a smaller space.
- Using thinner paper: Thinner paper is easier to fold and can help you make smaller or more delicate cranes.
- Using a magnifying glass: If you’re working with small details, using a magnifying glass can help you see the folds more clearly.
By using these advanced techniques, you can take your paper crane folding skills to the next level and create unique and intricate designs that will impress your friends and family.
Fun Facts
Paper cranes have a rich cultural significance in Japan and around the world. According to Japanese folklore, if you fold 1,000 paper cranes, your wish will come true. This belief became widely known after Sadako Sasaki, a young girl who survived the Hiroshima atomic bomb explosion, folded 1,000 paper cranes in the hospital while battling leukemia. She passed away, but her story inspired people around the world to fold paper cranes as a symbol of peace, hope, and healing.
Paper cranes have also become a popular symbol of the art of origami. Many artists have used paper cranes to create intricate installations and sculptures. One such artist is Robert J. Lang, a physicist and origami artist who has created stunning works of art using paper cranes. His work has been featured in museums and galleries around the world.
Finally, the largest paper crane ever folded was created by a group of students in Japan in 2009. The crane measured over 81 feet wide and 90 feet long, and it was made with over 800 pieces of paper. This feat earned the students a place in the Guinness World Records.
Conclusion
Learning how to fold a paper crane is not only a fun and creative hobby, but it also has numerous benefits. It can help improve your hand-eye coordination, boost your concentration and focus, and reduce stress and anxiety. Origami is a therapeutic activity that can be enjoyed by people of all ages and skill levels.
If you’re just starting with origami, don’t worry if your first few cranes don’t turn out perfectly. Practice makes perfect, and with some perseverance and patience, you’ll be able to fold a paper crane with ease. Don’t be afraid to experiment with different types of paper, colors, and sizes to create unique and beautiful cranes.
In conclusion, folding a paper crane is a rewarding and satisfying activity that can bring joy and peace to your life. Take some time to learn the basic steps, and soon you’ll be able to fold a paper crane in just a few minutes. So go ahead, grab a piece of paper, and start folding your first paper crane today!