
How to Make a Dart Paper Airplane: The Ultimate Guide
Table of Contents
Paper airplanes are a timeless classic that has been enjoyed by children and adults alike for generations. Not only is it a fun hobby, but it also serves as a great way to pass the time or relieve stress. Among the many designs available, the dart paper airplane is one of the most popular due to its sleek and aerodynamic shape. In this guide, we will provide a step-by-step tutorial on how to make a dart paper airplane that will soar through the air with ease.
Understanding the Basics of Dart Paper Airplanes
Before we dive into the instructions, it’s important to understand the basics of dart paper airplanes. The dart design is characterized by its pointed nose and triangular wings, which give it a streamlined shape that allows it to glide through the air with minimal resistance. To create this design, you will need a standard 8.5 x 11 inch piece of paper, preferably with a weight of around 20-24 lb.
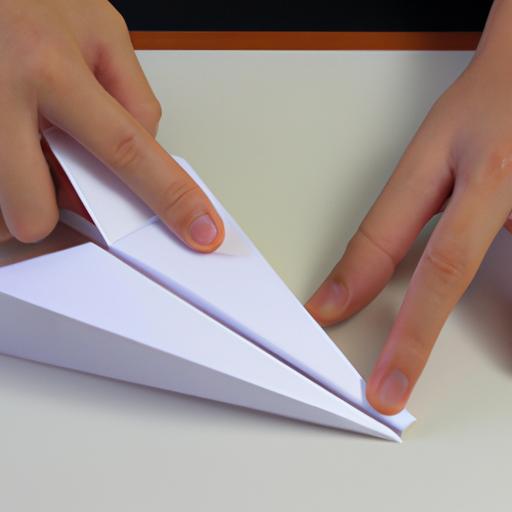
To begin, fold the paper in half lengthwise, and then unfold it. Next, fold the top corners of the paper down to the center crease, creating two diagonal folds that meet at the center. Then, fold the top edge of the paper down along the crease formed by the diagonal folds, creating a pointed nose.
Now that you have a basic understanding of the design, let’s dive into the steps needed to create your own dart paper airplane.
Steps to Making a Dart Paper Airplane
-
Take an 8.5 x 11 inch piece of paper and fold it in half lengthwise. Unfold the paper and fold the top corners down to the center crease, creating two diagonal folds that meet at the center.
-
Fold the top edge of the paper down along the crease formed by the diagonal folds, creating a pointed nose. Make sure the fold is sharp and precise to create a streamlined shape for your airplane.
-
Fold the paper in half along the center crease, bringing the pointed nose down to meet the bottom edge of the paper. Crease the fold well and unfold the paper.
-
Fold the top edges of the paper down to the center crease, creating two diagonal folds. The tips of the folds should meet the point where the previous fold was made.
-
Fold the paper in half along the center crease once again, this time tucking the pointed nose inside the folds to create a sleek look. Make sure the wings are even and symmetrical.
-
Fold down the wings along the diagonal folds, creating a flat surface on each side of the airplane. Make sure the wings are straight and even.
Congratulations, you have now successfully created a dart paper airplane! However, the key to making a great paper airplane is in the testing and adjustments, which we will cover in the next section.
Steps to Making a Dart Paper Airplane (continued)
-
Fold the wings down once again, this time along the bottom edge of the paper. The tips of the wings should meet at the center crease. Make sure the wings are flat and even.
-
Finally, make a small fold at the back of the airplane, right above the wings. This will give the airplane a slight upward angle, which helps it to lift off the ground smoothly.
Once you’ve completed all the steps, take a moment to admire your handiwork. You now have a sleek and aerodynamic dart paper airplane that is ready for flight! But before you launch it into the air, there are a few testing and adjusting techniques you should know about.
Testing and Adjusting
Testing your paper airplane is an essential step to ensure optimal performance. Here are some tips on how to test your dart paper airplane:
-
Find a large, open space with minimal wind. This will give your airplane plenty of room to fly without getting caught up in any obstacles.
-
Hold the airplane at the pointed nose and give it a gentle toss. Observe its flight path and note any areas that need improvement.
-
Adjust the wings as needed to achieve better flight. For example, if the airplane is diving too quickly, try folding the wings up slightly to create more lift. If the airplane is drifting to one side, adjust the wings on that side to create more balance.
-
Test your airplane again and make additional adjustments as needed until you achieve the desired flight path.
With these tips, you can make the necessary adjustments to achieve optimal performance from your dart paper airplane. Remember to experiment with different wing angles and weight distribution to find the perfect balance for your airplane.
In the next section, we’ll share some tips and tricks for making the best dart paper airplane possible.
Tips and Tricks
To make the best dart paper airplane possible, there are a few tips and tricks you can follow:
-
Use a lightweight and sturdy paper: A paper that is too heavy or flimsy will not fly well. Aim for a weight of around 20-24 lb, which is sturdy enough to create a sharp fold but light enough to glide through the air.
-
Make sharp and precise folds: The sharper and more precise your folds are, the better your airplane will fly. Use a flat surface to ensure your folds are straight and even.
-
Adjust the wings for better flight: If your airplane is not flying straight or is nosediving, adjust the wings by folding them up or down slightly. This will help create a more stable flight.
-
Experiment with different designs: Once you have mastered the dart paper airplane, try experimenting with different designs to create new and exciting airplanes. Who knows, you may even create your own unique design!
Common mistakes to avoid:
-
Overfolding: Be careful not to overfold your paper, as this can create unnecessary creases that will affect the flight of your airplane.
-
Using the wrong type of paper: As mentioned earlier, using a paper that is too heavy or flimsy will affect the flight of your airplane. Stick with a weight of around 20-24 lb for the best results.
-
Uneven wings: If your wings are not even, your airplane will not fly straight. Make sure to fold your wings carefully and check that they are symmetrical before testing your airplane.
Conclusion
In conclusion, making a dart paper airplane is a fun and easy hobby that anyone can enjoy. By following the steps outlined in this guide and using the tips and tricks provided, you can create a paper airplane that will soar through the air with ease. Don’t be afraid to experiment with different designs and adjust your airplane for better flight. So go ahead and take up the challenge, and have fun making your own paper airplanes!