
How to Make a Ninja Star with Paper
Table of Contents
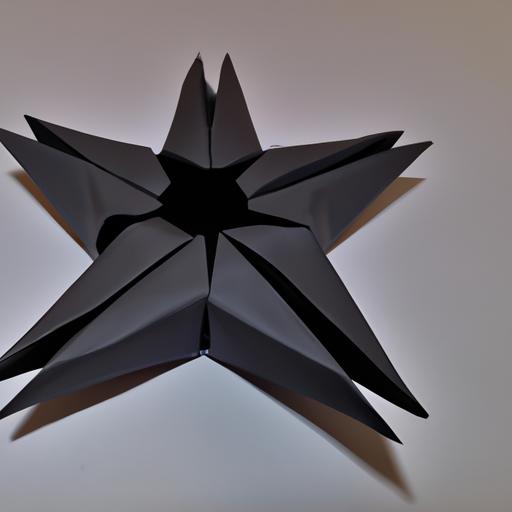
Ninja stars, also known as shurikens, are iconic weapons used by ninjas in ancient Japan. These throwing stars were designed to inflict damage on their enemies, but today, they’re mostly used for entertainment and fun. Making a ninja star with paper is a fun and easy craft project that anyone can do, whether you’re a kid or an adult. In this article, we’ll show you step-by-step how to make a ninja star with paper, as well as some tips, variations, and activities you can do with them.
Introduction
Before we dive into the instructions, let’s talk about the history and significance of ninja stars. Ninja stars were first used in feudal Japan by ninjas, who were highly skilled warriors trained in the art of espionage, sabotage, and assassination. The ninja star was one of their most iconic weapons, known for its ability to inflict damage on their enemies from a distance.
Today, ninja stars are mostly used for entertainment and fun. Making a ninja star with paper is a great way to recreate this iconic weapon without the danger of using a real one. All you need is a piece of paper, and you can create your very own ninja star in just a few minutes.
Materials Needed
To make a paper ninja star, you’ll need the following materials:
- One sheet of square paper (origami paper or printer paper cut into a square will work)
- Scissors (optional)
That’s it! You don’t need any glue or tape to make a paper ninja star, just a little bit of patience and some folding skills. Once you’ve gathered your materials, you’re ready to start making your ninja star.
Tips for Success
Making a paper ninja star may seem simple, but there are a few tips and tricks you should keep in mind to ensure your ninja star turns out perfectly. Here are some tips for success:
Using the Right Type of Paper
The type of paper you use can make a big difference in the final result of your ninja star. Ideally, you should use origami paper, which is thin and easy to fold. If you don’t have origami paper, you can also use printer paper, but make sure it’s cut into a square shape first. Avoid using thick or heavy paper, as it will be harder to fold and won’t hold its shape as well.
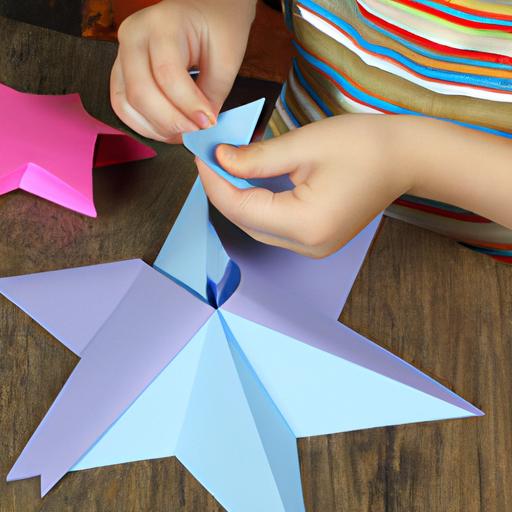
Making Precise Folds
To create a symmetrical and stable ninja star, it’s important to make precise folds. Take your time and make sure each fold is crisp and well-defined. Use a flat surface to help you make straight folds, and use your fingernail or a bone folder to crease the paper. Don’t be afraid to unfold and redo a fold if it’s not perfect.
Paying Attention to Symmetry
Symmetry is key when making a ninja star, as it ensures that each arm is the same length and that the star will spin evenly. Use a ruler or a straight edge to help you make straight folds and check that each arm is the same length. If one arm is longer than the others, it can throw off the balance of the star.
Variations of the Ninja Star
Once you’ve mastered the basic ninja star, you can experiment with different variations to create unique and personalized stars. Here are some variations you can try:
Different Sizes and Shapes
Try making a larger or smaller ninja star by using a larger or smaller square of paper. You can also experiment with different shapes, such as a pentagon or a hexagon, to create a more intricate star.
Adding Colors or Designs
Make your ninja star stand out by adding colors or designs to the paper. You can use colored paper, draw on the paper before folding, or even use stickers or washi tape to decorate the star.
Using Multiple Pieces of Paper
For a more advanced ninja star, try using multiple pieces of paper to create a layered star. You can create different colors or patterns for each layer, or use different sizes of paper to create a dimensional effect. This variation may require more time and patience, but the end result is a unique and impressive ninja star.
Fun Activities with Ninja Stars
Now that you’ve created your paper ninja star, it’s time to have some fun with it! Here are a few ideas for activities you can do with your ninja star:
Target Practice
One of the simplest and most satisfying things you can do with a ninja star is to practice throwing it at a target. You can use a cardboard box, a piece of foam board, or even draw a target on a piece of paper. Practice your aim and see how many times you can hit the target in a row. Just be sure to follow some basic safety rules, such as never throwing your ninja star at people or animals.
Creating a Ninja Star Throwing Game
If you want to take your ninja star throwing skills to the next level, you can create a game with them. Set up a few targets around your backyard or a park, and see who can hit the most targets in a set amount of time. You can even create different challenges, such as hitting moving targets or throwing your ninja star from a distance.
Making a Ninja Star Garland
If you’re feeling crafty, you can use your paper ninja stars to create a garland. Simply make several ninja stars in different colors or patterns, and string them together with some string or ribbon. You can hang your garland in your room, at a party, or even outside for a fun and festive decoration.
Conclusion
Congratulations, you’ve successfully made a paper ninja star! While it may take some practice to get the hang of folding and throwing your ninja star, it’s a fun and rewarding craft project that anyone can do. Remember to use the right type of paper, make precise folds, and pay attention to symmetry for the best results. With a little bit of creativity, you can also explore different variations and fun activities with your ninja star. So keep practicing, and have fun exploring the world of paper ninja stars!